Author: Sam Visnic

Levator Scapulae Trigger Points | How To Identify And Self-Release

The levator scapulae, a vital component in the neck and shoulders functioning, plays a pivotal role in our everyday motions. Yet, it has the potential to transform into a cause of discomfort and pain.

Relief from problems like neck pain, stiffness, and even referred pain can be the result of identifying and resolving levator scapulae trigger points. Let’s take a look at this muscle, and how to locate these tender points, as well as effective techniques to resolving them. 

The Levator Scapulae Muscle – Anatomy And Function

The levator scapulae muscle is a narrow, lengthy muscle that runs alongside and at the back of the neck. It originates from the posterior tubercles of the transverse processes of C1-C4 vertebras and inserts between the superior angle and the root of the scapular spine on the medial border of the scapula. The dorsal scapular nerve (C5) and the cervical nerves (C3-C4) innervate the levator scapulae muscle.

The levator scapulae muscle elevates the shoulder blade with the help of the trapezius and rhomboid muscles. These muscles also help to rotate the scapula downward by inferiorly tilting the glenoid cavity. This movement is essential for reaching overhead or behind the back. Additionally, the levator scapulae muscles assist with lateral flexion, neck extension, and neck rotation, which means bending and turning the head to the same side.

Trigger Points in the Levator Scapulae

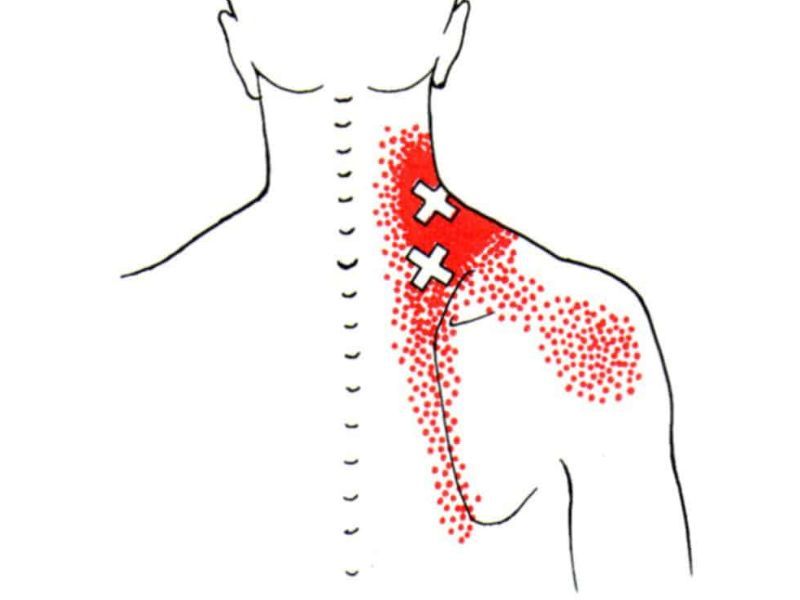
The levator scapulae muscle has two trigger points situated in its lower half. The lower trigger point is positioned just above the superior angle of the scapula, while the upper one is 1-3 inches above the lower trigger point. These trigger points are deeply embedded in the upper trapezius muscle and can cause pain that radiates laterally to the shoulder and along the inner edge of the shoulder blade. Movements such as elevating, rotating, or tilting the head or the shoulder blade can aggravate the pain.

Levator-Scapulae-Trigger-Points

Signs and Symptoms of Levator Scapulae Trigger Points

Some of the common symptoms associated with trigger points in the levator are:

  • Pain in the neck region, possibly radiating to the head and resulting in a headache.
  • Experiencing discomfort and limited range of motion, notably a decrease in the bending and tilting of the neck towards the opposite side.
  • Deep, achy pain or tightness on the upper back along the top of the shoulder blade or neck.
  • Increased trigger points and muscle tone.
  • Difficulty sleeping or finding a comfortable position.
  • Reduced breathing capacity or shortness of breath

What Causes Levator Scap Trigger Points?

A variety of factors can cause levator scapulae, including:

  • Poor posture: Prolonged sitting, particularly with a slouched posture, can lead to a condition known as levator scapulae syndrome. This syndrome is often observed in office workers who spend extended hours seated, causing their shoulders and head to jut forward, creating a ‘hunchback’ position in the upper back and lower neck. Over time, this posture can cause stiffness and inflexibility in the affected joints. The persistent stress on the levator scapulae muscle reduces flexibility and chronic overuse.
  • Carrying heavy bags with straps over the shoulder, such as backpacks, purses, or suitcases: The levator scapulae muscle could impact military personnel, particularly those who frequently carry heavy gear and engage in repetitive load-bearing tasks. These activities may compromise the upper body posture, potentially causing chronic stress or recurring injuries to the muscles and joints in the neck, including the levator scapulae.
  • Stress, anxiety, or emotional tension can increase muscle tension and reduce blood flow.
  • Repetitive arm motions (throwing, swimming, or racquet sports.)

Cervical spine dysfunction, such as disc herniation, osteoarthritis, or whiplash injury.

Treatment of Levator Scapulae Trigger Points

There are different treatment options for active trigger points, depending on the severity and duration of the symptoms, the underlying cause, and the individual preference. Finding out why there’s pain and fixing body movement problems that worsen it usually comes first. Some of the common treatment options are:

  • Physical therapy: This involves hands-on techniques like massage, mobilization, or manipulation to release trigger points and restore muscle function. It also includes stretching and strengthening exercises to improve muscle length, enhance flexibility, posture, balance muscles, and prevent trigger point recurrence.
  • Acupuncture: Acupuncture, a traditional Chinese medicine technique, has shown effectiveness in relieving pain, making it a valuable option for individuals seeking alternative therapies for scapula syndrome. Thin needles are strategically inserted into specific points on the body, stimulating energy flow and promoting the body’s natural healing processes.
  • Local Corticosteroid Injections: For cases where inflammation plays a significant role in trigger point pain, corticosteroid injections offer a direct and powerful intervention. These injections aim to reduce inflammation around the scapulae muscles’ trigger points, providing relief from pain and promoting a more conducive environment for healing.
  • Botox Injections: Botox injections present an innovative approach to treating levator trigger points. Botox temporarily paralyzes the muscle by injecting botulinum toxin into the affected muscle, leading to relaxation. This can be effective in cases where muscle tension significantly triggers point-related pain.
  • Electrical stimulation: The levator muscle is subjected to a moderate-frequency current, inducing fatigue and sedation in the muscle, leading to a relaxation effect. 

Heat or cold therapy: Heat or cold therapy relaxes muscles, boosts blood flow, and reduces inflammation and pain. Apply heat or cold to the muscle for 15 to 20 minutes, as needed. You can use tools such as a heating pad, hot water bottle, warm towel, ice pack, cold compress, or frozen towel.

Differential Diagnosis for Levator Scapulae Pain 

Levator scapulae pain can be confused with other conditions that affect the neck, shoulder, or upper back, such as:

  • Cervical radiculopathy: it occurs when a nerve compression or irritation in the neck causes pain, numbness, tingling, or weakness in the arm or hand
  • Snapping scapula syndrome: In snapping scapula syndrome(washboard syndrome), the scapula rubs against the rib cage, resulting in pain and audible clicking or grinding sounds in the shoulder. 
  • Myofascial pain syndrome: This chronic condition affects muscles and connective tissues, leading to the development of trigger points. Research indicates that trigger points or myofascial pain syndrome can lead to heightened irritability in the muscle tissues, impacting the functionality of nerve endings and mobility.
  • Cervical myofascial pain: A specific subtype of myofascial pain syndrome, cervical myofascial pain, targets the neck muscles. It results in trigger points, pain, stiffness, or reduced range of motion in the neck or head.
  • Sternocleidomastoid syndrome: This condition appears as muscular spasms or trigger points in the sternocleidomastoid muscle, leading to discomfort, rigidity, or limitations in neck movement. Additionally, individuals may experience headaches, dizziness, or facial pain.

How To Self-Treat 

Stretching the levator scapulae muscle can help lengthen the muscles and improve flexibility and posture. It also helps prevent or reduce muscle spasms, trigger points, and pain. Here are some levator scapulae stretching exercises that you can do at home or work:

Standing Levator Scapula stretches:

  1. Stand up straight, feet shoulder-width apart.
  2. Bend your chin down toward your chest and slightly to the right.
  3. Put your right hand on your head and gently pull down. You’ll feel a stretch on the left side of your neck.
  4. Hold for 10 seconds, then go back to normal.
  5. Do this 3-5 times, then switch sides.
 

Rhomboid Myofascial Release Techniques | Trigger Points

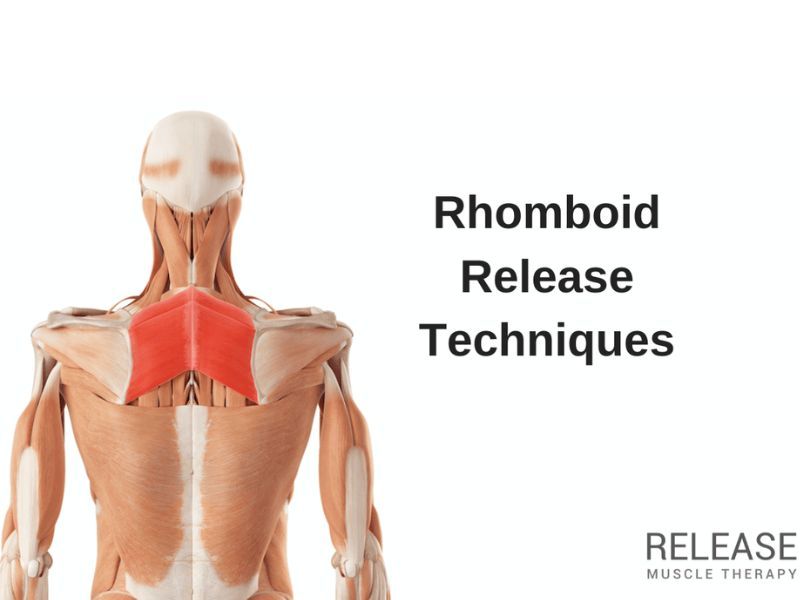
The rhomboid muscles form a muscle group that links your shoulder blades to your spine. They enable shoulder movement, arms lifting, and keeping your posture in check. 

However, these muscles can sometimes develop trigger points, leading to discomfort and stiffness in your upper back, neck, and shoulders. This blog post will dive into rhomboid trigger points, their identification, and self-release techniques to ease these pains.

Rhomboid-Myofascial-Release

Rhomboid Muscle – Anatomy And Function

The rhomboid comprises two muscle groups( the rhomboid minor and the rhomboid major muscles). These muscles are in between your shoulders and spine and have fibers running diagonally downward from the thoracic vertebrae’s spinous processes to the scapula’s inner border, the shoulder blade’s inside border. The rhomboid muscles’ function is to stabilize the scapula. It helps perform various shoulder girdle movements, such as:

  • Scapular adduction: Bringing the shoulders closer to the spine,
  • Scapular elevation: Lifting the shoulders and
  • Scapular downward rotation: Turning the shoulder blades down.

These movements are essential for reaching, pulling, pushing, and throwing. The rhomboid muscle group collaborates with other upper back muscles, like the trapezius, levator scapulae, and serratus anterior, to coordinate the motion and positioning of the shoulder blades.

Trigger Points in Rhomboid Muscles

Rhomboid-Trigger-Points-Locations

Image reference: David G. Simons, Janet G. Travell, Lois S. Simons. Myofascial Pain and Dysfunction: The Trigger Point Manual

Rhomboid trigger points are a common occurrence, affecting individuals across various age groups and professions. These trigger points manifest along the inner border of the scapula, near the spine, or within the midsection of the rhomboid muscles. They can give rise to discomfort in the mid-upper back, often felt between the shoulder blades or along the thoracic spine.

The pain stemming from rhomboid trigger points can manifest in diverse ways, including sharp, dull, burning, or throbbing sensations varying in intensity and frequency. This discomfort may even radiate to other body areas, such as the chest, arm, or head. The referred pain can mimic symptoms of heart attack or migraines.

Trigger points can also occur in other muscle groups, including the pectoralis major, trapezius, levator scapulae, latissimus dorsi, scalenes, and infraspinatus muscles.

Symptoms Associated with Rhomboid Trigger Points

Symptoms linked to rhomboid trigger points include:

  • Pain and stiffness in the upper back, between the shoulders, or along the thoracic spine.
  • Difficulty moving the shoulders, lifting the arms, or reaching overhead.
  • Pain, tightness, or pressure in the chest, especially on the left side.
  • Poor posture, including rounded shoulders, forward head, or hunched back.
  • Trigger points in the upper trapezius muscles can radiate pain to the temple, cause a headache behind the eye, or pain in the back of the neck.
  • Pain, numbness, tingling, or weakness in the arm, particularly in the fourth and fifth fingers.

Causes and Treatment Options for Rhomboid Muscle Pain

Various factors can contribute to the development of these trigger points, including:

  • Poor or incorrect posture, especially sitting hunched at your computer for a long time.
  • Repetitive or strenuous trigger point activity that involves the shoulders, such as rowing, throwing, or lifting.
  • Poor sleep patterns.
  • Trauma or injury to the upper back or neck.
  • Tight pectoralis muscles pull the shoulder forward, causing a stretch of the middle trapezius muscle.

The treatment options for rhomboid active trigger points depend on the severity and duration of the symptoms—some of the common treatment options and what they offer.

  • Massage therapy offers muscle relaxation, trigger point release, and enhanced blood flow and oxygen delivery to the affected tissue.
  • Trigger point therapy entails the application of targeted pressure directly on the trigger points. You can do this manually or with specialized tools like a cane or a knob, effectively deactivating the trigger points and easing pain.
  • Dry needling involves inserting thin needles into the trigger points, either by a therapist or by yourself, to stimulate the muscle and release the trigger points.
  • Heat therapy helps warm the muscles, increase blood circulation, and ease pain and stiffness.
  • Cold therapy can help reduce inflammation, numb pain, and prevent swelling.
  • Stretching helps relax the muscles and improves flexibility.
  • Rhomboid Exercise can help strengthen the muscles, improve posture, and prevent the recurrence of trigger points.

Differential Diagnosis for Rhomboid Trigger Points

Rhomboid trigger points can cause pain and symptoms that can be confused with other conditions, such as:

  • Angina: Can cause chest pain, triggered by physical or emotional stress, and relieved by rest or medication.
  • Cervical Radiculopathy: Nerve root compression in the cervical spine can cause pain, numbness, and tingling along the affected nerve pathway. These symptoms resemble those seen in rhomboid trigger points.
  • Scapular dyskinesis: Occurs when your shoulder blade doesn’t move or position itself correctly during shoulder movements. This can lead to shoulder pain, instability, and weakness. Their trigger points can refer pain to the rhomboid area.
  • Rotator Cuff Tendinopathy: Inflammation or degeneration of the rotator cuff tendons, which stabilize the shoulder joint, can refer pain to the rhomboid area.
  • Thoracic Outlet Syndrome: Compression of the nerves and blood vessels in the thoracic outlet, the space between the collarbone and first rib, can cause pain, numbness, and tingling. The pain may occur in the neck, shoulders, and arms.

Consult your doctor or a qualified therapist for a detailed examination to rule out these conditions.

How To Self-Treat Rhomboid Trigger Point

There are several ways to self-treat rhomboid trigger points at home, such as:

Stretching the Rhomboid Muscle.

  • Lower neck and upper back stretch.
    1. Start by standing or sitting with proper posture.
    2. Interlace your fingers in front of your chest.
    3. Begin by gently extending your arms away from your chest, rounding your upper back, and bringing your chin toward your chest.
    4. Hold this stretch for 15-30 seconds, then gradually ease back to your initial position.
    5. Repeat this stretch 2-4 times for optimal results.
  • Doorway stretch:
    1. Position yourself in a doorway, extending your arms outward and placing your hands on the door frame.
    2. Gently incline your body forward until you sense a stretch in your chest and shoulders.
    3. Maintain this position for 15-30 seconds, then gradually return to your initial stance.
    4. Repeat this sequence 2-4 times.

Exercising the Rhomboid Muscles

  • Rear delt flyes:
    1. Stand with your feet hip-width apart and bend forward at the waist until you are almost parallel to the floor.
    2. Hold a dumbbell in each hand, palms facing each other.
    3. Bend your elbows so that your forearms are parallel to the floor.
    4. Raise your arms to the sides until they parallel the floor.
    5. Lower them back down to your starting position.
    6. Repeat 10-12 times.
  • Scapular retraction:
    1. Stand with your feet hip-width apart and hold your arms to the sides, palms facing down.
    2. Squeeze your shoulder blades together and retract them towards your spine.
    3. Hold for a few seconds, then relax.
    4. Repeat 10-12 times. 
  • Front raise:
    1. Stand with your feet hip-width apart and hold a dumbbell in each hand, palms facing down.
    2. Raise your arms out until they are level with your shoulders.
    3. Lower them back down to your sides.
    4. Repeat 10-12 times.

Use these self-treatment methods for your rhomboid muscles when necessary, but avoid overdoing it. Begin with lighter weights and gradually increase as your strength improves. Always warm up before exercising and cool down afterward. If you feel any pain, stop and consult a medical professional.

Wrapping up

Rhomboids trigger points are common and can cause discomfort in your upper back and shoulders. However, you can identify and self-treat them at home with some simple techniques. If you have a concern, seek advice from your doctor or a qualified therapist.

Serratus Anterior Trigger Points and Effective Relief Strategies

If you’ve been dealing with pain or discomfort along your ribs or around your shoulder blades, you may have trigger points in your serratus anterior muscle. These sneaky trigger points can cause all sorts of annoying symptoms. 

In this article, we’ll look at what the serratus anterior muscle does, what causes trigger points to form, and most importantly – how to get relief.

serratus-anterior-trigger-points

Anatomy and Function of the Serratus Anterior

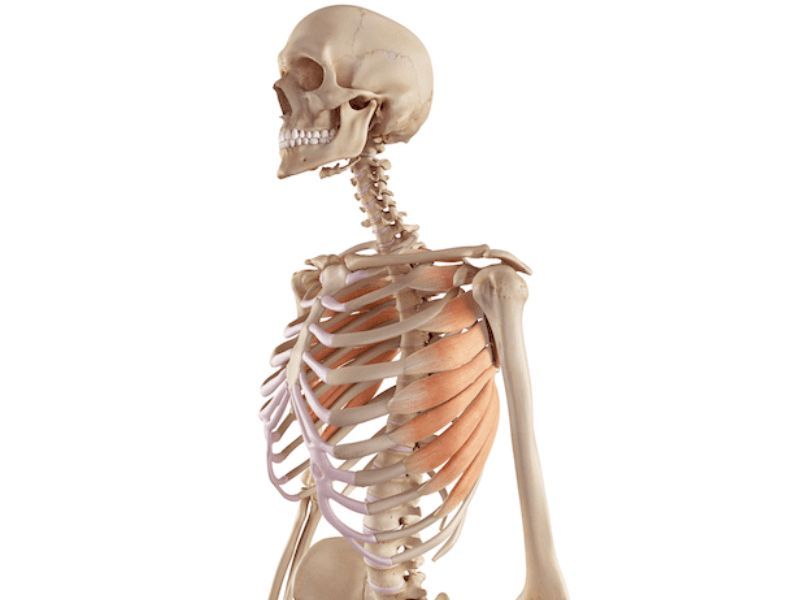
The serratus anterior is a large muscle that originates along the side of your ribcage. It’s the area that occupies your upper five ribs, runs under your armpit, and wraps around to attach to the inner border of your shoulder blade.

This large muscle forms the medial wall of your axilla (arm pit) and covers the lateral ribs up to around your mid-back. It has a fascia covering, and digitation attaches to the external oblique muscle. 

The main functions of the serratus anterior are;

  • Protracting the scapula (pulling shoulder blade forward)
  • Upward rotation of the scapula 
  • Support your shoulder girdle
  • Supports breathing by elevating your ribs

It’s a key muscle for facilitating pushing movements like push-ups, pull-ups, throwing, and punching. No wonder it’s nicknamed the “boxer’s muscle.”

Trigger-points-in-serratus-anterior

Serratus Anterior Muscle Pain

Let’s talk about that annoying pain you might feel along your ribs or around your scapula, which you probably call chest pain. If your ribs feel like a really deep ache or stabbing pain under your arm around your ribs, it could be your serratus anterior muscle hurting. (but always check with your physical first if you’re feeling any kind of chest pain!)

When this muscle group gets injured or irritated, it can cause pain in your chest wall that you’ll really notice, especially when you move your arm or take a deep breath.

You might feel the pain strongly when you press on the sore spots against your chest wall, along your ribs under your arm. The pain might even wrap around your side to your back by your shoulder blade. Making an upward rotation of your arm can also worsen the pain.

But please don’t confuse this localized pain for C8 nerve problems. The latter often presents sensations down the inner arm towards the palm, especially affecting the fifth digit (little finger) and fourth digit. 

If you start feeling a deep, aching pain along your ribs that just won’t go away, it could be a trigger point activation. Given the complex nature of this muscle, accurate evaluation is key to pinpointing any active central myofascial pain.

Signs and Symptoms of Serratus Anterior Trigger Points

Trigger-Point-Locations-Serratus-Anterior

Image reference: David G. Simons, Janet G. Travell, Lois S. Simons. Myofascial Pain and Dysfunction: The Trigger Point Manual

When a trigger point forms in the serratus anterior, it can cause various symptoms, including;

  • Persistent pain along your ribs that may radiate around to your rib cage or shoulder blade
  • Tenderness at specific spots on your ribs or around your scapula
  • Difficulty during deep breathing due to rib pain
  • Shoulder pain when reaching overhead or behind you
  • Pain or numbness down your arm 
  • Scapular winging (shoulder blade protruding)

The pain is usually felt along the muscle fibers, though it can radiate to nearby areas. It may come and go.

Common Causes of Serratus Anterior Trigger Points

Activities that overuse or strain the serratus anterior can lead to trigger points;

  • Repetitive overhead motions (think painting, serving in tennis, throwing)
  • Push-ups or pull-ups with poor form
  • Heavy lifting with arms extended
  • Sudden movements like catching a falling object
  • Sports like rowing, boxing, or baseball use the serratus anterior extensively
  • Sustaining ribs in an extended position during yoga poses
  • Whiplash injuries
  • Violent coughing fits
  • Poor posture over time

Sometimes, even minor trauma, like a bump or blow to the ribs or muscle, can cause a trigger point to form. Once they develop, trigger points restrict blood flow and cause pain – often leading to immobility and more trigger points. It becomes a vicious cycle.

Effective Serratus Anterior Trigger Point Relief Strategies

If you suspect you have serratus anterior pain, don’t worry – there are several ways of treating trigger points. Here are some effective treatment strategies.

Self-Massage Techniques

You can DIY massage therapy to relieve the pain patterns. Using a massage ball, foam roller, or your fingers, apply pressure to tender spots for 30-90 seconds to release tension. Try massaging along your ribs and around the inner border of your scapula. Go slowly and breathe deeply.

Stretches and Exercises

Gently stretching and strengthening the serratus anterior can help alleviate trigger points. Try scapula squeezes, shoulder rolls, and movements like push-ups plus and lawnmower pulls. Avoid overexerting the muscle. 

Professional Treatments

Physical therapy is another crucial relief strategy for your pain. Physical therapists use techniques like dry needling and manual trigger point physical therapy. Massage therapists may employ myofascial release, friction massage, or other specialized techniques to address trigger points.

Lifestyle Modifications

Improving posture, limiting overuse of your arms, and avoiding repetitive strain or sudden trauma can prevent trigger points from recurring. Don’t slouch. Manage stress levels and stay active, but listen to your body. If you really have a bad cough that can alleviate your pain, ensure to drink a lot of water.

Relaxation Techniques

Practices like breathing exercises, meditation, and yoga can reduce muscle tension and irritation in your body. Use heat packs or ice packs to loosen up tight muscles as needed.

Prevention and Long-Term Serratus Anterior Health

The best way to keep your serratus anterior happy is by preventing trigger points in the first place. Warm up properly before exercise, improve your posture, avoid repetitive overhead motions, and take breaks when doing repeated arm movements. 

Don’t ignore aches and pains – get assessed early before this myofascial pain worsens. Incorporate gentle stretches, self-massage, and relaxation into your regular routine. Stay active, but don’t overdo it.

With proper self-care and targeted treatment when necessary, you can keep your serratus anterior muscle pain-free and functioning at its best.

Frequently Asked Questions

Is Serratus Anterior Pain Serious?

Serratus anterior pain can be pretty serious if it’s really affecting your daily life. You’ll experience sharp pain along your ribs that makes it hard to move or breathe.

Pay attention to any pain that doesn’t go away or keeps coming back. Your body is trying to tell you something’s wrong with that thin and superficial muscle.

What factors lead to Serratus Anterior pain?

That serratus anterior muscle that’s caged inside your chest can start hurting for all sorts of reasons. If you play sports like tennis or boxing with many repetitive arm motions, you might strain the muscles and irritate them over time.

Weightlifting with poor form is another common cause. Even just bad posture, like slouching, can overstretch the muscle and cause pain. Injuries like getting hit in the ribs or whiplash from a car accident can also make that muscle start aching.

Which methods offer the best relief for Serratus Anterior trigger points?

If you experience pain in your serratus anterior, try some DIY massage therapy along the muscle with a ball or your fingers to release the knots. Stretching the area gently can also help. Posture exercises and scapular strengthening moves are good, too.

If these don’t fix the problem, see a physical therapist for careful assessment. 

When should I consider professional help for Serratus Anterior trigger points pain?

As soon as you experience pain along your ribs that isn’t going away with a little rest and self-massage, it’s time to ask the pros for help. 

Get an appointment with a physical therapist or a massage therapist who specializes in addressing trigger points right away. The sooner those knots get professionally released, the less likely they’ll stick around and cause more trouble. 

How is the sensation typically described in cases of Serratus Anterior discomfort?

If your serratus anterior is talking to you through pain, your rib feels a deep, strong ache. Some describe it as an intense stabbing, piercing pain under the arm and wrapping around the ribcage. People often say pressing on the sore spots hurts a ton. 

Some also feel pain that travels up into the shoulder or down the arm. Listen to your body – if it’s saying “ow!” around your ribs, your serratus anterior is likely the culprit. 

Conclusion

Hopefully, now you have a good understanding of what serratus anterior trigger points are, what causes them, and how you can find relief through various self-care techniques, professional treatment, and lifestyle changes.

Don’t let annoying rib and scapula pain slow you down. You can get back to pain-free movement and deep, full breaths by identifying and addressing serratus anterior trigger points.


Ischiofemoral Impingement Syndrome | How To Identify And Self Help

Medical jargon is sometimes as complex as a labyrinth. Arguably, ischiofemoral impingement (IFI) is one of these difficult terms. But once explained, it is no longer hard to understand.

If you have heard the term and need to know what it means, this article will give you the answer. But I’m not only here to demystify the tongue-twister. I’ll also share a few clues from my experience as a physical therapist to treat hip pain and solve the problem.

Did you know many patients get better with physical therapy and other conservative measures? I’ll explain further, but let us start with the basics.

What is an ischiofemoral impingement, and where is it located?

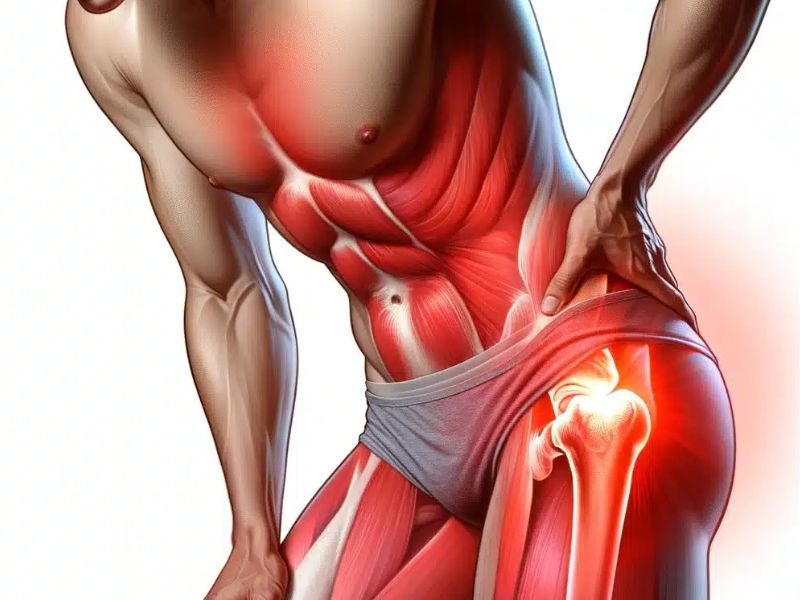
Ischiofemoral Impingement Syndrome

In an article published in the Journal of Hip Preservation Surgery, orthopedist Hans Gollwitzer defines ischiofemoral impingement as “a narrowing of the space between the lateral aspect of the ischium and the lesser trochanter of the femur with entrapment of soft tissue structures” (1). But cutting through the medical mumbo-jumbo, what does it mean?

Let’s picture the hip joint. There is a defined space between bones and other anatomical structures, which differs from person to person. Here, we refer to the space between the lesser trochanter and the ischium. That is a prominence of the femur and the surface of the hip bone. 

Generally, this so-called ischiofemoral space measures 2 cm. It allows various muscles and nerves to go through without problem. Ischiofemoral impingement refers to a space reduction that triggers hip pain (2).

The space is not wide enough, presses the structures, and turns your buttock into a hotstop. Ischiofemoral impingement commonly causes sciatic nerve entrapment and affects other soft tissues. Therefore, it is considered part of the deep gluteal pain syndrome.

As we will cover, you can have symptoms that radiate to the leg when the nerve is affected. However, you’ll find the problem in the hip joint where the ischium and the lesser trochanter meet.

How does the ischiofemoral impingement work? What are the causes?

As mentioned above, ischiofemoral impingement consists of a reduction of the ischiofemoral space.

The extension of this space is dynamic. In other words, it can change from person to person and at any moment. It changes slightly with gait. However, it is usually around 2 cm (2). 

Anything that reduces this space can cause an ischiofemoral impingement. For example, after hip replacement surgery the new joint may become slightly misaligned.

However, some people are predisposed to it because of the size of the lesser trochanter and other structures. Furthermore, we can have edema in the area, which causes pressure.

Let’s look at these and other causes, one by one.

Causes of ischiofemoral impingement syndrome

We can divide the causes of ischiofemoral impingement into primary or secondary. That is, congenital or acquired.

The former are inherent to the human body. These generally refer to deformities or anatomical variants. You can say they are your body’s original quirks. The second cluster is due to modifications of your anatomy or changes that occur over time.

Among the primary causes we have (3):

  • Coxa valga. In this condition, we have a reduction of the angle between the neck of the femur and the bone shaft. Although minute, this change can reduce the available space between the bones.
  • Position of the femur. When the femur is located slightly toward the center and back, the risk of ischiofemoral impingement increases.
  • Pelvic bone anatomic variants. The pelvic bone may also be slightly wider or protruding. When this occurs, the ischiofemoral space decreases. These variants are common in women. Therefore, women are more prone to ischiofemoral impingement syndrome.

Secondary causes include (3):

  • Replacement surgery. This syndrome started getting attention in patients after pelvic surgery. When the components are slightly misaligned, they can obstruct or step on the nerve.
  • Tumors. It is uncommon, but sometimes we can find a growth pushing on anatomical structures in the ischiofemoral space. It can be a lipoma or fatty growth. 
  • Overuse or trauma. It is a common trigger in athletes. Repetitive motion and overuse of the joint can cause pain. One of the mechanisms is edema. It features fluid accumulation in the area that pushes the structures and presses on the nerve.
  • Functional disorders. If you have developed hip problems such as hip instability or problems with your abductor and adductor muscles, these can cause ischiofemoral impingement.

What are the symptoms of ischiofemoral impingement syndrome?

We can include the symptoms of ischiofemoral impingement syndrome in the deep gluteal pain syndrome, too. They are as follows (1):

  • Posterior hip pain or buttock pain
  • Pain may travel down the leg when the sciatic nerve is involved (radiating gluteal pain)
  • Hip pain is usually worse when sitting for more than 30 minutes.
  • Tingling or numbness in the affected buttock or leg

We may guess whether the cause of ischiofemoral impingement is primary or secondary. In young people affected in both hips, it is most likely a primary cause. In seniors with unilateral pain, the causes are most likely secondary.

Knowing this, you may have something to check on yourself before going for a consultation. However, keep in mind that everything you are reading is only informative.

You need an evaluation by a healthcare professional to identify the problem. Only then will you be able to get personalized advice after getting an accurate diagnosis.

How is it diagnosed?

The diagnostic process has different steps, including:

An exploration stage

It all begins by evaluating the symptoms, as described above. The patient’s age, previous illnesses, and the unilateral or bilateral nature of the problem can provide many insights. 

Therefore, your therapist or physician may ask several questions. It is advisable to answer accurately and provide all the relevant data.

A physical exam

In addition, your therapist can identify the problem by physical examination. There are no validated clinical studies, but at least two are very effective to evaluate the ischiofemoral space. One of them is called the ischiofemoral impingement test, or IFI test. The other is known as a long-stride walking test (4).

  • The IFI test consists of extending the hip in a lateral position with the hip in abduction. Your therapist will help you do this specific movement, so you don’t have to worry about it. It can be uncomfortable, but the discomfort is temporary.
  • You also have the long-stride walking test. In this case, the examiner will ask you to walk with long strides.

In both cases, the test is positive when causing the characteristic pain of hip impingement.

A study published in 2016 by Gomez-Hoyos et al. showed that the IFI test has a sensitivity and specificity of over 80%. The long-stride walking test has a sensitivity of 94% and a specificity of 85% (4).

In other words, they are excellent for detecting the problem and ruling it out as a differential diagnosis.


Diagnostic imaging

The final step is diagnostic imaging. Imaging usually helps us rule out other problems. They do not necessarily provide the final word.

Ultrasound can identify edema, and radiography is useful to find bony abnormalities. On the other hand, magnetic resonance imaging (MRI) provides more data when all of the above provide insufficient data, for example, in the case of a quadratus femoris muscle tear.

Differential diagnoses

A differential diagnosis includes any other health problems we should rule out as they have similar symptoms. It includes all entities of the deep gluteal syndrome. For example, piriformis syndrome, problems with the iliopsoas tendon, hamstring tendon edema, and so on.

They all press the sciatic nerve and can have similar symptoms or the same. However, your therapist will be able to recognize them through a thorough physical examination.

Likewise, similar symptoms may be present in posterior hip arthropathy. Even ischiofemoral ligament sprain can mimic these symptoms.

This is why getting yourself evaluated with a physical exam is so important. Each muscle has a specific range of motion, and we can find out where the discomfort is coming from by reproducing the pain.

How is ischiofemoral impingement syndrome treated?

We can divide treatment into operative and non-operative. One requires surgery or an invasive approach, and the other does not.

The most recommended is the conservative treatment. It features anti-inflammatory drugs and exercises to beef up the core and hip abductors.

We can also use corticosteroid injections in the quadratus femoris muscle. This strategy serves to both diagnose and treat the problem. Some doctors may also use botulinum toxin. However, these injections are still experimental (1, 3).

On the other hand, surgical treatment aims to increase the distance between the lesser trochanter and the ischium. We can accomplish this through surgical decompression of the ischiofemoral space. For instance, with a resection of the lesser trochanter. Doctors can do it through an open technique or with endoscopy.

What conservative measures are used?

We have mentioned above two fundamental conservative measures to alleviate symptoms. One is the use of anti-inflammatory drugs. The other is specific exercises to strengthen the core and abductor muscles because they usually feature hip abductor weakness. Let’s briefly review them and a few others (3):

  • Most symptomatic patients benefit from anti-inflammatories. These medications help reduce quadratus femoris muscle edema and free up the ischiofemoral space. You can also contribute to this through your diet by consuming anti-inflammatory foods—for example, omega-3 and turmeric.
  • Something else you can do is exercise, but in the right proportion and in the right way. Your therapist will tell you what exercise to include in your daily routine to improve your symptoms. These mainly strengthen the core and abductor muscles.
  • If you are an athlete, one thing to consider is to avoid excessive exercise and heavy loads. Remember that hip joint overuse can also cause ischiofemoral impingement syndrome.
  • When you walk, try to stay at ground level. Uneven surfaces and hiking trails can trigger the problem.

But above all, don’t hesitate to call your therapist or doctor if you experience a flare-up. Remember that this guide is no more than a starting point. If you follow instructions from a professional you may in time improve your quality of life. And doing so does not necessarily require surgery.

References:

  1. Gollwitzer, H., Banke, I. J., Schauwecker, J., Gerdesmeyer, L., & Suren, C. (2017). How to address ischiofemoral impingement? Treatment algorithm and review of the literature. Journal of Hip Preservation Surgery, 4(4), 289-298.
  2. Torriani, M., Souto, S. C., Thomas, B. J., Ouellette, H., & Bredella, M. A. (2009). Ischiofemoral impingement syndrome: an entity with hip pain and abnormalities of the quadratus femoris muscle. American Journal of roentgenology, 193(1), 186-190.
  3. Gómez-Hoyos, J., & Martin, H. D. (2019). Ischiofemoral Impingement. Posterior Hip Disorders: Clinical Evaluation and Management, 215-228.
  4. Hatem, M. A., Palmer, I. J., & Martin, H. D. (2015). Diagnosis and 2-year outcomes of endoscopic treatment for ischiofemoral impingement. Arthroscopy: The Journal of Arthroscopic & Related Surgery, 31(2), 239-246.

6 Fast And Easy Hamstring Release Techniques + Massage

How to know if you may need to address the Hamstring Muscles:

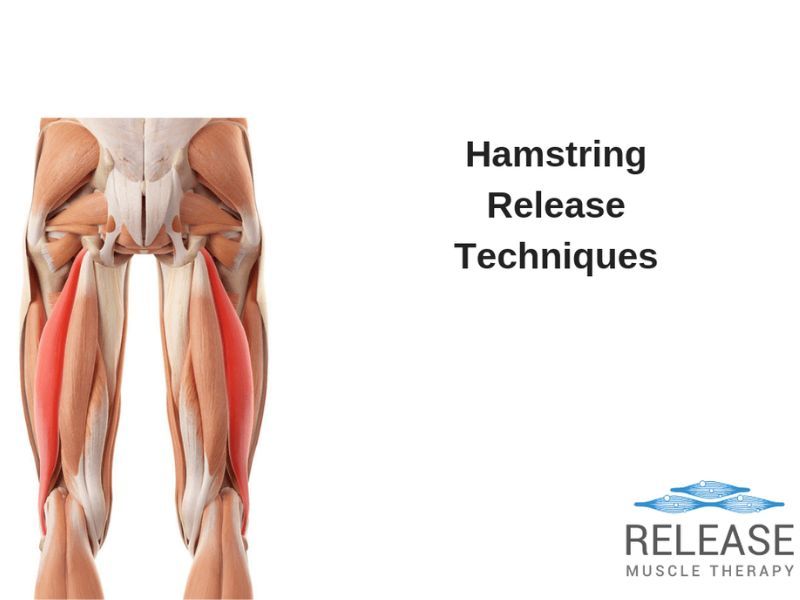
The hamstring muscle group consists of 3 muscles:  Biceps Femoris, Semitendinosus, and Semitendinosus.

The most common finding in assessment to determine the need for hamstring stretching is inability to touch the toes, or the presence of posterior pelvic tilt in the standing position.

If these are found to be positive, then these hamstring release techniques may be utilized.

Are Your Hamstrings REALLY Tight?

How do you know if your hamstrings are actually tight, or if they just “feel” tight?

It may surprise you to know that hamstring flexibility tests are often misinterpreted.  Watch the video to see how to properly assess hamstring length.

Hamstring Massage Therapy Release Technique

The hamstrings as a whole are fairly easy to treat when using an elbow or fist contact, however, isolating each hamstring can be challenging due to the thick, ropey-type element to the muscles.

Especially when trying to find specific hamstring trigger points, the thumbs will provide a much more accurate assessment and treatment tool.

An important side note, when you want to massage pulled hamstring fibers (or in cases of hamstring tendinopathy), don’t be too aggressive!  These tissues are already irritated, and just need some support with light to moderate glides.

Hamstring Stretch – Waiters Bow Exercise

The waiter’s bow stretch is one of best options for stretching the hamstrings because it has the added benefit of teaching how to bend from the hips instead of rounding the lower back.

In addition, this strategy will transfer to movements like deadlifts and traditional back extension exercises.

It’s crucial to learn how to sit back with the hips instead of bending the knees.  This allows the hamstrings to lengthen.

This lengthening effect (called eccentric contraction) will ensure the hamstrings maintain their flexibility over time with less effort.

Think “lengthening WHILE strengthening!”.

Hamstring Stretch – Supine Hip at 90 Degrees + Knee Extension

The supine hamstring stretch is an excellent option for applying the muscle energy technique called reciprocal inhibition.  This technique works by activating the opposite muscle/s of the one you want to stretch.  Specifically in this example, you will activate your quadricep muscles to inhibit your hamstrings.

This will allow for a greater stretch through neurological inhibition of the hamstrings!

Tip:  To target the bicep femoris (outside hamstring) rotate the thigh inward and bring the leg slightly toward the midline.  For a semitendinosis stretch, do the opposite!

Hamstring Active Release Technique

Active release technique is a proprietary soft tissue therapy technique that can be effective for hamstring work.

The idea is to pin the muscle while either actively or passively taking it through its range of motion.  According to the developers of the technique, this can assist with identifying and releasing adhesions and fibrotic areas of the fibers, but this is a questionable theory.

Regardless, it appears to be frequently helpful, especially when the person has progressed through basic massage and stretching techniques.

This video shows a great demonstration.

Hamstring Release Techniques – Post Isometric Relaxation (PNF version)

Post-isometric relaxation is another form of muscle energy technique that allows for achieving a greater range of motion than just stretching can accomplish alone.  This technique alone is my go-to when asked how to loosen hamstrings fast.

By moving the hamstrings toward the stretch position, contracting them with a low level effort for 8-10 seconds, followed by a short rest (2-5 seconds), you will be able to move your hamstrings to a greater degree into the stretch.

Hamstring Release – Percussion Therapy Tool

Percussion massage tools are becoming more popular and for good reason.  They can assist with improving results with massage therapy work, as well as self-myofascial release.

This technique combines reciprocal inhibition of the hamstrings (through quadricep activation) with percussion to the hamstrings to assist with relaxation.

There are a lot of options for choosing the best hamstring massager, but you can’t go wrong with the Achedaway Pro or Theragun.  Both of these massage gun hamstring tools are worth looking into.

Hamstring Release – Foam Roller Self-Massage

Self-massage for the hamstrings is easily do-able with a standard foam roller.  The goal is to roll with a light-moderate level of discomfort that allows you to comfortably work on the tissues.

When you find areas that are particularly tender, hold those points for 10-15 seconds, then move to another area.

Continue this process until you treat the areas that you can access effectively.

FAQ

Q: How can I tell if I need to address my hamstring muscles?

A: If you experience symptoms such as a posterior pelvic tilt, inability to touch your toes, hamstring strain or tendinopathy, lower back, hip, or knee pain, or sacroiliac joint dysfunction, it may indicate the need to address your hamstring muscles.

Q: What are some signs of tight hamstrings?

A: Signs of tight hamstrings include difficulty touching your toes, a feeling of tightness in the back of your thighs, limited range of motion during activities that involve bending or straightening the legs, and discomfort or pain in the hamstrings.

Q: How do I properly assess hamstring length?

A: Properly assessing hamstring length can be done by following the instructions provided in the video link: https://youtu.be/8iHTU5j2Bvo.

Q: What is the best massage therapy release technique for the hamstrings?

A: The hamstrings, as a whole, can be treated with an elbow or fist contact during massage therapy. It is important to avoid being too aggressive, especially when massaging pulled hamstring fibers. Light to moderate glides are recommended to provide support and relief to the irritated tissues.

Q: How does the Hamstring Active Release Technique work?

A: The Hamstring Active Release Technique is a proprietary soft tissue therapy technique that can be effective for working on the hamstrings. For a demonstration, please refer to the accompanying video.

Q: Can percussion therapy tools assist with hamstring release? Which ones are recommended?

A: Yes, percussion massage tools can assist with hamstring release. Recommended options include the Achedaway Pro or Theragun, which are massage guns specifically designed to provide percussion therapy to the hamstrings and help with relaxation.

Q: What are the best hamstring exercises for tendinopathy?

A: The article does not provide specific information about the best hamstring exercises for tendinopathy. It is recommended to consult with a healthcare professional or physical therapist who can provide appropriate exercises based on an individual’s specific condition and needs.

TMJ Massage Tools – Top 6 Products To Get Relief

Before selecting the right TMJ tool, you need to know what you are trying to target for relief. The profession most commonly associated with addressing temporomandibular joint dysfunction is dentists, but they certainly aren’t the only professionals often needed to resolve this often complicated condition.

Dentists may address the input of the teeth (occlusion) and depending on their training, airway issues that may be helped with certain dental appliances, but there is also an aspect that involves musculoskeletal input.

This brings in the need for an orthopedic doctor, a physical therapist that has expertise in dental/postural integration, specialized massage therapist, or other structural oriented expert.

Addressing all of the factors that may be contributing to TMJ dysfunction is well beyond the scope of this post, but I do want to emphasize the importance of taking a multi-disciplinary approach.

When selecting TMJ massage tools, we will only be addressing the musculoskeletal aspect of the overall approach, so the results may be limited to the degree this aspect is influencing your specific condition.

With that in mind, let’s briefly cover the muscles specifically that we want to address with these TMJ tools.

Key muscles to address

There are a lot of muscles in the craniofacial region, but the most influential muscles can be reduced to the following.  These muscles directly influence jaw position the most.

TMJ-Massage-Tool

Masseter

The masseter muscle is a very powerful closer of the jaw.  It is found in the cheek region, near the back teeth.  If you place your fingers in this region and clench your teeth, you will feel it bulge.

Common trigger points in this muscle tend to refer over the eyes.  It’s a common target for botox injections.

Temporalis

The temporalis muscle is the other closer of the jaw, being a bit less powerful than the masseter.  Its location is over the temporal bones at the side of the head.

Placing the fingers over this area and clenching reveals the location.  Trigger points in this muscle refer to the face and even into the teeth.

Pterygoids

There are medial and lateral aspects to the pterygoid muscles.  These important muscles protrude the jaw forward and assist in rotary motion during chewing.

They are often involved heavily in the jaw shifting toward one side, and thus can have a dramatic impact on TMJ issues when relaxed.

Jaw Massage Tools

There aren’t many options in the search results for TMJ massage devices, but a few of them can be very helpful when combined with dental therapy that is aimed at getting to the root cause.

The most important aspect of selecting the right jaw massage tool is knowing what muscle group you will be focusing on.

The outer muscles of the jaw, the temporalis and masseter, can be addressed with virtually all of the following tools.

The pterygoids, however, are only going to be addressed intra-orally (inside the mouth), so the options are much more limited.

Consider selecting a tool or the outside and inside of the mouth for the most thorough approach.

Gua Sha – IASTM – Graston For TMJ Muscles

There are a number of different names for this class of tools, but they can generally be referred to as IASTM (instrument assisted soft tissue manipulation).

The primary goal of these tools is to gently pull or tug on the superficial tissues (skin primarily) to stimulate release and relaxation of deeper tissues.

It is noteworthy that very often you find video demonstrations online of therapists using these tools very aggressively, which results in visible discomfort as well as bruising after therapy.  This is neither appropriate, necessary, or desirable.

Therapy with these tools should be very comfortable, with only very mild discomfort at max.

At this point in time, there are literally dozens of IASTM style tools available online at many different price points.  The truth is you don’t need anything super fancy.

This little tool is probably the best face massager for TMJ on Amazon.

graston-for-tmj-muscles

Get specifics and buy your Gua-Sha tool here: https://amzn.to/3EZwggi

The Myofree Solution TMJ Massage Tool Kit

This handy kit is for sure the most effective jaw massage tool.  While the treatment of the outer jaw muscles can help quite a bit, the internal muscle release work tends to create the most dramatic improvements.

In particular, massaging the pterygoid muscle is of utmost importance.  The Myofree kit includes a handy tool to perform this release.  If you’re not a fan of constantly sticking your fingers in your mouth, this tool will especially be valuable for you.

It also includes a travel case for the tool and a very helpful DVD with 3D animation to demonstrate where the muscles are located so that you can treat yourself effectively.

Myofree-TMJ-Massage-Tool-Kit

https://releasemt.wpenginepowered.com//myofree
Here is the 10% off coupon:

RELEASEMUSCLETHERAPY10

Gentle Jaw Muscle Stretcher

On the quest for the perfect jaw massage tool for bruxism, we can’t forget about the value of stretching.  While not a massage tool, the Gentle Jaw can provide excellent results by lengthening and stretching the tight clenching muscles of the jaw, including the temporalis and masseter specifically.

This handy little tool includes the ability to progress through levels of stretch intensity.  This is a great way to gauge your level of improvement.

Gentle-Jaw-TMJ-Stretch

Get specifics and buy the Gentle Jaw here: https://releasemt.wpenginepowered.com//gentle-jaw

TMJ Massage Guns

Most percussion massage guns are far too aggressive for use on the face.  Due to the stroke range of motion the average tool uses, it’s possible to injure the jaw joint if improperly applied.

This is why I prefer to use a tool such as the Rapid Release, which is a vibration-based tool rather than percussive.  The range of motion of the nozzle is extremely small, and the high speed of the device can bring about a fairly quick reduction in muscle tension.

The cost of the Rapid Release, however, is fairly high because it targets health practitioners.  Is it worth it for the price?  Absolutely.

Rapid-Release-Electric-Jaw-Massager

Get specifics and purchase the Rapid Release here: https://amzn.to/3FlGucf

Ice + Heat Face Wrap

Ice or heat can be very effective for short term relief, or prior to performing any massage techniques.  Of course you can just hold the pack against your face, but there are better options available that are hands-free.

In looking for a strap that could essentially “hold” the jaw in place and reduce the workload on the muscles, I stumbled on a face wrap that holds the packs against the face.

This wrap is very popular after dental procedures such as wisdom tooth removal, but it works great for TMJ as well.

TMJ-Wrap-Ice-Heat

Get specifics and buy TMJ face wrap: https://amzn.to/3gXsGLD

TENS For Jaw Tension Relief

A TMJ electric massager has been shown to be beneficial in research studies for jaw pain sufferers.  The most important feature of the right device is the intensity setting.

The average TENS unit is too intense at the lowest setting, making it far too uncomfortable to use on the facial muscles.

The main benefit of TENS for TMJ therapy is that it’s passive, meaning just stick the pads, and turn the unit on.

The downside is that very often the results only occur while the unit is on.  It is possible to get temporary relief, but it doesn’t appear to work as well as the manual massage techniques previously outlined.

For these reasons, an electric acupressure pen is much more manageable for the TMJ muscles.

TENS-For-Jaw-Tension

Get specifics and buy acupressure pen: https://amzn.to/3F1c2Tc

Disclaimer: While we do promote the above products and TENS therapy as an effective and non-invasive form of pain relief, the information contained in this blog is for general information purposes only. We recommend seeking the advice of a medical professional before proceeding with self-treatment.

Pudendal Nerve Entrapment | How To Identify And Self Help

In some cases, even the best specialists have no final answer. Meanwhile, many patients suffer from symptoms with no idea about what to do.

One such problem is pudendal nerve entrapment. It tends to be a condition that’s difficult to diagnose. However, there are ways to identify the problem with proper attention to the signs and symptoms. Once the problem is located, we can alleviate the symptoms with something as simple as lifestyle modifications.

Information is key, especially concerning the identification of the problem. So, let’s take a brief look at the issue and how to achieve a bit of self-help. As we move on, remember it’s important to discuss what you read with your healthcare provider before making any decision on your health.

Pudendal-Nerve-Entrapment-Cycling

What is the pudendal nerve, and where is it located?

The pudendal nerve is a branch of the sacral spinal nerves, a nerve bundle found in the lower portion of the spine, between S2 and S4. It runs around the pelvis from the spine to the genitals.

On its way, it leaves different branches and picks up sensations from the skin and other pelvic structures. Such sensory recollection includes your external genitalia and anus.

Thus, the pudendal nerve is essential during intercourse to feel sexually stimulated. Damage to this nerve can have profound implications on sexual enjoyment. As such, it is definitely a health issue with plenty of social and psychological implications.

Before it goes through the pudendal canal (Alcock canal) and reaches the genitals, the pudendal nerve passes through the deep gluteal area. Here, it comes into contact with ligaments such as the sacrospinous and muscles such as the piriformis (1).

How does the pudendal nerve get entrapped? What are the causes?

The pudendal nerve may cause pain for various reasons. For example, endometriosis can irritate the pudendal nerve and trigger the symptoms.

But a frequent cause of pain will be nerve entrapment. It occurs when other structures place mechanical pressure on the nerve.

Where it gets entrapped

Since the pudendal nerve runs adjacent to various muscles and through bones and canals, it can get impinged in many areas.

For instance (2):

  • Below the piriformis muscle, causing entrapment syndrome type I.
  • Between the sacrotuberous and sacrospinous ligaments, causing an entrapment syndrome type II.
  • In the Alcock canal, causing an entrapment syndrome type III.
  • In its terminal portion, it causes an entrapment syndrome type IV.

Depending on the location, pudendal entrapment can trigger specific signs and symptoms a therapist can identify.

Causes of pudendal nerve entrapment

The primary causes of pudendal nerve compression include (2):

  • Following surgery on the pelvis, especially when surgeons leave a mesh in place.
  • As a result of stretching in a vaginal delivery.
  • In response to direct trauma to the buttocks or lower back.
  • In case of excessive cycling on an inadequate seat. This triggers microtrauma and fibrosis in the Alcock canal.
  • In people who remain seated for very long periods.
  • Occasionally, chronic constipation may also contribute to the problem.

What are the symptoms of pudendal nerve entrapment?

When a compression of the pudendal nerve occurs, it causes symptoms in the genitals and pelvic floor. For example (3,4):

  • Burning pain in the perineum, rectum, and/or genitals.
  • Numbness in the perineum, rectum, and/or genitals.
  • Pain or discomfort increases when sitting. It improves when standing or sitting on a toilet.
  • Pain can be triggered or worsened after bowel movements
  • Pain is predominant on one side
  • Pain improves when lying down at night. Thus, it does not awaken the patient from their sleep.
  • A sensation of urgency to urinate
  • Foreign body sensation in the anus, urethra, or vagina
  • Painful urination (dysuria)
  • Painful ejaculation in men
  • Other types of sexual dysfunction, such as dyspareunia, male erectile problems, and arousal dysfunction
  • Fecal incontinence or constipation
  • As with other types of chronic neuropathic pain, it can also lead to anxiety, depression, and similar issues.

About the symptoms of pudendal entrapment, specialists from Rochester University mention that “the main symptom is pain with sitting. You feel great in the AM until you sit for coffee, or drive to work. You get better with lying down”.

Thus, every patient is different and you’re unlikely to experience all symptoms at once. But the one that’s usually there is pain with sitting.

How is it diagnosed?

The diagnosis of pudendal nerve damage is often challenging. Due to its complexity, it should be guided by a doctor, physical therapist, or another specialist. Diagnosing pudendal entrapment involves different phases which contribute to the process (2,3):

1. Considering the symptoms

Initially, your healthcare provider will evaluate the symptoms of pudendal nerve entrapment. Physical examination may also aid in the diagnosis.

Depending on the signs and symptoms, your therapist can guess the site of entrapment.

For example, an impingement below the piriformis causes spasms of the piriformis muscle. An entrapment in the pudendal canal causes spasms in the obturator internus muscle. A therapist can identify these signs accurately on the physical exam.

2. Nerve blocks

A doctor may also use nerve blocks to diagnose pudendal nerve entrapment. It involves injecting anesthesia into the portion of the pudendal nerve that passes through the deep gluteal space.

3. Imaging tests

In addition, some specific tests may help. For example, an ultrasound may show a flattened nerve or liquid retention (5). MRI is also helpful in identifying the exact location of the nerve entrapment (6).

4. Ruling out other causes

Pudendal nerve entrapment symptoms are similar to numerous chronic pain syndromes and other ailments. It is one of the reasons why it is difficult to diagnose. It often requires ruling out other health problems that trigger persistent pelvic pain. For example, through a vaginal or rectal exam.

In some cases, your therapist or doctor will make recommendations to reduce overlapping symptoms of other pain contributors. Pudendal nerve entrapment syndromes are easier to diagnose after ruling out similar diagnoses.

Differential diagnoses

What ailments should we rule out?

For example, pain triggered by sitting is also frequent in deep gluteal pain syndrome. Similarly, prostatitis can also trigger pelvic floor pain. It is also essential to rule out some sexually transmitted diseases. Two differential diagnoses worth mentioning include (7):

Hamstring tendinopathy

It also causes pain aggravated by sitting. In this case, however, patients usually feel a boggy mass in the gluteal area. A simple physical exam can help your therapist determine if you have hamstring tendinopathy.

Piriformis syndrome

It causes buttock or pelvic pain and is also associated with nerve impingement. However, in this case, the affected nerve is the sciatic nerve. Since the piriformis is also in contact with the pudendal nerve, you can sometimes have both nerves affected simultaneously.

How is pudendal neuralgia treated?

Pudendal neuralgia may require surgical treatment (pudendal nerve decompression). However, most others respond to conservative measures and lifestyle changes.

One of the most important recommendations is to avoid positions and activities that trigger pain. There are also physical therapy exercises designed for the pelvic floor. By relaxing these muscles, it is possible to reduce pain in some patients.

Of course, we can also use oral medications, such as analgesics, muscle relaxants, and anticonvulsants.

It is essential to highlight that not all patients will respond the same way. Depending on the site of entrapment and the cause, you may respond to one treatment protocol and not the other (2).

When conservative treatment fails, surgical decompression is a suitable option. Even so, minimal access surgical techniques may solve the problem. In a study published in the Journal of Neurosurgery, the investigators found that 87% of cases improved with a type of surgery that does not require too much cutting through (3).

What conservative measures are used?

As a massage therapist specializing in massage therapy, muscle release, and pain science, my main focus is conservative treatment. Do you know the conservative approaches available for pudendal entrapment?

Here’s what I typically recommend (2):

Physical therapy

Depending on the compression zone, pelvic floor physical therapy can be quite helpful. For example:

  • When the pain comes from a muscle spasm, physical therapy can relax the muscle. The type of physical therapy available for pelvic floor muscles involves neuromuscular massage therapy. This technique is designed to detect and release muscle tension where the pudendal nerve runs.
  • Your therapist can offer traditional physical therapy combined with transcutaneous electrical nerve stimulation (TENS). This technique is not expensive and is associated with better results.

Oral therapy

As mentioned above, doctors may recommend analgesics, muscle relaxants, and anticonvulsants.

  • Analgesics reduce the sensation of pain, as we all know.
  • Muscle relaxants improve pain when muscle tension is affecting the pudendal nerve. They may not work in other causes of compression.
  • Anticonvulsants reduce the constant firing of the pudendal nerve. That’s how they improve pain symptoms.

Pudendal nerve blocks

These injections come in handy to complete the diagnosis. Pudendal nerve pain subsides for a few minutes or hours.

However, some patients experience a more extensive pain relief. In these patients, doctors can use a pudendal nerve block to reduce nerve irritation and improve the quality of life.

Lifestyle changes

In addition to medical treatment and physical therapy, there is much you can do on a self-help approach. The following recommendations tend to work and reduce pelvic pain in pudendal neuropathy (2,7):

  • If you are a cyclist, make sure you have a properly padded seat.
  • Discontinue any sporting activity in case it triggers pain.
  • Avoid rowing, skiing, jogging, and other exercises that require constant hip flexion.
  • If you have an office job, alternate sitting and standing periods.
  • Invest in a workstation you can use while standing, such as a standing desk.
  • Weight loss can sometimes help the treatment. Try to maintain or achieve a healthy weight.
  • Chronic perineal pain can cause sexual dysfunction with serious psychological implications. Seek counseling if you experience frustration, anxiety, depression, and similar problems.

These recommendations may not seem a big deal. However, 20-30% of patients get better just by applying them. Another percentage improves with therapy, medical treatment, and following these recommendations. Decompression surgery is recommended only in severe cases or those that do not respond to other modalities.

Still, all we considered in this article does not substitute professional advice from a licensed therapist or doctor. It is important to consult with your healthcare provider and make a treatment plan together based on a personalized treatment approach. Doing so will get you much closer to relieving pain and improving your quality of life.

References:

  1. Kinter, K. J., & Newton, B. W. (2020). Anatomy, abdomen and pelvis, pudendal nerve.
  2. Kaur, J., & Singh, P. (2019). Pudendal nerve entrapment syndrome.
  3. Filler, A. G. (2009). Diagnosis and treatment of pudendal nerve entrapment syndrome subtypes: imaging, injections, and minimal access surgery. Neurosurgical focus, 26(2), E9.
  4. Labat, J. J., Riant, T., Robert, R., Amarenco, G., Lefaucheur, J. P., & Rigaud, J. (2008). Diagnostic criteria for pudendal neuralgia by pudendal nerve entrapment (Nantes criteria). Neurourology and Urodynamics: Official Journal of the International Continence Society, 27(4), 306-310.
  5. Mollo, M., Bautrant, E., Rossi-Seignert, A. K., Collet, S., Boyer, R., & Thiers-Bautrant, D. (2009). Evaluation of diagnostic accuracy of colour duplex scanning, compared to electroneuromyography, diagnostic score and surgical outcomes, in pudendal neuralgia by entrapment: a prospective study on 96 patients. Pain, 142(1-2), 159-163.
  6. Wadhwa, V., Hamid, A. S., Kumar, Y., Scott, K. M., & Chhabra, A. (2017). Pudendal nerve and branch neuropathy: magnetic resonance neurography evaluation. Acta Radiologica, 58(6), 726-733.
  7. Castellanos, M. E., de Souza, K., & Hibner, M. (2021). Pudendal Neuralgia. Management of Chronic Pelvic Pain: A Practical Manual, 156.

The Top 3 Techniques For Quadratus Lumborum Release

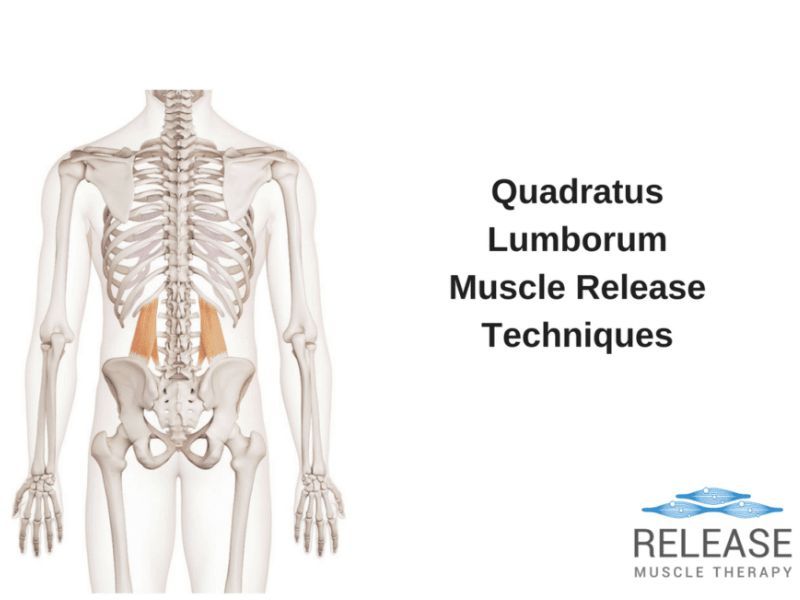
The quadratus lumborum muscle (QL) is located in the lower back on both sides of the spine.  Due to its attachments and actions on the spine, the QL is often associated with conditions of lower back, pelvis, and hip pain.

If during pelvic assessment a hip-hike and/or excessive anterior pelvic tilt is found, then targeted quadratus lumborum release techniques can be applied.

Due to the overlapping actions of the QL muscle with the spinal extensor muscles, they should all be addressed together for optimal results.

How to know if you need QL muscle release:

Quadratus Lumborum Trigger Points

Trigger-Points-In-Quadratus-Lumborum

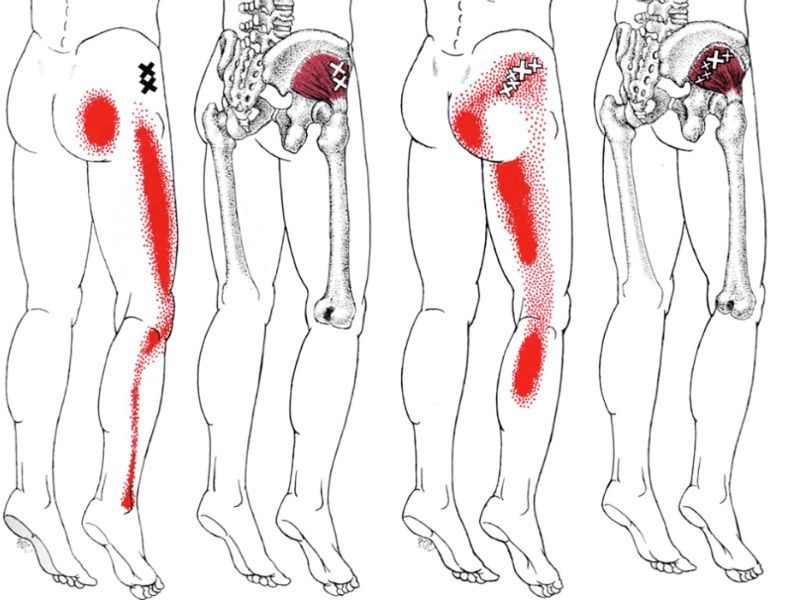
Trigger points are very commonly found in the QL muscles.  They frequently refer sensation down to the SI joint region, as well as into the upper glutes.

The most frequent trigger point locations are at the transverse processes of the lumbar vertebrae, the 12th rib attachment, and at the insertion on the iliac crest of the pelvis.

QL Muscle Massage Therapy

The QL muscle is fairly deep but can be accessed just to the side of the long spinal erectors.  Due to all the attachments on the ribs, pelvis, and spine, its important to perform QL massage glides in upward and downward strokes, as well as compress the attachment points directly to cover the muscle thoroughly.

An important note when performing massage in this area is to be mindful of the 12th rib, which is known as a “floating rib” and may be injured as a result of excessive force.  Never press directly into it with an elbow!

After massage therapy, its recommended to add a frequent QL muscle stretch in order to get the work to “stick”.

Quadratus Lumborum Release – Post Isometric Relaxation Technique

The QL is a side a side-bending and hip-hiking muscle.  Post isometric relaxation technique can be done in the side-lying position with light resistance applied to the top of the hip or pelvis.

Since this position can feel slightly threatening to someone experiencing lower back pain or discomfort, it’s advised to only move slightly into the position of stretch, just up to the point where the person feels comfortable.

Once the position is attained, as mentioned in the video, only a 5-10% effort should be exerted by the QL muscle while breathing in.  As the exhale and relaxation occurs, only take the stretch again to a point of comfort and repeat.

QL Self Massage Release – Theracane

The Theracane is a great tool for quadratus lumborum self massage and for reaching other back muscles.  The knob on the curved end is perfect for reaching trigger points in this area.

When performing this technique, just like any other QL release, avoid using excessive pressure.  I only recommend using 5/10 intensity, which means about 50% of a pressure you can tolerate maximally.  You should be able to comfortably hold the pressure without holding your breath or having your arms fatigue for up to 30 seconds.

Be especially careful about NOT compressing the 12th rib!

Quadratus Lumborum – Side Stretch Over Ball

quadratus lumborum stretch can be attained by laying over a swiss ball.  When in this position, deep breathing is essential to influence the muscle due to its lower rib attachments.  Additionally, since the muscle fibers go in slightly different angles, it’s best to move your upper body slightly forward, backward, and also position your body more or less over the ball to address all the possible fibers you can get to.

The quadratus lumborum is an important muscle to address in a multitude of issues involving the lower back, pelvis and hips, but it’s also important to keep in mind it should always be addressed in the context of an overall therapeutic program. Quadratus lumborum release should not be the sole focus!

No muscle works by itself, and frequently, muscles that appear short, tight and even painful may simply be compensating for another muscle/group that may in fact be the actual underlying problem.

Gluteal Tendinopathy | Identify And Fix

Dealing with relentless butt pain? If you’re experiencing lateral hip region pain, it could be gluteal tendinopathy.

The buttocks are very complex structures. They contain many gluteal muscles and tendons. But none of these should cause lateral hip pain or discomfort after sitting for only a few hours.

What is gluteal tendinopathy? It is the medical name for the damage to the tendons of the buttocks, which can trigger deep gluteal pain. You can even get sciatica pain from gluteal tendinopathy.

But how do you know this is what you’re experiencing? Is there anything you can do about it? Does physical therapy help? You’re in the right spot to find the answer.

[lwptoc]

What are the symptoms of Gluteal Tendinopathy?

The main symptom of gluteal tendinopathy is pain, which is located laterally. This lateral hip pain starts mild and worsens over time. You may localize the pain in one side of the buttocks. It is unilateral (1,2).

It usually occurs in people who frequently carry weights or in runners. Thus, the pain increases with specific movements and loads.

If you have lateral hip pain, your therapist may use palpation to look for signs. They may touch the area above the great trochanter, which may cause pain or discomfort.

In many cases, the examiner asks patients to tie their laces. In gluteal tendinopathy, this movement triggers the pain (3).

Lateral hip pain may also leave you with other problems. For instance (1,2):

  • Pain increases when you sit on the problematic side.
  • The symptom may force you to sleep on one side only.
  • Climbing stairs, walking, prolonged standing, or running may worsen the symptoms.
  • Prolonged sitting triggers lateral hip pain, especially when sitting cross-legged.
  • After prolonged sitting, you may experience difficulty walking.

What parts of your body does gluteal tendinopathy affect?

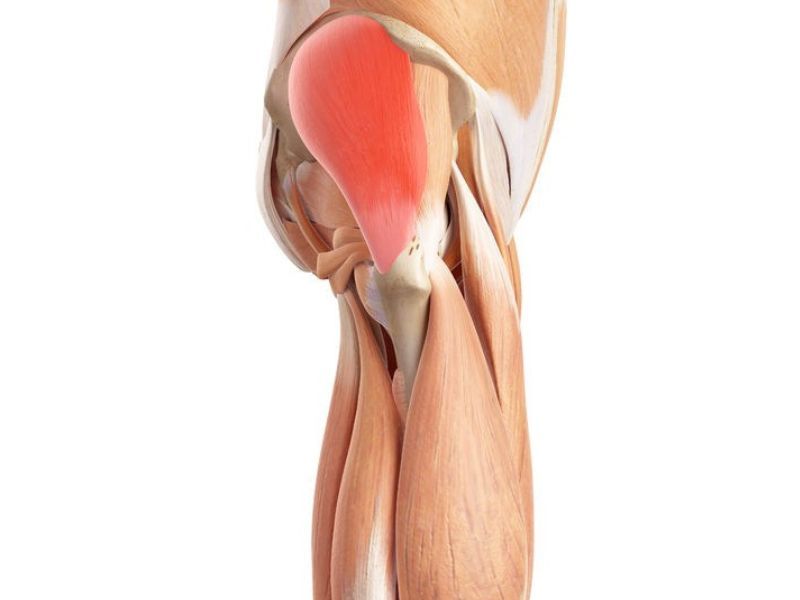
As the name suggests, gluteal tendinopathy affects the tendons of the buttocks. Two tendons are mainly involved. These are the gluteus medius tendon and the gluteus minimus tendon.

In this case, both gluteal tendons are affected by non-inflammatory processes. The most common include compression and overuse damage.

We can find these muscles in the gluteus. Still, patients usually report pain in the lateral hip. That’s where you have the tendon insertion (1).

What are the common causes of gluteal tendinopathy?

The gluteal muscles and surrounding structures are designed to withstand pressure. If that’s the case, why does gluteal tendinopathy affect some people and not others?

There are several possible causes. It usually involves a non-inflammatory event affecting the gluteus medius or gluteus minimus tendons. For instance:

The position of the joint

Researchers have found that hip adduction is a frequent pain trigger. In other words, when we bring the legs close together.

An example would be sitting with our legs crossed for a long time. Another example is keeping your knees together while standing up.

Maintaining this position while performing weight-bearing tasks can cause lateral hip pain. It’s because the iliotibial band compresses the gluteal tendons (4).

When holding a specific posture

Some postures promote compression on the gluteus medius and gluteus minimus tendons. Compressing them causes gluteal tendinopathy.

For example, when you stand on one leg. This position forces the abductor muscles and the iliotibial band to maintain pelvic control. These structures become tense and cause strain and compression in the gluteal tendons (1).

Some anatomical variants

Some people have a different angle between the neck and body of the femoral bone. These people may experience more tension in the iliotibial band.

This occurs mainly in women. They also have a small insertion of the gluteus medius tendon. Thus, the load of the iliotibial band won’t have an extensive surface to dissipate and it will be more likely to trigger pain (1,5).

What’s the difference between gluteal tendinopathy, gluteal tendinitis, and trochanteric bursitis?

gluteal tendinopathy

Gluteal tendinopathy is a potential cause of deep gluteal pain syndrome. This syndrome brings together signs and symptoms found in other problems in the same area. Each one can have a different treatment.

That is why therapists need to highlight the differences between them. For example, how is gluteal tendinopathy different from tendinitis and trochanteric bursitis?

Gluteal tendinopathy vs gluteal tendinitis

The main difference between them is the source of pain. 

In tendinitis, the cause is inflammation. We can locate this inflammatory process within the structure of gluteal tendons. Alternatively, an external structure can be the trigger. Besides pain, patients have edema (liquid retention) in the gluteus muscles (6).

In gluteal tendinopathy, the cause of pain is generally unrelated to inflammation. Instead, it is due to mechanical compression. As noted above, it can be due to an anatomical variant or the position you typically adopt.

Gluteal tendinopathy vs trochanteric bursitis

Similar to gluteal tendinitis, trochanteric bursitis is an inflammatory process. It is enclosed in the greater trochanteric pain syndrome.

In this case, the bursa is the source of the problem. This structure protects the hip joint. You’ll find the bursa above the greater trochanter.

Therefore, symptoms in greater trochanteric pain syndrome will be very similar but not the same. In trochanteric bursitis, the pain is located a little higher. Your physiotherapist can determine the exact location by palpation (7).

Other pathologies

Before diagnosing gluteal tendinopathy, it will be necessary to rule out other pathologies. For example, hip osteoarthritis.

X-rays are useful to make a clear difference. Your therapist may also suspect osteoarthritis with some maneuvers in the physical exam.

Many other health problems can also mimic gluteal tendinopathy pain. Thus, it is essential to rule them out with your examiner and ask as many questions as you may have.

What are the treatment options for Gluteal Tendinopathy?

Gluteal tendinopathy tends to get much better with physical therapy and some lifestyle changes. Some medical treatments and exercises are also available.

Here are some things you can do to relieve your pain (1,2,4):

Easy postural changes

Sometimes a simple change in your posture habits can improve your symptoms.

For example, avoid sitting cross-legged or standing on one foot. When sitting or lying down, do not put your weight on the affected side.

Build strength in your legs

Exercise therapy is essential for improving gluteal tendinopathy.

Many cases of gluteal tendinopathy are associated with atrophy and weakness of the gluteal muscles. By strengthening them, we also protect gluteal tendons.

However, you should ask your therapist for guidance. For example, some patients may need to avoid walking uphill, even if they want to strengthen their legs.

Maintain a healthy weight

Excess weight affects all the joints in your legs. The hips and buttocks are not an exception. 

Maintaining a healthy weight will reduce the strain on your joints and help with gluteal tendinopathy.

Stick to your hormone treatments

If you have a hormonal imbalance, you should follow your treatment, especially as a woman. Gluteal tendinopathy pain can develop during menopause due to hormonal changes.

By addressing them and strengthening your legs, you can improve your symptoms.

Other treatment options

Besides these home measures, physical therapy and other treatments are also available.

The good news is that gluteal tendinopathy usually doesn’t require surgery. In most cases, conservative treatment is sufficient. For example:

  • Oral therapy: like other types of pain, this can respond to painkillers. Over-the-counter analgesics are usually sufficient.
  • Massage therapy: Trigger point massage, in particular, can help. This neuromuscular massage technique helps to identify tension points and release them through manual pressure. This technique should be applied by a physical therapy or massage specialist.
  • Tendon rehabilitation techniques: Various exercises in physical therapy can rehabilitate gluteal tendons. You should perform these exercises under the instructions of your physiotherapist. They have a progression and will change as the condition improves.
  • Other treatments: In some cases, a corticosteroid injection may be necessary to relieve gluteal tendinopathy. Shockwave therapy has also been applied. Surgery is recommended only when there is a tendon tear or when conservative treatment does not work. For example, in hip abductor tendon tears.

How long does Gluteal Tendinopathy last?

Symptoms of gluteal tendinopathy vary in duration, depending on the treatment used. It also depends on the severity of the tendon injury.

Many patients experience an improvement after three to eight weeks of treatment and/or rehabilitation. Again, it is necessary to follow the guidelines of your physician and physiotherapist.

Treatments such as corticosteroid injections may provide early relief. These usually have their peak effect by the sixth week. However, they are only temporary solutions.

Overall, the pain should not last more than a year. If it does, you are probably a candidate for surgical treatment, as it indicates that conservative treatment did not work.

But don’t worry. Most cases of gluteal tendinopathy respond very well to lifestyle changes and postural modifications. Physical therapy is also very effective, including exercise and massage therapy.

References:

  1. Grimaldi, A., Mellor, R., Hodges, P., Bennell, K., Wajswelner, H., & Vicenzino, B. (2015). Gluteal tendinopathy: a review of mechanisms, assessment, and management. Sports Medicine, 45, 1107-1119.
  2. Grimaldi, A., & Fearon, A. (2015). Gluteal tendinopathy: integrating pathomechanics and clinical features in its management. journal of orthopaedic & sports physical therapy, 45(11), 910-922.
  3. Fearon, A. M., Scarvell, J. M., Neeman, T., Cook, J. L., Cormick, W., & Smith, P. N. (2013). Greater trochanteric pain syndrome: defining the clinical syndrome. British journal of sports medicine, 47(10), 649-653.
  4. Grimaldi, A., Mellor, R., Hodges, P., Bennell, K., Wajswelner, H., & Vicenzino, B. (2015). Gluteal tendinopathy: a review of mechanisms, assessment and management. Sports Medicine, 45, 1107-1119.
  5. Birnbaum, K., Prescher, A., & Niethard, F. U. (2010). Hip centralizing forces of the iliotibial tract within various femoral neck angles. Journal of Pediatric Orthopaedics B, 19(2), 140-149.
  6. Paik, N. C. (2014, June). Acute calcific tendinitis of the gluteus medius: an uncommon source for back, buttock, and thigh pain. In Seminars in Arthritis and Rheumatism (Vol. 43, No. 6, pp. 824-829). WB Saunders.
  7. Redmond, J. M., Chen, A. W., & Domb, B. G. (2016). Greater trochanteric pain syndrome. JAAOS-Journal of the American Academy of Orthopaedic Surgeons, 24(4), 231-240.

Gluteus Minimus Trigger Points | Pain, Symptoms, and Finding Relief

Are you struggling with unexplained hip or lower back pain that radiates down your leg?

You might be dealing with gluteus minimus trigger points, a common but often overlooked source of discomfort. These trigger points can mimic conditions like sciatica, making them tricky to diagnose and treat.

In this comprehensive guide, we’ll run through the anatomy, function, and common symptoms associated with gluteus minimus trigger points.

We’ll also provide actionable advice on self-massage techniques and stretching exercises to help you find relief. Whether you’re a healthcare professional or someone dealing with chronic pain, this article offers expert insights and practical solutions to help you understand and manage this condition effectively.

Glute Minimus Anatomy And Function

The gluteus minimus is one of the three major gluteal muscles that make up the glute group, along with the gluteus maximus and gluteus medius. It’s not just the smallest but also the deepest of the three, featuring a unique fan-shaped structure.

The anterior fibers of the muscle are slightly thicker than the posterior ones. This muscle plays a pivotal role in hip stabilization and movement, particularly in keeping the pelvis level during activities like walking and standing on one leg.

Origin and Insertion

The gluteus minimus originates from the external surface of the ilium, specifically between the anterior and inferior gluteal lines.

It inserts into the anterior border of the greater trochanter of the femur, serving as a critical point for thigh movement.

Action and Synergistic Muscles

– Abduction of the hip (moving the leg away from the midline)

– Medial rotation of the thigh

– Helps in hip stabilization, especially when the opposite leg is lifted off the ground

The gluteus minimus works synergistically with the gluteus medius and tensor fasciae latae during these movements. Conversely, muscles like the adductor magnus oppose the gluteus minimus during abduction, while the piriformis and gluteus maximus oppose it during medial rotation.

Innervation

The gluteus minimus is innervated by the superior gluteal nerve, which arises from the lumbar spinal nerves L4, L5, and S1.

Glute Minimus Trigger Point Locations

glute medius and minimus trigger points
Image reference: David G. Simons, Janet G. Travell, Lois S. Simons. Myofascial Pain and Dysfunction: The Trigger Point Manual

Signs and Symptoms

Localized Pain: A specific, tender area in the muscle itself may be due to a glute minimus trigger point.

Referred Pain Pattern: Pain can radiate down the leg, often mimicking sciatica (called pseudosciatica). It can also refer pain to the lower back and contribute to hip pain.

Limited Range of Motion: Difficulty in hip abduction or medial rotation.

Limping or Altered Gait: The pain and muscle tightness can affect walking patterns.

Pain When Sitting: Discomfort or pain when sitting for extended periods, especially on hard surfaces.

Night Pain: Some people experience increased pain at night, which can interfere with sleep.

Muscle Weakness: The affected muscle may feel weaker than usual, affecting balance and stability.

Tightness and Stiffness: A general feeling of tightness or stiffness in the hip area.

Differential Diagnosis

Trigger points in the gluteus minimus can often present symptoms that are easily confused with other medical conditions, complicating diagnosis and treatment. For instance, the radiating leg pain commonly associated with gluteus minimus trigger points can mimic the symptoms of sciatica.

Similarly, the referred pain to the lower back might be mistaken for lumbar spine issues or even sacroiliac joint dysfunction. The condition can also resemble hip bursitis, piriformis syndrome, or iliotibial band syndrome (ITBS), all of which cause hip pain and thigh region.

In some cases, the symptoms might even be attributed to more serious conditions like a herniated disc or osteoarthritis of the hip.

What Causes Gluteus Minimus Trigger Points?

Trigger points in the gluteus minimus muscle can be a significant source of hip and lower back pain, often mistaken for conditions like sciatica or lumbar spine issues. These painful knots can develop for a myriad of reasons, making them a common concern for those dealing with chronic pain.

Factors such as poor posture from prolonged sitting, overuse from activities like running or cycling, and muscle imbalances can all contribute to the formation of these trigger points. Additionally, direct trauma, sedentary lifestyles, and even improper footwear can exacerbate the issue.

Psychological stress and underlying medical conditions like arthritis or lumbar disc problems can also be culprits. As we age, the susceptibility to developing trigger points in the gluteus minimus increases, making it a relevant issue across multiple age groups.

Understanding the root causes of these trigger points is crucial for effective treatment and long-term relief.

Gluteus Minimus Trigger Point Pain Relief

Self Massage Using A Massage Ball

  1. Identify the Trigger Point: Refer to an illustration of the gluteus minimus muscle to locate where the trigger points are. They are usually indicated by a black dot, and the red referred pattern often goes down the back or the side of the leg.
  2. Positioning: Lay on your side on a flat surface.
  3. Apply Pressure: Place the 5-inch diameter fit ball under your gluteus minimus, specifically way up toward the hip crest where it meets your waist.
  4. Initial Compression: Raise your body slightly to apply pressure on the fit ball. Hold this position for 10 to 15 seconds, keeping the bottom leg relaxed.
  5. Adjust and Hold: Use your top leg to scooch your body upward. Look for any areas of pain or discomfort. Hold the position.
  6. Regulate Pressure: If the pressure feels too intense, you can use your arms to lift some of your body weight off the ball, move a bit, regroup, and then reapply pressure.
  7. Repeat: Scooch up again and continue to apply pressure on different potential trigger points.

How To Stretch The Glute Minimus For Trigger Point Relief

Stretch 1: Seated Forward Bend Glute Minimus Stretch

Seated Forward Bend Glute Minimus Stretch-min

Steps:

  1. Positioning: Sit on the floor with your legs extended.
  2. Leg Placement: Bring your right leg in front of you, keeping it bent. Extend your left leg straight behind you.
  3. Body Alignment: Maintain a flat back.
  4. The Stretch: Gently lean your upper body over your bent right leg.
  5. Hold: Hold the stretch for about 15 to 20 seconds. This muscle group can be very tight, so go easy on the stretch.
  6. Repeat: Perform the stretch again for another 15 to 20 seconds.
  7. Switch Sides: Now switch legs and repeat the stretch on the other side.

Stretch 2: Supine Glute Minimus Stretch

Supine Glute Minimus Stretch-min

Steps:

  1. Positioning: Lie on your back on the floor with your knees bent and arms down by your sides.
  2. Leg Placement: Place your right ankle on top of your left knee.
  3. The Stretch: Bring your left knee up towards your chest.
  4. Hand Placement: Interlace your hands around the thigh of your left leg.
  5. Pull: Gently pull both legs towards your chest until you feel a stretch in the right hip.
  6. Hold: Hold the stretch for about 15 to 20 seconds.
  7. Repeat: Perform the stretch again for another 15 to 20 seconds.
  8. Switch Sides: Now switch legs and repeat the stretch on the other side.