Author: Sam Visnic

Foam Rolling: A Beginner’s Guide

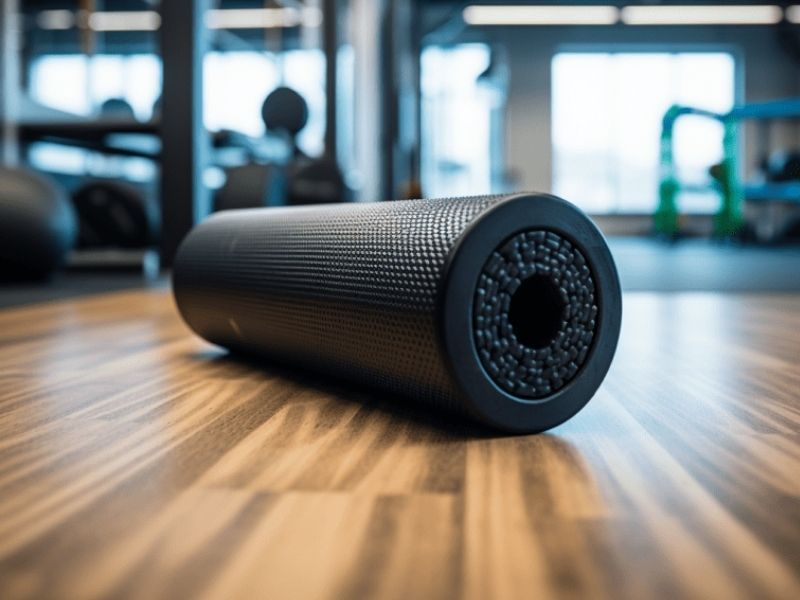
Foam rolling is a self-massage technique that utilizes a foam cylinder to release muscle tightness and tension. It has become a popular way for beginners to improve flexibility, relieve soreness, and support overall well-being.

Specifically for beginners, foam rolling can enhance flexibility, reduce post-workout muscle soreness, and provide relaxation. This guide will provide foam rolling basics, from proper technique to creating a starter routine.

Whether you’re new to fitness or just looking to enhance your workouts, foam rolling offers numerous benefits. The targeted pressure can increase blood flow, improve range of motion, and help prevent injury. When performed correctly, almost anyone can incorporate foam rolling into their fitness journey.

By starting with basic exercises and foam rolling best practices, beginners can ease into this beneficial activity safely. Follow along for step-by-step instructions on the best foam rolling exercises for beginners.

Also be sure to check out our previous post, Foam Rolling 101 for additional info.

Foam-Rolling-A-Beginners-Guide

Why Start Foam Rolling?

Foam rolling provides both physical and mental rewards on the path towards better health. Here are some of the top reasons to add it to your routine:

  • Reduces muscle tightness from poor posture or strain
  • Restores mobility by loosening tense areas
  • Prepares muscles for workout by increasing joint range of motion and improving blood flow
  • Soothes soreness and speeds recovery after exercise
  • Improves circulation through gentle tissue massage
  • Potentially reduces risk of injury by enhancing flexibility
  • Offers pain relief through low-threat novel stimulation
  • Provides stress relief and relaxation

The unique pressure from foam rolling can yield improvements unachievable through stretching alone. Dedicate just 10-15 minutes 1-3 times per week to feel the benefits.

Choosing the Right Foam Roller

With different sizes, textures and densities available, selecting the ideal foam roller ensures safety and effectiveness. Here are key factors for beginners to consider:

  • Size: Standard rollers are 12-18 inches long. Mini rollers are more portable while 36-inch rollers allow you to lie on top.
  • Density: Opt for medium soft density. Very soft rollers offer insufficient pressure while hard ones are overly intense.
  • Texture: Smooth rollers without ridges are suitable for beginners.

Try an in-store test roll to assess comfort and pressure before purchasing. It should provide gentle-but-firm support.

Step-by-Step Rolling Exercises

Follow these illustrated guides to roll out your upper body, core and lower body like a pro:

Upper Body

Shoulders: Sit with roller under upper back. Extend arms straight out to sides. Slowly roll back and forth from low shoulder blade to upper shoulder.

Arms: Sit with one arm extended, palm down. Place roller under forearm. Roll from elbow to wrist. Repeat on other arm.

Upper back: Lie back with roller under mid-upper back. Cross arms in front. Raise hips and slowly roll up to armpits and down.

Core

Lower back: Sit with roller under curve of low back. Cross ankles. Place hands behind knees. Tilt pelvis back and roll up to mid-back.

Abs: Lie back with roller under abdomen above naval. Place hands behind head. Contract abs and slowly roll roller side to side.

Lower Body

Glutes: Sit on roller, placing one glute cheek on roller. Cross ankle over opposite knee. Roll from hip to mid-glute. Repeat on other side.

Quads: Lie facedown with roller under thigh of one leg. Support weight on forearms. Roll from hip to above knee. Repeat with other leg.

Calves: Sit with one leg extended, placing roller under mid-calf. Support weight with hands behind you. Roll up and down calf, repeating on other side.

Common Mistakes to Avoid

As a foam rolling beginner, it’s normal to make some errors. Watch out for these common missteps:

  • Rolling too fast or aggressively before you’re warmed up
  • Allowing the roller to roll away uncontrolled rather than moving slowly
  • Focusing solely on problem areas, rather than entire muscles
  • Progressing too quickly rather than gradually increasing pressure
  • Rolling joints or spine rather than surrounding muscles
  • Pushing through sharp pain rather than easing up pressure

Remember to start slow and focus on proper form. It may feel awkward at first, but your technique and body awareness will improve with practice.

Developing an Effective Routine

To fully reap the rewards, foam rolling should be done consistently. Here are tips for creating a sustainable routine:

  • Schedule sessions right before stretching or after workouts when muscles are warm.
  • Target 1-3 muscle groups per session, spending at least 90 seconds rolling each area.
  • Gradually increase pressure and duration, while reducing frequency to 2-3 times per week to avoid overuse.
  • Pair foam rolling with stretching, massage, or physical therapy for compounding benefits.
  • Listen to your body and adjust your routine as needed allowing for rest days.
  • Use a foam rolling journal or app to track progress over time.

Consistency and patience are key. Stick with it to make foam rolling a habit.

Conclusion

For beginners, foam rolling can provide numerous benefits like enhanced flexibility, relief from muscle soreness, and overall improved muscle health. When starting a foam rolling routine, opt for a soft, smooth roller and focus on proper technique. Incorporate it consistently to reap the rewards of this beneficial activity.
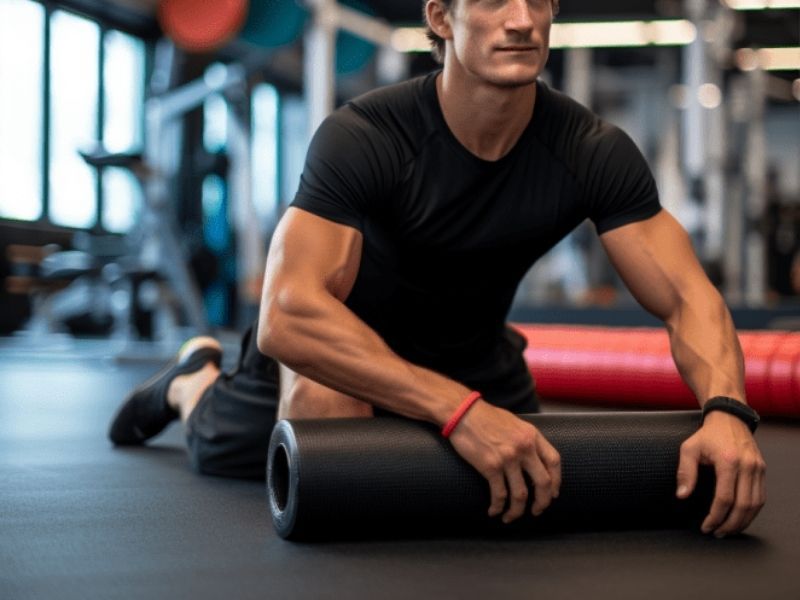
Foam Rolling 101: Your All-in-One Guide to Pain Relief and Flexibility

Foam rolling, also known as self-myofascial release, has become an increasingly popular practice among athletes, fitness enthusiasts, and physical therapy patients. But what exactly does foam rolling do to your body? How does it provide its purported benefits?

In this comprehensive guide, we will explore the origins and evolution of foam rolling, the science behind how it works, proper techniques to utilize it, and the evidence-based benefits it can provide.

First developed by physical therapists to help patients, foam rolling has now become a mainstream recovery and mobility practice. But the techniques and expected benefits have developed in parallel with the research. Many assume foam rolling “breaks up adhesions” or “releases tight muscles,” but the mechanical effects may not be that straightforward.

By evaluating the research on foam rolling’s effects on range of motion, pain sensitivity, and more, we can categorize its impacts into mechanical, physiological, neurological, and psychobiological effects. We will break down what the science says about each of these categories to explain how foam rolling influences the body and mind.

With a research-backed understanding of how foam rolling works, individuals can utilize it in their training and recovery more effectively. Our guide will cover proper foam rolling techniques for both beginning and advanced fitness enthusiasts. We’ll also provide specific recommendations for athletes, rehabilitation patients, seniors, and other groups looking to experience its benefits.

History of Foam Rolling

Once a practice reserved for physical therapists and professional athletes, foam rolling has become accessible to all. Discover the history and evolution of this remarkable tool.

  • Foam rolling has its roots in myofascial release techniques used by physical therapists to treat patients.
  • Dr. Moshe Feldenkrais, an Israeli physicist, was the first to use a foam roller for self-massage in the 1970s.
  • Foam rolling was popularized by his students and eventually adopted by therapists, trainers, and athletes.
  • Variations like vibrating foam rollers, rumble rollers, and massage sticks emerged as foam rolling gained popularity.
  • Foam rollers are now a mainstream recovery tool found in gyms and homes worldwide.

Who Can Benefit

Foam rolling has become a mainstream practice utilized by everyone from elite athletes to recreational fitness enthusiasts. However, due to limited and sometimes contradictory scientific research, it’s unclear exactly who can realistically benefit from foam rolling techniques.

Based on the current research, here is a breakdown of who may benefit from foam rolling:

  • Elite athletes: Studies show foam rolling may provide minor performance benefits for elite athletes who are training at very high volumes. However, the effects tend to be short-lived.
  • Recreational athletes: For most regular gym-goers and casual fitness enthusiasts, the benefits of foam rolling are less clear. More research is needed to determine if foam rolling provides any advantages over proper warm-ups and cooldowns for flexibility.
  • Patients in physical therapy: Under the guidance of a physical therapist, foam rolling may help relieve muscle tension and discomfort after injuries or surgery. However, patients with acute inflammation should avoid foam rolling painful areas.
  • Chronic pain patients: Some research indicates foam rolling can temporarily reduce feelings of muscle pain and soreness. However, more studies are needed to determine if it provides lasting pain relief.
  • Fitness class participants: Many yoga, Pilates, and group fitness classes have incorporated foam rolling. While participants may enjoy the practice, there’s no evidence it provides added benefit over traditional mobility warm-ups.

More research is still needed to clarify exactly who can realistically expect to benefit from foam rolling. Many individuals continue to use foam rollers because they subjectively feel better after use. However, the science is still unclear regarding any evidence-based advantages for most mainstream fitness and rehab applications.

Different Types of Foam Rollers

Foam rollers come in various shapes, sizes, and textures. From smooth to ridged, soft to firm, there’s a foam roller for every need. Learn more about the different types of foam rollers and find the one that’s right for you. Explore our product reviews for top recommendations.

  • Smooth foam rollers: Basic foam rollers with a uniform surface. Beginners may prefer a smoother, softer density.
  • Textured foam rollers: Designed with ridges, nobs, or grooves for increased pressure on tissues.
  • Vibrating foam rollers: Feature internal components to provide vibration while rolling. However, claims of increased blood flow and massage benefits are unproven.
  • Rumble rollers: Made from hard rubber with protruding balls to mimic massage pressure points. For advanced self-massage.
  • Foam rolling sticks: Resemble rolling pins to target smaller areas like the calves, arms, and back.
  • Balls: Tennis, lacrosse or other balls can provide focused pressure. Cheap DIY option.

Foam Rolling Techniques

Whether you’re a beginner or a seasoned pro, our guide to foam rolling techniques has something for everyone. Discover basic and advanced techniques to enhance your recovery and performance.

Basic Rolling Techniques

  • Slowly roll over muscles using body weight pressure for 20-40 seconds per area. Avoid bones and joints.
  • Focus on large muscle groups like quads, hamstrings, calves, glutes, lats, and upper back.
  • Adjust pressure and speed as needed. Discomfort is normal but pain indicates you should lighten up.
  • Roll before exercise as part of warm up routine to enhance range of motion.
  • Roll after exercise during cool downs to help reduce muscle soreness.

Advanced Rolling Techniques

  • Flossing – Keep foam roller stationary while moving the targeted body part back and forth.
  • Vary cadence – Increase pressure by pausing for 1-2 seconds over tender areas.
  • Layering – Stack limbs on top of each other to increase pressure on muscles.
  • Supported positions – Use wall or bench to allow gravity to increase pressure.
  • Review our video tutorials for step-by-step guidance on basic and advanced foam rolling techniques.

Benefits of Foam Rolling

  • Improved flexibility: Research shows foam rolling improves range of motion in joints, though effects dissipate within 10-15 minutes. Regular use enhances overall flexibility.
  • Reduced muscle soreness: Foam rolling following exercise appears to help decrease delayed onset muscle soreness by increasing blood flow to tissues.
  • Enhanced circulation: The pressure and motion increases blood flow to muscles and soft tissue allowing better oxygen circulation.
  • Better range of motion: Foam rolling can reduce muscle tightness allowing for freer movement.
  • Pain relief: The pressure stimulates the nervous system providing temporary pain relief in overused and sore muscles.

Foam Rolling for Specific Audiences

Foam rolling isn’t just for athletes. Whether you’re into yoga, weightlifting, or recovering from an injury, foam rolling can be tailored to your needs.

  • Runners: Focus on foam rolling the IT band, hamstrings, quads, and calves which take a pounding during runs.
  • Weightlifters: Target the lats, chest, upper back, glutes and thighs between heavy lifting sets.
  • Yogis: Use foam rolling to open hips, inner thighs, and shoulders before stretching for greater mobility.
  • Rehab patients: Work with a physical therapist to use foam rolling to aid in recovery from injuries, strains or surgery.
  • Seniors: Gentle foam rolling can help improve circulation and flexibility allowing for greater mobility.

Equipment and Accessories

From choosing the right foam roller to discovering handy accessories, our equipment guide has you covered.

Foam Rollers

Foam rollers come in a variety of densities, sizes, and textures to suit different needs. Consider these factors when selecting a roller:

  • Density: Firmer rollers provide more intense pressure. Softer ones are more gentle. Choose based on your sensitivity and experience level.
  • Size: Standard rollers are 6 x 12-18 inches. Longer 36 inch rollers allow you to lie on top. Shorter rollers are more portable.
  • Shape: Half-round and full-round shapes are available. Some have ridges or bumps for targeted massage.
  • Material: More expensive EPP/EVA foam is durable and long-lasting. Cheaper styles may deteriorate faster.

Other Equipment

  • Rolling sticks: Target smaller areas like forearms, legs, and upper back. Easier to transport than rollers.
  • Lacrosse balls: Place on knots or trigger points for focused, intense pressure. An affordable DIY option.
  • Yoga blocks: Use underneath elbows, knees, or back for support and stability during foam rolling.
  • Mats: Provide cushioning and prevent slipping. Helpful for beginners.

Consider starting with an inexpensive, medium-density foam roller to determine your preferences before investing in more advanced equipment. Review our top product recommendations.

Conclusion

While the research is still emerging, many individuals report subjective benefits from foam rolling. It can be a useful tool as part of a warm-up or cool-down routine, with guidance from a therapist or trainer. However, the science is unclear about lasting performance and recovery advantages for most. Focus on proper technique and avoid excessive pressure.

TFL And IT Band Release – 4 Top Techniques

The tensor fascia lata (TFL) is a muscle located on the front of the hip and merges into the iliotibial band (IT band). It is often associated with a variety of movement pattern imbalances and pain in the lower back, pelvis, hips, and knees.

This muscle should be addressed in all of the above issues.

Key Takeaways

  • The TFL (tensor fascia lata) muscle, which merges into the iliotibial band (IT band), is often associated with pain and movement imbalances in the lower back, pelvis, hips, and knees.
  • To release the TFL muscle, you can use hands-on massage techniques, self-massage techniques like foam rolling, or neuromuscular techniques such as muscle energy.
  • Tightness in the TFL muscle can be caused by compensatory patterns and excessive anterior pelvic tilt. Strengthening opposing muscles and addressing muscle imbalances are essential for fixing overactive TFL.
  • TFL pain can be sharp or a dull ache and may contribute to sacroiliac and lower back pain.
  • Assessing TFL tightness can be done through tests like the Ober Test and Thomas Test, which reveal reduced hip range of motion.
  • Foam rolling can help address the muscle beneath the IT band, but the IT band itself cannot be released or stretched. It’s important to incorporate a comprehensive approach that includes exercises, stretches, and other techniques to effectively manage TFL and IT band pain.
Tensor Fascia Lata

How to know if you need to address the TFL and IT Band:

Most Common IT Band And TFL Questions

How do you release the TFL muscle?

The tensor fascia lata can be released with hands-on massage techniques, self massage techniques (SMFR) such as foam rolling, or with neuromuscular techniques such as muscle energy technique.  In this blog you’ll find demonstration videos for all these options.

What causes tight TFL?

The TFL is a very common compensatory muscle.  Its often over-active as an internal hip rotator, especially when the pelvis is positioned in excessive anterior pelvic tilt.  When the opposing muscles are weak, this muscle will become dominant and become facilitated.  Therefore, a TFL muscle stretch may be warranted.

What does TFL pain feel like?

Pain in the TFL can either be sharp (usually during single leg standing or when lifting your leg in front of you), or a dull ache when walking up or down stairs.  If the muscle is short and tight, it can also be a contributor to sacroiliac and/or lower back region pain.

How do you fix overactive TFL?

Reducing the effect of an overactive tensor fascia lata involves two parts:

  1. Reducing excess muscle tone with TFL release techniques (described later in this article)
  2. Increasing activity in the muscles that both oppose and synergistically work with the TFL.

While release techniques can provide relatively rapid results including pain relief, exercise work should be the primary focus over the long term. TFL muscles can be effectively stretched as part of a full range of motion exercise strategy as well.

How do you check TFL tightness?

The Ober Test and Thomas Test both reveal reduced range of motion in the hips that is related to TFL and IT band tightness.

Why does the IT band get tight?

Since the IT band is not a contractile tissue, it does not become tight, and thus there is no true IT band release techniques.  There are, however, muscles that attach to the band, including the tensor fascia lata (TFL) and the gluteals.  In addition, the band lays over a commonly tight muscle, which is the vastus lateralis (a quadricep muscle), which is usually the source of the tenderness which is often felt during IT band massage therapy or foam rolling.

Should you foam roll your IT band?

Foam rolling is a version of IT band self massage, and can be helpful for addressing the muscle that lies beneath the IT band, which is the vastus lateralis.  It’s important to understand that releasing the IT band itself is not possible.

TFL Trigger Points

TFL trigger points are routinely found, and can often refer sensation down the lateral aspect of the thigh.  This referred sensation location can be familiar to those dealing with pain in this area.

They are often quite tender, and light to moderate pressure is usually all that is necessary to diminish sensitivity.  Tensor fascia lata trigger points in my experience are very important to address in cases of hip and knee pain that doesn’t seem to be improving just by focusing on basic rehabilitation practices.

TFL Trigger Point Location

Top Tips For Dealing With TFL + IT Band Pain

  • Avoid crossing legs
  • Strengthen all glute muscles to opposite TFL
  • Professional or self-massage techniques to reduce TFL over-activity
  • Re-training exercises to balance hip musculature and reduce TFL dominance

Seated TFL Massage Technique

Addressing the tensor fascia lata muscle in the seated position is an easy way to locate the muscle and get enough leverage to work it.

In this position, the TFL is shortened, which means its not an ideal position to attempt to stretch it, but regardless, it can reduce tissue strain and also allow you to self-treat without too much difficulty.

Word on caution here:  Be nice to your thumbs!

TFL and IT Band Massage

With IT band massage, we are really addressing the lateral quadricep, called the vastus lateralis, which lies under the iliotibial band.

Since the TFL merges into the IT band superiorly, we should address that too in the same massage session.

In the video below, I’ll show you step-by-step how to massage the IT band along with the tensor fascia latae and vastus lateralis.

TFL and IT Band Theracane Self-Massage

The Theracane is a great tool for self-treating the TFL in the standing position.  The key is proper placement of the tool, as well as shifting your bodyweight to the other leg.

Foam Rolling The TFL And IT Band

Foam rolling the IT band is a great general technique to address the outside quadricep muscle, the IT band, as well as a small portion of the TFL muscle.

Because of where the TFL is located, along with the size of the roller, you won’t be able to sufficiently access most of the muscle.  You will need to use a lacrosse ball or select another technique or position to adequately address tensor fasciae latae pain.

After foam rolling, I would recommend a tensor fascia lata stretch for further improve the effectiveness of the work.

Tensor fascia lata stretches are essentially the same as some psoas stretch techniques, which some subtle differences found HERE.  TFL stretch work alone won’t provide the best results, so be sure to add in the other techniques in this post for maximum benefit.

Lastly, I’m frequently asked about the best IT band massager, and while there are some interesting tools available, you can’t go wrong with a simple foam roller or a massage gun tool.

FAQ

How do you release the TFL muscle?

You can release the TFL muscle through hands-on massage techniques, self-massage techniques such as foam rolling, or neuromuscular techniques like muscle energy. Demonstration videos for these options can be found in the blog.

What causes tight TFL?

The TFL muscle can become tight due to compensatory patterns and excessive anterior pelvic tilt. When the opposing muscles are weak, the TFL muscle becomes overactive and facilitated, leading to tightness.

What does TFL pain feel like?

TFL pain can manifest as sharp pain during activities like single-leg standing or lifting the leg, or as a dull ache when walking up or down stairs. Short and tight TFL muscles can also contribute to sacroiliac and lower back pain.

How do you fix overactive TFL?

Reducing the overactivity of the TFL involves two steps: reducing excess muscle tone through TFL release techniques and increasing activity in the opposing and synergistic muscles. While release techniques provide rapid results, long-term focus should be on exercises that stretch and strengthen the TFL and surrounding muscles.

How do you check TFL tightness?

The Ober Test and Thomas Test can reveal reduced hip range of motion associated with TFL and IT band tightness. These tests can help determine if TFL tightness needs to be addressed.

Should you foam roll your IT band?

Foam rolling the IT band can be helpful for addressing the muscle that lies beneath it, such as the vastus lateralis. However, it’s important to note that the IT band itself cannot be released or stretched. Foam rolling can be part of a comprehensive approach to addressing TFL and IT band pain, along with other techniques described in the article.

Psoas Stretching And Strengthening | Restore Psoas Muscle Health

The psoas muscle, located deep within the abdominal cavity, plays a crucial role in our body’s movement and stability. However, due to our sedentary lifestyles and perhaps prolonged sitting, the psoas muscle often becomes tight and weak, leading to various musculoskeletal issues.

This raises the question: why should we prioritize stretching and strengthening our psoas muscle?

Some may argue that stretching and strengthening the psoas muscle is unnecessary, as they believe that our bodies naturally adapt to any imbalances. However, research has shown that a tight and weak psoas muscle can contribute to lower back pain, hip dysfunction, and poor posture. Therefore, it is crucial to restore and maintain the health of our psoas muscle through appropriate stretching and strengthening exercises.

In this article, we will explore the importance of psoas muscle health and provide a comprehensive guide on the best stretches and exercises to restore and strengthen this vital muscle. By incorporating these techniques into our daily routine, we can alleviate pain, improve mobility, and enhance overall musculoskeletal function.

[lwptoc]

 Key Takeaways

– Sedentary lifestyles and perhaps prolonged sitting can cause the psoas muscle to become tight and weak.
– Stretching and strengthening the psoas muscle is important for restoring and maintaining its health.
– The psoas muscle plays a crucial role in movement, stability, and posture.
– Specific movements, such as the Thomas Stretch and Kneeling Hip Flexor Stretch, can effectively stretch the psoas muscle, while exercises like Supine Leg Sliders and Quadruped Leg Slide With Cable can strengthen it.

How does the psoas muscle work?

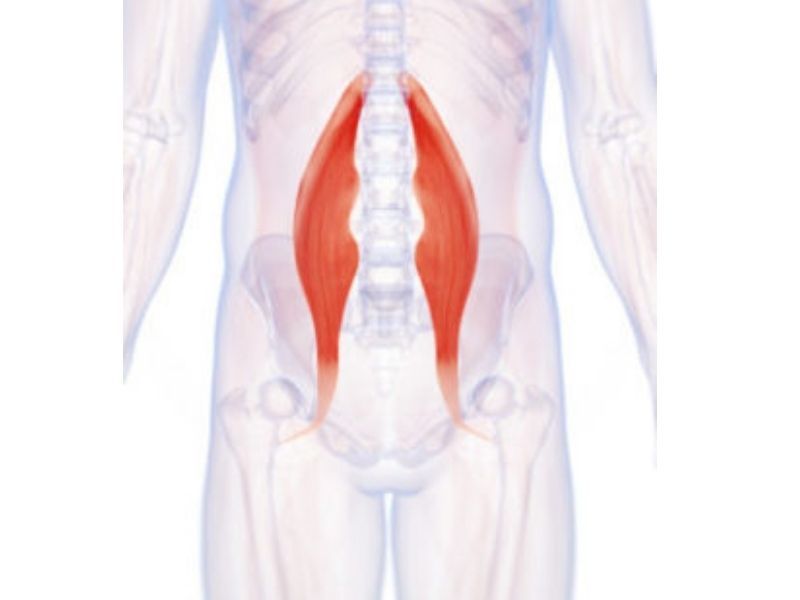
The psoas muscle, also known as the iliopsoas muscle, works by connecting the lower spine to the upper thigh, facilitating hip flexion and contributing to core stability.

As a key hip flexor, the psoas muscle plays a crucial role in the movement of the legs and torso. It works in conjunction with other muscles to allow for activities such as walking, running, and climbing stairs.

Additionally, the psoas muscle helps maintain proper posture by stabilizing the lower back and pelvis. When the psoas muscle is weak or tight, it can lead to imbalances in the body, causing issues such as lower back pain and compromised posture.

Strengthening exercises for the psoas muscle can help restore its health and function, promoting better overall body mechanics.

Why should you stretch and strengthen your psoas?

Improving flexibility and building strength in the muscles that connect the lower spine to the thighs can contribute to overall physical well-being and enhance physical performance.

The psoas muscle, which is located deep within the abdomen, plays a crucial role in hip flexion and is responsible for maintaining proper posture and stability.

Stretching and strengthening the psoas muscle can help alleviate tightness and improve its function. Tightness in the psoas can lead to a variety of issues, such as limited range of motion, lower back pain, and excessive anterior pelvic tilt.

By incorporating specific psoas exercises into a regular exercise routine, individuals can both stretch and strengthen this muscle, promoting improved coordination, increased flexibility, and enhanced muscular function throughout the body.

The best psoas muscle stretches

In the discussion on the best psoas muscle stretches, two effective stretching techniques that can help improve the flexibility and health of the psoas muscle are the Thomas Stretch and the Kneeling Hip Flexor Stretch.

The Thomas Stretch involves lying on your back while pulling one knee towards your chest, which helps to elongate and stretch the psoas muscle.

On the other hand, the Kneeling Hip Flexor Stretch requires kneeling on one knee while pressing the hips forward, providing a deep stretch to the psoas muscle as well as the other hip flexors such as the Rectus Femoris and TFL.

Both of these stretches target the psoas muscle and can be beneficial for its overall health and function.

Thomas Stretch

To enhance the flexibility and strength of the psoas muscle, the Thomas Stretch is a valuable stretch that involves:

– Sitting at the edge of a massage table
– Engaging the abdominal muscles
– Gradually leaning back while drawing the knees towards the chest, then allowing one knee to lower until a stretch is felt in the front of the thigh + groin region

This stretch primarily targets the iliopsoas, which consists of the psoas major and iliacus muscles. As the individual leans back, the hip flexors are deeply stretched, promoting increased range of motion in the hip joint. The Thomas Stretch also encourages flexion of the lumbar region of the spine and helps to maintain proper alignment and flexibility of the spinal extensor muscles.

It is important to keep the leg straight and the head in line with the spine throughout the stretch. By performing this exercise with control and maintaining the bent knee position, the psoas muscle is effectively stretched and strengthened.

Kneeling Hip Flexor Stretch

The kneeling hip flexor stretch is a beneficial stretch for correcting excessive anterior pelvic tilt and primarily targets the rectus femoris, TFL and also the psoas.

This stretch is performed by starting in a lunge position, with the front foot positioned so that the ankle is underneath the knee and the back knee underneath the hip.

To initiate the stretch, squeeze the glute muscles and initiate a posterior pelvic tilt by tucking the tailbone. This should already create a stretch down the leg.

To intensify the stretch, engage the abdominal muscles to further tilt the pelvis posteriorly. Shift the weight forward toward the front knee while maintaining the posterior pelvic tilt.

It is important to avoid excessive lower back arching during the stretch.

Hold the stretch for the recommended amount of time (usually 30 seconds) and switch sides after completing the recommended repetitions (usually 1-3 each side).

The best psoas muscle strengthening exercises

Now lets move on to the three effective exercises for strengthening the psoas muscle that I like to use:

– Supine Leg Sliders
– Cable Assisted Hip Flexion
– Quadruped Leg Slide With Cable

These exercises target the psoas muscle as well as the rest of the hip flexors, which play a crucial role in hip flexion and stability. By engaging in these exercises, individuals can improve the strength and functionality of their psoas muscle, leading to enhanced overall performance and reduced risk of injury.

Supine Leg Sliders

Engaging the abdominal muscles and maintaining control, the supine leg slide exercise can be performed for up to two minutes to promote psoas muscle health and enhance flexibility.

By using a slider or smooth surface, the leg is slid out while maintaining control of the abdominals and avoiding excessive hip flexion.

This movement stretches the psoas muscle if very tight.

Additionally, engaging the abdominal muscles and performing a pelvic tilt during this exercise further encourages muscle “teaming” and enhances its benefits.

Incorporating supine leg sliders into a regular exercise routine can contribute to improved psoas muscle health and overall hip stability.

Cable Assisted Hip Flexion

Utilizing cable assistance in hip flexion exercises can be an effective method to reduce loading and promote pain-free exercise.

This exercise helps to build endurance in the psoas muscle, allowing for much higher repetition training. By attaching an ankle cuff to a cable machine or using exercise tubing with an anchor, individuals can engage their abdominal muscles and allow the cable or tubing to reduce the weight of their leg.

This exercise can be repeated for a desired amount of time, such as up to two minutes, to achieve optimal results.

Quadruped Leg Slide With Cable

The Quadruped Leg Slide with cable is a great progression from the previous two exercises.

By attaching an ankle cuff and connecting it to a cable machine, individuals can engage their abdominal muscles and slide their leg back while maintaining contact with the ground. This movement helps to lengthen and strengthen the psoas muscle, while integrating many more core muscles at the same time.

Conclusion

In summary, addressing the psoas muscle with a combination of stretching and strengthening exercises is ideal.  This supports not only optimal flexibility, but strength, endurance and function.

Simple Exercise to Inhibit the Psoas Muscle

In this post, we will discuss an often overlooked aspect of psoas release techniques—exercises. While hands-on techniques are commonly covered, exercises can play a significant role in inhibiting and relaxing the psoas muscle. We will explore two effective techniques: reciprocal inhibition and post-isometric relaxation. By understanding the opposite muscle group and using specific exercises, you can achieve a psoas release. Let’s get started!

Understanding Reciprocal Inhibition

Reciprocal inhibition is a technique that involves activating one muscle to encourage the relaxation of its opposing muscle. For instance, when we engage the bicep, the tricep naturally relaxes to allow for the bicep’s contraction. Similarly, if we want to relax the psoas muscle, we need to activate its opposite muscle group. In the case of the psoas, the opposite muscle group consists of the glutes and hamstrings.

The Power of Post-Isometric Relaxation

Post-isometric relaxation is a widely used technique in manual therapy. It involves contracting a muscle with slight effort and then relaxing it, which leads to a reduction in resting muscle tension. Although often discussed in the context of hands-on therapy, this technique can also be applied through exercises. Exercising muscles that are tight or overactive, such as the psoas, can help restore normal range of motion.

The Supine Hip Lift: Exercise for Psoas Inhibition

The supine hip lift is an excellent exercise for inhibiting the psoas muscle. It effectively engages the hamstrings and glutes while inhibiting the hip flexors, including the psoas. This exercise not only helps with reciprocal inhibition but also promotes a posterior pelvic tilt and provides relief for the lower back.

Performing the Supine Hip Lift

  1. Lie on your back with your hips and knees at a 90-degree angle.
  2. Place your feet on a box or a soft object at the same height as a chair or workout bench.
  3. Push your heels down into the box, engaging your hamstrings.
  4. As you push down, allow your pelvis to rotate into a posterior pelvic tilt, flattening your lower back.
  5. Avoid arching your back or squeezing your glutes. The focus should be on activating the hamstrings and inhibiting the hip flexors, including the psoas.
  6. You can confirm the posterior pelvic tilt by gently pressing your lower spine against the ground.
  7. Hold the position, feeling the activation in your hamstrings while keeping the hip flexors relaxed.
  8. You can increase the activity on one side by lifting one heel off the box, providing a unilateral variation.

Conclusion

Incorporating exercises into your routine can effectively inhibit and relax the psoas muscle. The supine hip lift is a simple yet powerful exercise that promotes reciprocal inhibition and post-isometric relaxation. By activating the hamstrings and inhibiting the hip flexors, including the psoas, you can improve flexibility and alleviate tension in the lower back. Remember, exercising muscles that are tight or overactive can aid in restoring normal range of motion. Give the supine hip lift a try and experience the benefits for yourself!

Learn more about the Postural Restoration Institute.

SI Joint Myth Busting – Do Dysfunctions Really Occur?

Today we will debunk common myths surrounding sacroiliac joint dysfunction. In this article, we will provide you with evidence-based information to help you understand the truth behind SI joint dysfunction. It is important to dispel misconceptions and rely on scientific evidence when it comes to diagnosing and treating this condition.

Myth: Palpating SI Joint Movement

One common myth is that movement at the SI joint can be palpated. However, the reality is that movement at the SI joint is minimal, ranging from one to two degrees in young individuals to virtually none in the elderly. Even highly trained clinicians struggle to reach a consensus on what constitutes SI joint dysfunction. Studies have shown poor reliability for common tests used to assess SI joint movement.

Anatomical Variations and Assessment

Assessing SI joint motion manually is challenging due to anatomical variations and unreliable tests. Anatomical differences in the angle between the anterior and posterior superior iliac spines can vary significantly, making it difficult to rely solely on pelvic tilt assessment. These variations further emphasize the limitations of manual assessment in diagnosing SI joint dysfunction.

The Role of Manipulation

Manipulation of the SI joint is a common treatment approach for low back pain associated with SI joint dysfunction. However, studies have shown that manipulation does not lead to any significant changes in the position of the sacrum and ilia. The mechanism behind why some individuals experience pain relief after manipulation is not fully understood, but it is essential to consider factors other than joint repositioning.

Comprehensive Approach to Low Back Pain

It is important to adopt a comprehensive approach when assessing and treating low back pain. Instead of solely focusing on the SI joint, healthcare professionals should consider other potential sources of pain, such as muscle imbalances, lumbar spine issues, or hip joint dysfunction. A thorough examination, including a detailed medical history, physical assessment, and possibly diagnostic imaging, can help identify the underlying cause of the pain more accurately.

Conclusion

By debunking the myths surrounding SI joint dysfunction and understanding the limitations of palpation and manual assessment, we can adopt a more evidence-based approach to diagnosis and treatment. It is crucial to consider the broader context of low back pain and explore multiple potential sources of pain. By doing so, we can provide more accurate diagnoses and implement appropriate management strategies for pain sufferers.


Simple Exercise To Inhibit Psoas Muscle – Stop Digging And Do This!

In this post, we’ll explore two powerful techniques for psoas muscle release: reciprocal inhibition and post-isometric relaxation. Additionally, I’ll introduce you to a specific exercise called the Supine Hip Lift, which can be a game-changer in promoting psoas release.

Let’s get started on our journey to unlock hip flexibility!

Understanding Reciprocal Inhibition and Post-Isometric Relaxation

  1. Reciprocal Inhibition: Reciprocal inhibition refers to the concept that activating a muscle on one side of the body leads to the relaxation or release of the opposing muscle. For instance, when we contract our bicep, the tricep relaxes to allow the bicep to shorten. Similarly, to achieve a psoas release, we need to identify and activate the opposite muscle group, which, in this case, is the hip extensors comprising the glutes and hamstrings.
  2. Post-Isometric Relaxation: Post-isometric relaxation is a powerful technique used in manual therapy to reduce muscle tension. By contracting a muscle with some effort and following it with relaxation, the resting muscle tension decreases. While often overlooked in exercise routines, this technique can effectively aid in releasing tight muscles, including the psoas.

The Supine Hip Lift: A Powerful Exercise for Psoas Release

The supine hip lift is an excellent exercise for achieving reciprocal inhibition of the psoas. It also serves as a starting point for beginners due to its low intensity and potential for progression. Let’s learn how to perform this exercise step by step:

  1. Set Up: Lie on your back with your hips and knees bent at a 90-degree angle. Place your feet on a box, chair, or workout bench of similar height.
  2. Activation: Push your heels down into the box, engaging your hamstrings. This activation will initiate a posterior pelvic tilt, flattening the lower back and providing relief for those experiencing discomfort or sensitivity to lumbar spine extension.
  3. Inhibition: As you push your heels down and the pelvis rotates backward, the pressure on the box inhibits the hip flexors, including the psoas. Focus on allowing your hamstrings to lift your pelvis off the ground while keeping your lower back relaxed. Avoid excessive glute activation or arching of the back.
  4. Modification: To increase the activity on one side, lift one heel off the box while maintaining the pressure on the other foot. This modification enables you to target specific areas and address any muscle imbalances or weaknesses.
  5. Duration and Progression: The duration of the exercise will vary based on individual capacity. Some may sustain the position for minutes, while others may need to start with shorter intervals. Begin with what feels comfortable and gradually increase the duration as your strength and endurance improve. Seek guidance from a qualified health professional to determine the optimal duration and progression for your specific needs.

Conclusion

Incorporating psoas release techniques into your fitness routine can be immensely beneficial for restoring normal range of motion and alleviating tightness in the hip flexors. By understanding the concepts of reciprocal inhibition and post-isometric relaxation, you can engage in exercises that effectively relax and strengthen your hip muscles. The supine hip lift, in particular, offers an accessible starting point for beginners while allowing for progression as you build strength.

Remember to consult with a qualified health professional to tailor these techniques to your individual needs!

Plantar Fasciitis – How To Tape Your Own Foot At Home

If you’re suffering from plantar fasciitis and looking for an effective way to support your foot and arch, taping can provide much-needed relief. In this step-by-step guide, we’ll walk you through the process of taping your own foot at home using regular athletic tape. Let’s get started!

Step 1: Gather the necessary supplies

To begin, you’ll need the following supplies:

  • Regular athletic tape (cloth-based tape is recommended)

Step 2: Prepare your foot

Ensure that your foot is clean and dry before applying the tape. This step is crucial for achieving good adherence and longevity.

Step 3: Avoid taping too tightly

Especially when you’re new to taping, it’s essential to avoid applying the tape too tightly. Overtightening can cause discomfort and may require redoing the taping process. Start with a light application and gradually increase the tightness as you become more familiar with the technique.

Step 4: Position your foot correctly

Maintaining the correct foot and ankle position is key to effective taping. Avoid letting your foot fully relax before applying the tape, as this can lead to excessive tightness when you start walking. Keep your foot and ankle at approximately a 90-degree angle throughout the process.

Step 5: Begin taping with anchor strips

Using the athletic tape, start by creating anchor strips on the bottom and top of your foot. These strips will serve as reference points for the taping process. Place one strip along the bottom just below the knuckles of your toes and another strip on the top.

Step 6: Create the foundation

Cut the tape into two sections to avoid getting tangled. Start by wrapping one section from the bottom knuckle on the foot to the backside of the heel. Tear the tape and secure it, ensuring it’s snug but not overly tight. Repeat this process from the top knuckle to the backside of the heel, creating a crisscross pattern.

Step 7: Reinforce the foundation

To provide additional support, reinforce the crisscross pattern by applying another strip of tape on each side. Offset these strips slightly to maximize support and prevent the tape from coming off easily.

Step 8: Apply cross strips

To enhance stability and support, add shorter strips of tape that go across the bottom of your foot. Start from one anchor point and attach the tape to the opposite anchor point. Repeat this process, overlapping the strips as you work your way up the foot.

Step 9: Secure the tape

Ensure that all the tape is firmly pressed down, eliminating any air bubbles or loose edges. This step is crucial for the tape to last longer and provide continuous support.

Step 10: Add support on the sides and top

To prevent the tape from lifting or peeling, add additional support on the sides and top of your foot. Apply strips of tape along the sides, directly over the previous tape strips. For the top, run a strip of tape over the taping pattern, pressing it down firmly.

Step 11: Check for proper support

After completing the taping process, stand and put weight on your taped foot. You should feel the tape preventing excessive pronation and supporting your foot as it bears weight. Adjust the tightness or add extra tape as needed for optimal support.

Step 12: Wear socks and shoes

Once the taping is done, gently put on your sock and shoes. The tape should stay in place and provide ongoing support throughout the day.

Remember, taping your foot for plantar fasciitis is not a substitute for professional medical advice or treatment. If you experience severe pain or your condition worsens, consult a healthcare professional.

The Best Piriformis Syndrome Exercise: Step-by-Step Guide

Piriformis syndrome is a painful condition that affects the back side of the hip. If you’re dealing with piriformis syndrome and haven’t found relief from other exercises, this blog post will guide you through an effective and gentle exercise to alleviate pain and restore function. We’ll discuss the side lying hip shift, a step-by-step exercise that can help you improve endurance, tolerance, and strength while reducing discomfort.

What is Piriformis Syndrome?

Piriformis syndrome causes pain in the back side of the hip. While some people may experience minor cases, others find it extremely painful. Traditional exercises like the glute clamshell may be too triggering for this sensitive area, resulting in flare-ups. However, it’s important to find ways to exercise to improve endurance, reduce pain, and restore function.  Finding an addressing piriformis trigger points is important as well.

The Side Lying Hip Shift: A Gentle Alternative

The side lying hip shift is an excellent exercise for individuals dealing with piriformis syndrome. It allows you to work on the hip muscles without lifting the leg, minimizing sensitivity and discomfort. By gradually increasing your tolerance, you can progress to more challenging exercises like the clamshell in the long run.

Step-by-Step Guide to the Side Lying Hip Shift:

  1. Start by lying on your side with your hip and knee positioned at a 90-degree angle.
  2. Place a small ball between your knees to unload the weight of the leg during the exercise.
  3. Anchor your upper body to prevent rotation.
  4. Slide your top knee forward and backward, covering the full range of motion available to the hip.
  5. Control your range of motion and only work within a comfortable range that feels good.
  6. Begin with around 60 seconds of easy sliding, focusing on low-intensity, pain-free movement.
  7. As you feel more comfortable, gradually increase the range of motion in each direction, but always work within your comfort zone.
  8. Listen to your body and prioritize pain relief over range of motion. Desensitize the nerves before pushing for more mobility.
  9. Over time, try making your knee lighter on the ball to engage the external hip rotator muscles more.
  10. Start with a small range of motion and gradually increase it as tolerated.

Remember, it’s essential to progress at your own pace and not rush the exercise. Enjoy pain relief first, and as the nerves calm down, you can work on expanding your range of motion as a secondary goal.

Conclusion

The side lying hip shift is a highly effective and gentle exercise for individuals with piriformis syndrome. It provides a low-intensity, threat-free movement that helps improve endurance, tolerance, and strength while minimizing discomfort. By gradually building up your tolerance and reducing sensitivity, you can eventually progress to more challenging exercises.

Massage For Psoas Muscle – How To Perform Step By Step

When it comes to dealing with the psoas muscle, taking a soft-tissue perspective can be highly beneficial. In this step-by-step guide, we will explore an effective massage technique for the psoas muscle. This technique, inspired by Paul St. John, focuses on gentle manipulation and proper release to reduce tension and facilitate relaxation.

By incorporating this approach, you can effectively target the psoas muscle and promote overall well-being. Let’s delve into the process.

Step 1: Approach the Psoas Muscle from the Soft-Tissue Perspective

To begin, approach the psoas muscle from the lateral side of the abdominal wall. Remember, gentleness is key. By being mindful of the surrounding structures, such as the viscera, you can ensure a safe and effective massage. Start with a swirling motion to gently displace the viscera and clear the way for accessing the psoas muscle.

Step 2: Identifying Areas of Tension and Resistance

As you swirl your way around the side of the abdomen, pay attention to areas of resistance. When you encounter the first barrier of resistance, pause gently and allow it to release. You can facilitate this release by guiding the individual to take a deep breath, hold it momentarily, and then exhale and relax. By maintaining a non-threatening approach, you can trigger a relaxation effect within the nervous system.

Step 3: Continuing the Release Process

Once you achieve the initial release and the tension starts to dissipate, proceed further. Swirl your way down until you encounter the next barrier of resistance. Repeat the process of deep breathing and relaxation to encourage the release of tension in this area. Remember to be cautious and avoid any aggressive techniques that may compromise the surrounding visceral structures.

Step 4: Extending the Soft Tissue Treatment

To ensure a comprehensive soft tissue treatment, it is important to address the inguinal area, which includes ligaments and extends towards the hip. Gradually work your way down from the femur bone towards the attachment of the hip flexors. By following this methodical approach, you can effectively target the psoas muscle and surrounding tissues.

Step 5: Incorporating Facilitation and Inhibition Techniques

While soft tissue manipulation is essential, it is equally important to engage the nervous system and reinforce new movement patterns. Once you have relaxed the psoas muscle, focus on facilitating and activating other muscles. This includes exercises to engage the glutes, hamstrings, and other reciprocal muscles. By doing so, you can maintain the positive effects of the treatment and promote long-lasting results.

Step 6: A Holistic Approach for Optimal Results

To achieve the best outcomes, it’s important to adopt a multi-pronged approach when working with the hip flexors. Combine soft tissue work, stretching, and activation exercises to ensure comprehensive care. This holistic approach helps to strengthen and support the psoas muscle, facilitating improved movement patterns and reduced tension.

Conclusion

By following this step-by-step guide, you can effectively address the psoas muscle through a soft-tissue perspective. Remember to approach the massage with gentleness, focusing on releasing tension and promoting relaxation. Additionally, integrating facilitation and inhibition techniques will help re-educate the nervous system and maintain the positive effects of the treatment. If you require further assistance or have any questions, don’t hesitate to reach out to our team. Happy therapeutic endeavors!