Author: Sam Visnic

Is Walking Good For SI Joint Pain

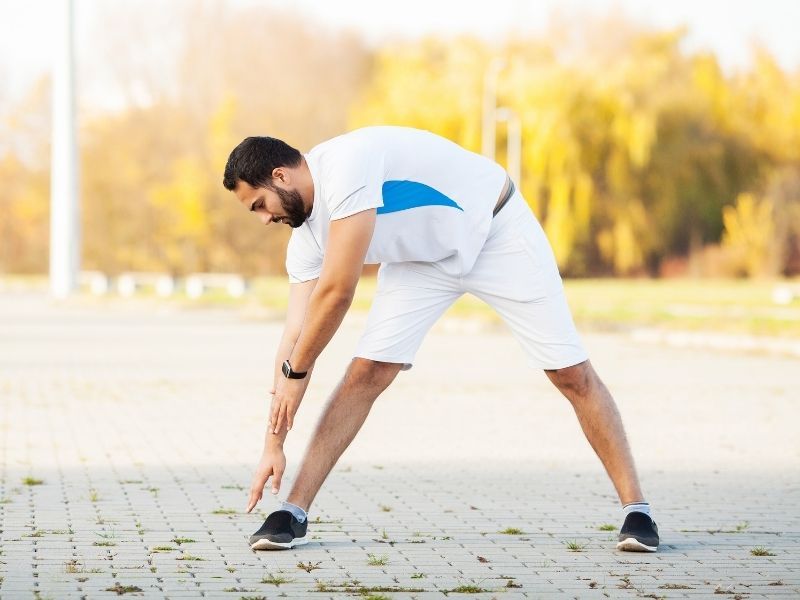
Thinking about walking for SI joint pain relief? While walking is generally considered a safe choice for physical exercise, it may not be right for every sacroiliac joint pain sufferer.

Read on to learn who may benefit, as well as some additional tips to reduce discomfort during walking.

[Be sure to check out my SI Joint Solution Program for a complete step-by-step approach for relief!]

What Is Sacroiliac Joint Pain?

Sacroiliac joint pain (SI joint pain) generally refers to pain felt at the points where the ilium bones meet the sacrum bone. These joints are held together through the varied surfaces of the bones, along with very dense connective tissues and ligaments.

Pain felt in the sacroiliac joint region is often difficult to discern from the lower lumbar spine, and for this reason, its always important to take into account the spine, pelvis, and hips as a whole.

Is Walking Good For SI Joint Pain?

Some individuals have difficulty with single leg activities, and since walking is essentially an alternating single leg movement, some people may not be able to walk much or risk a flare up.

The length of the step stride, speed, or distance are all factors that can modified in order to get a starting point. For example, taking short steps, at a leisurely pace, for only 5-10 minutes may be a good place to begin.

Over time as the tissues adapt and the nerves calm, additional time could be added to work up to build resilience.

An additional tip to keep in mind is that the goal of any activity to reduce sacroiliac joint pain is to reduce sense of threat. A great way to help this process is to take a walk with a family member, close friend, or just listen to something you really enjoy, like a podcast or music you enjoy.

I’ve noted a common experience from personal clients that tolerance to longer walks with less pain has been associated with having a good conversation with someone during their walk!

If lingering pain occurs well after even modified, low intensity walking, or its very difficult to increase the tolerance to more, then other non-impact exercises such as cycling or water aerobics may be a better option in these situations.

Top Benefits Of A Walking Program

A regular walking program can offer pain relief from SI joint dysfunction through a number of different mechanisms. When combined with a proper program to strengthen muscles (with a focus on core muscles), walking can provide a variety of benefits to the whole body.

Stretching + Strengthening Muscles

Walking can help stretch and strengthen de-conditioned muscles in the lower spine, pelvis and hips. These muscles function to transfer forces across the SI joints.

Inactivity reduces endurance and strength of these important stabilizer muscles which can lead to increased joint stress.

Physical therapy exercises and some supplemental upper body work can help create a good balance combined with walking to build strength and improve flexibility.

Reduce Inflammation

Walking can increase blood flow to the sacroiliac joint region, which can help to reduce inflammation and calm sensitive nerves. This can be particularly helpful if your pain is due to joint degeneration.

Reduce Muscle Stiffness

Muscle stiffness is often the result of being in pain and holding tension. Walking, especially when pain-free, can help loosen guarded and tense muscles.

Reduce Mental Stress

Regular exercise is a well-known stress reliever that can assist in improving mental-emotional well-being and reduce anxiety and even depression due to dealing with pain.

Improve Overall Health

In addition to its benefits for SI pain, physical activity has numerous other health benefits. It can improve cardiovascular health, strengthen the immune system, and help to improve overall pain coping skills.

Conclusion

If you are having difficulty walking with increased pain or feeling worse, be sure to consult with your doctor and/or physical therapist for a more precise evaluation and recommendations.

Related Articles

5 Special Tests To Uncover SI Joint Dysfunction

How To Know If Your SI Joints Are Causing Your Pain

Sacroiliac Joint Belts – Do They Work?

How To Sit With SI Joint Pain?

Best Mattresses For SI Joint Pain

Yoga For SI Joint Pain – Here Are The Best Poses

How To Sleep With SI Joint Pain

Yoga for SI Joint Pain – Here Are The Best Poses

Yoga for SI joint pain relief can be very helpful, especially due to the many positive effects that yoga practice offers.  However, no matter what movement system you participate in, everything should be modified to individual needs.

Whenever we approach the topic of SI joint dysfunction and/or pain, we have to include the lumbar spine and the hips.  Due to the extremely minimal amount of movement that is present (if at all), any movements that we focus on should be directed at the positioning of the lumbar spine and hip complex.  The result of these adjustments will affect the sacroiliac joint region.

In this post we’ll explore some of the most useful yoga poses for those dealing with SI joint pain, and also some movements that demand more awareness and caution when performing.

Best 4 Yoga Poses For SI Joint Pain

Cat Cow

The cat-cow pose is a simple movement performed on all fours and emphasizes flexion + extension of the spine.  In the all-fours position, there is less influence from the legs and associated muscles on postural distortion, thus it offers a safe way to both test these movements in an unloaded position, as well as identify any potential discomfort.

Child’s Pose

Child’s pose can help with stretching the spinal extensor muscles, as well as encourage posterior pelvic tilting.  In this position, since inhalation will be somewhat restricted in the abdominal region, a stretch can be felt in the back ribs which is often helpful.

There are multiple potential challenges with this position, however, mainly due to hip, knee and/or ankle restrictions.  This movement can be modified by doing a simple search on Youtube if needed.

If you have sensitivity to spinal flexion, be sure to consult with your physical therapist for how to use this position.

Low Lunge

The low-lunge pose is helpful for stretching the hip flexor muscles (psoas, iliacus, rectus femoris, TFL).  These muscles are often short and tight.  When both sides are short, the pelvis moves into more anterior pelvic tilt.  When one side is tighter it pulls the pelvic bone (ilium) forward and turns the pelvis toward the lengthened side.

Either of these positions, when in excess, can increase lumbar spine extension and therefore be a source of lumbo-sacral region discomfort.  This makes the low-lunge a useful pose.

One thing to note, if there is a discomfort to lumbar extension, the pelvic tilt should be controlled as one moves into the hip flexor stretch position.  Meaning, a posterior pelvic tilt should be maintained.  If not, its easy to hyper extend the lumbar spine through anterior pelvic tilt.

Seated Forward Bend


The seated forward bend focuses on stretching the hamstrings primarily, and if the lumbar spine is flexed forward, the lumbar extensors will be lengthened.

Perhaps the biggest benefit of this pose is learning to control the movement of the pelvis to introduce a hamstring stretch WITHOUT flexing forward at the lumbar spine.

Yoga Poses To Avoid With SI Joint Pain

Generally speaking, any specific movement could be fine OR problematic for any specific person.  This is why it’s hard to come up with a list of yoga poses to avoid.  A better way to frame this is a “list of yoga poses to be cautious with”.

Poses that require deep forward folding

Any pose that requires a very deep forward folding (lumbar spine flexion) could be problematic for those dealing with flexion intolerance.  This means pain/discomfort when rounding the lumbar spine due to potential disc pathology for example.

These positions should be modified to reduce the amount of flexion to a tolerable level or omitted if your therapist advises against it.

Poses that require deep twisting

Generally speaking twisting of the spine is normal and healthy.  However some individuals may have difficulty controlling lower lumbar spine and/or hip movement which may create unwanted stress across the SI joint region.

Another common problem is lack of thoracic spine mobility, thus increasing the demands of rotation from the lower spinal segments, creating discomfort.

Poses that require a super wide stance

Yoga poses that require a really side stance can be problematic due to which pose, and the individual’s specific sensitivities.  For example, a wide stance squat position is often very comfortable, but a very wide stance lunge-type position combined with flexion and/or rotation may be problematic (think Warrior or Triangle).

Caution should be practiced with these positions.

Poses that require single leg standing

One of the common features of SI joint pain is difficulty putting weight on the irritated side.  For obvious reasons, doing single leg balance poses on that side need to be modified or avoided until the discomfort is reduced.

Conclusion

Yoga for SI joint pain can be a very helpful way to reduce discomfort and encourage normal resting muscle tension.  Precautions should be taken and modifications to any movement as needed based on recommendations from a qualified therapist and individual needs.

Related Articles

5 Special Tests To Uncover SI Joint Dysfunction

How To Know If Your SI Joints Are Causing Your Pain

Sacroiliac Joint Belts – Do They Work?

How To Sit With SI Joint Pain?

Best Mattresses For SI Joint Pain

Is Walking Good For SI Joint Pain?

Best Mattresses For SI Joint Pain – How To Choose

Sacroiliac joint pain (SI Joint) is pain that is felt in the lower part of the spine where the sacrum bone connects with the ilium bones.  SI joint pain can be caused by a number of factors, including pregnancy, injury, and other specific medical conditions.

The symptoms associated with SI joint pain can include pain in the lower back, gluteal area, and thighs.  Its also commonly associated with difficulty shifting weight to the painful side when standing or walking.

Dealing with sacroiliac joint pain requires an integrated approach, including physical therapy, massage, and lifestyle interventions.

Optimizing sleep is very important for all types of chronic pain, and sleeping with SI joint pain can be a real challenge for many sufferers.  In this article we’ll discuss the best mattresses for SI joint pain, with additional tips and comments.

How To Sleep With SI Joint Pain

Sleeping with SI joint is really a matter of understanding how the sacroiliac joints and lumbar spine move, and how to position them in the most neutral and comfortable way.

Here is a video to discuss the essentials.

Factors To Consider When Selecting The Best Mattress For SI Joint Pain

Before committing to purchasing a mattress, there are several factors to consider.  Everyone seems to have a slightly different opinion on the matter when it comes to whats best for the spine, but most agree on some common factors.

For instance, here is what famous Youtuber physical therapists Bob and Brad have to say:

Here is a video from Sleepopolis:

Here are the key points for best mattress selection:

Consider Your Sleeping Position

If you’re a side-sleeper, then a medium to firm mattress may be the best for you because it can provide extra support for the hips and shoulders.

If you’re a back-sleeper, a somewhat softer mattress may work better.

If you’re a stomach-sleeper, a firmer mattress could be the best option.  This will help reduce the “sagging” of your lower spine into extension.

Try Out Different Mattresses In An Actual Store

While this may seem obvious, its often tempting to just select a mattress from an online store based on reviews and what you think may be comfortable, but it’s best to actually physically try out a mattress in-person first.  Additional details or preferences may be found in-store that you can’t notice online.

Look At The Materials Used In The Mattress

Mattress materials can influence different aspects of the selection process.  For example some materials have more durability, while others are better for body temperature regulation.  Memory foam mattresses are popular for many people as well, but may not be the best for your needs.

Consider The Sizing Options

Mattress sizing is an important factor, especially if you sleep with a partner.  Even more important if you have kids and/or a pet that ends up finding their way into your bedroom at night.  A bed that is too small doesn’t offer many sleeping position options, and is particularly uncomfortable if you’re dealing with SI joint pain.

Check Out Online Reviews From Multiple Places

Online reviews can only be trusted so far, which is why it’s advisable to check out reviews from different websites.  Read through them to gain insights about the mattress for things you may not have considered.  While it might not be easy to find reviews specifically from sacroiliac joint pain sufferers on a particular mattress, undoubtedly you’ll run across some that discuss the value of certain features the user found helpful.

Conclusion

Buying a new mattress is often a big investment, and a big pain if the one you buy doesn’t work for you and you have to send it back.  The most important thing is to do your research when looking for the best mattresses for SI joint pain.  If you do the work on the front-end, you’ll end up with the best option that suits your needs, and that will leave you with many good nights of comfortable and pain-free sleep!

Related Articles

5 Special Tests To Uncover SI Joint Dysfunction

How To Know If Your SI Joints Are Causing Your Pain

Sacroiliac Joint Belts – Do They Work?

How To Sit With SI Joint Pain?

How To Sleep With SI Joint Pain

Is Walking Good For SI Joint Pain?

Yoga For SI Joint Pain – Here Are The Best Poses

Best Mattress For SI Joint Pain

Is Cycling Good For SI Joint Pain?

Is Cycling Good For SI Joint Pain? – Factors To Consider

Cycling is a great form of exercise that can provide many health benefits.

For individuals dealing with SI joint pain, it can be an excellent option for exercising that doesn’t aggravate pain, and oftentimes can bring pain relief.

In this article, we’ll discuss is cycling good for SI joint pain, and some of the key benefits and tips.

Here are the top 5 benefits of cycling for SI Joint Pain:

  • Its low impact

Unlike activities like running or jogging, cycling doesn’t produce much joint stress, making it a good option for exercise for pain relief.

  • It reduces muscle stiffness

Cycling can improve blood flow and reduce stiffness in the muscles  surrounding the SI joints, thus improving mobility and reducing nerve sensitivity.

  • It strengthens muscles

Regular cycling can improve muscle endurance and strength of key leg and hip muscles that stabilize your core and sacroiliac joints.  This includes the hip flexors, glutes, hamstrings, abdominals and groin muscles.

  • It improves cardiovascular fitness

The effects of aerobic fitness training on pain relief and improved mood are outstanding.  It also helps to boost energy expenditure which can lead to losing excess weight which is positive for joint health as well.

  • It reduces stress

Exercise in general has positive effects on mental health.  Anyone dealing with chronic pain may benefit from the boost in physical activity, especially if dealing with feelings of depression or anxiety.

Additional Tips For Cycling With SI Joint Pain

  • Get your bike fitted properly

A bike that is properly fitted with distribute your weight evenly and reduce strain on the SI joints.  Find a local bike shop that can help you with a professional fitting.

  • Get a comfortable seat

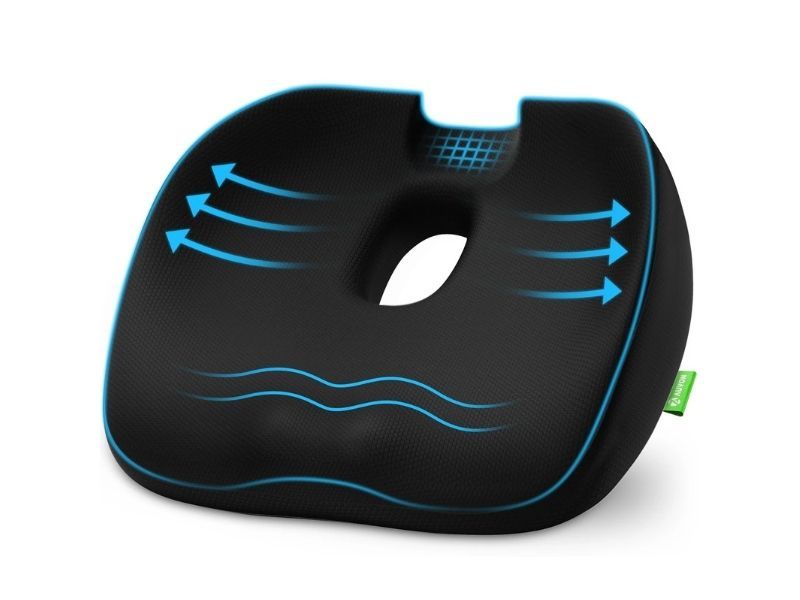
The right seat can help reduce discomfort while riding.  Seat selection is up to the individual, and its recommended to test them out before committing to a purchase.

  • Try different riding positions

Some people feel better riding more upright with hands on the top handlebars, while others like the lower drops when riding.  Experiment to find what gives you the most comfort.

How Frequently Can You Cycle?

There is no one-size-fits-all answer to this one.  A good frequency for one person with si joint pain may be the wrong amount for someone else.

Frequency is going to be based on multiple factors, ranging from degree of pain, medical history, and level of fitness and/or tolerance to the activity.

Regardless, it’s always a good idea to start slowly and gradually build up the frequency and intensity of the activity as you adapt.

Even starting with just a few minutes of cycling at a time may work perfectly well after a period of inactivity.

Conclusion

So when it comes to the question is cycling good for SI joint pain, as always, it depends.  If you’re medically cleared to exercise, then it may be a great option, especially if you consider the items listed above.

Related Posts:

5 Special Tests To Uncover SI Joint Dysfunction

How To Know If Your SI Joints Are Causing Your Pain

Sacroiliac Joint Belts – Do They Work?

How To Sit With SI Joint Pain?

Best Mattresses For SI Joint Pain

Piriformis Strengthening – Do’s And Don’ts For Pain Relief

If you’re suffering from piriformis issues, ranging from simple weakness to pain, then you’re in the right place.

Piriformis strengthening is crucial if you want strong and stable hips. In this article, I’ll cover how to start from very simple to more advanced, and also address how to approach exercising if you’re dealing with a painful piriformis.

Note: If you’re dealing with piriformis issues and need a specific step-by-step protocol, be sure to check out my Piriformis Protocol program.

Piriformis Muscle Location And Movement

The piriformis muscle is one of 6 muscles called the “Deep Six” that are found on the back of the hip. Together these muscles externally rotate the leg.

It attaches at the sacrum bone and inserts into the greater trochanter.

It’s also important to note the sciatic nerve is located just under the piriformis muscle (and in some individuals the nerve travels through it.

How To Strengthen The Piriformis

Since the piriformis primarily is an external rotator of the leg, the main exercises for this muscle involve external rotation. It also functions as a stabilizer for the hip, so it can be trained with single leg balance exercises as well.

While it is not discussed often, the piriformis, due to its location, acts as a medial/internal rotator of the hip when the hip is position at greater than approx 60 degrees of hip flexion.

Since this dual function is fairly confusing, I’ll tackle how to strengthen the internal rotation function in a separate post.

This muscle works with other paired muscles in this movement, so you will not be able to directly isolate it.

Critical Notes If You’re Dealing With Piriformis Syndrome

Stretches and exercises for piriformis syndrome can be a bit of a mine field. The nature of the condition is one of varying levels of nerve sensitivity and tolerance to movement and exercise.

While its common for many people to self-diagnose via “Dr. Google” these days, it is important to have a proper screening and diagnosis before doing any self therapy.

In particular, piriformis syndrome and sciatica, although two completely different conditions, often are used to explain the same symptoms.

Sciatica involves irritation of the sciatic nerve, most commonly originating at the lower spine. When buttocks region pain is due to sciatic nerve compression, it should be treated at the spine level to begin with.

Piriformis strengthening isn’t likely to have much if any positive impact.

Piriformis pain is more complex. The condition called piriformis syndrome is not clearly defined. Like many other issues with the “syndrome” label, its a collection of symptoms, although no specific cause can be identified.

Its common for a muscle to become weakened as a result of pain, due to inhibition, so strengthening exercises are often assigned to “fix the weakness”.

This is a chicken egg scenario. Did the pain cause the weakness, or the weakness cause the pain?

Regardless, it has been my experience in working with many challenging piriformis syndrome cases in my career that many have responded poorly, not at all, or made worse with aggressive piriformis strengthening programs.

Thus I’ve developed a very cautious approach to assigning exercises for this type of situation.

Exercises Virtually Guaranteed To Aggravate Piriformis Syndrome

This may come as a surprise, but I commonly help people improve from piriformis syndrome without doing any direct external rotation isolation exercises.

I find they tend to create flare ups very quickly that sometimes can take days to recover from. This is frustrating and defeating to many people dealing with this problem, especially when they have been told by many well-intentioned therapists to just “work through it”.

I disagree with this approach. I find the following exercises, particularly when initially beginning an exercise program, to be very triggering:

Sidelying Clamshells

Piriformis-Strengthening-Sidelying-Clamshell

Banded Hip Abductions

Supine-Banded-Hip-Extension-Glutes

Tubing Walks

Lateral-Tubing-Walk-Glute-Medius

Machine Hip Abductions

Machine-Hip-Abduction

As you can see, these are the MOST commonly advised exercises for piriformis syndrome!

Now to be clear, I’m not saying these exercises will not help anyone. What I am saying is that they tend to be too aggressive for more challenging cases of piriformis syndrome.

Non-Aggravating Exercises For Piriformis Syndrome

Piriformis syndrome exercises should be done with primarily the intention of allowing for NON-threatening movement. The outcome is pain relief, not muscle strengthening or endurance training.

Its simply to be able to perform movement with excessive stimulation or fatigue that may result in a flare up of more pain.

My go-to movements are ones that are extremely low loading on the muscle, can be performed for approximately 2 minutes at a controlled pace, and generate virtually no direct muscle fatigue.

This allows for nerves to calm down after being exposed to movement that doesn’t provoke threat, and therefore reduces guarding and apprehension. Another way to think about it is to convince the nerves they are OK.

Prone Hip Extensions

Sidelying Hip Shifting

Supine Hip Shifts

Step Ups

Split Squats

Piriformis Strength vs. Endurance – Which Is Better?

As mentioned above, isolating the piriformis muscle is not possible. It works in a group of gluteal muscles that externally rotate the hip.

The larger glute muscles are far stronger and more powerful than the smaller, deeper external hip rotators, so traditional strength training exercises such as squats and lunges should be employed to address them.

The piriformis, like most muscles does need to get stronger, needs a good dosage of endurance training as well. This means moderate to higher repetitions (greater than 15).

This will serve as a nice foundation of low resistance training to encourage blood vessel and capillary development in the muscle to resist fatigue and prepare the tissues for more strenuous training later.

Piriformis Stretching

Is the Muscle Actually Tight OR Just Feels Tight?

This is often a very confusing topic, but it’s important to understand. Muscles and joints have “normal” ranges of motion. These are generally well established in orthopedic and physical therapy textbooks.

Testing for normal range of motion should be done to determine if there is indeed shortness in a particular muscle group. However, in my experience, most often the muscle/s FEEL tight or tense, but there is normal range of motion present in the muscle.

When this occurs, a better word to describe the muscle tension would be “facilitated” or over-active. Stretching can still be an effective means for reducing the tightness symptoms, but it changes our intentions when doing stretches and exercises.

I have found the piriformis muscles often have normal range of motion upon testing. The muscle can certainly “feel” tight especially when dealing with piriformis syndrome due to the pain and likely guarding of the muscle.  Piriformis release techniques can be helpful as well to reduce over-activity in this muscle without stretching.

Getting The Perfect Piriformis Stretch

Stretching the piriformis isn’t too complicated. Since the muscle externally rotates the hip, we can accomplish a stretch by doing the opposite, which is internal hip rotation.

The additional variable to manipulate is how much flexion in the hip is used. There are 2 primary positions that work best for piriformis stretching; supine and seated.

The standard recommendation for stretching is 3 repetitions, holding for 30 seconds on each stretch.

I always advise against aggressive stretching, and the number of repetitions and/or holding times can certainly be reduced if the nerves are very sensitive to stretch. The key is to find a good tolerance point to start, then build up from there over time.

Supine Piriformis Stretch

90-90 Stretch

Lower Back Pain When Stretching? – How To Fix It

We have all experienced the occasional achy back. In fact, most people will experience back pain at some time in their lives. At first the discomfort is short lived and tends to go away on its own.

But over time, these episodes can become more frequent, lasting longer and longer. Friends, fitness specialists and health care professionals may recommend stretching to alleviate your back pain.

After a little research, you add a nice stretch routine. Unfortunately, you find that your lower back is worse after stretching. Well, you are not alone. If your back feels so tight, why does stretching make the back pain worse?

What is pain? (A useful re-frame!)

The experience of pain is our brain’s way of notifying us of an unpleasant and potentially damaging stimulus. Pain is our body’s way of reacting and protecting itself from tissue damage.

There are receptors in our muscles, joints, skin, bones, and tendons, called nociceptors. Nociceptors are sensory receptors that respond to mechanical force, chemical irritation and temperature.

Nociceptors will be stimulated by potentially harmful joint forces, tissue stretching or pinching, and chemical irritation such as inflammation.

When you experience back pain during stretching or soreness after stretching, the nociceptors were sufficiently stimulated to notify the brain about the potential of injury or damage to the body.

So what exactly is stimulating nociceptors in the low back pain with stretching?

First it is important to point out that pain is highly subjective and every body is different.

This is especially true for proper selection of exercises, including stretches. There are many potential causes of pain during stretching – inflammation from injured tissues, tight tissues being stretched further, or compression of joints or tissues to name a few.

Furthermore, your current physical and even mental status will affect your pain. Issues such as repetitive stress injuries, degenerative changes in the discs, joints, and soft tissues, acute injury, and autoimmune disorders can influence your experience of pain as well.

The good news is that stretching can be used to treat many of the underlying triggers of pain, but it is important to choose the right stretches for you. If you experience lower back pain with stretching, it is important to listen to your body.

Stretching needs to be tailored to each individual’s specific needs.

Lower back pain when you stretch or soreness after stretching is your body’s way of telling you that the tissues are being irritated or even damaged. To understand how to stretch without making your back pain worse, it is helpful to understand how your body works.

Specifically, the structure and function of the spine.

The spine is the body’s pillar of support, the foundation for all movement. Our spine holds us upright and provides a stable base for our arms and legs to move from.

For safe and effective movement, the vertebrae should have optimal stability and mobility. Proper positioning and motor control of the vertebrae helps to protect the joints and nerves from injury and maximize the effectiveness of the muscles that attach to them.

The spine is naturally curved, somewhat like an “S”. Correct posture is posture that preserves the shape of these curves – this is known as a “neutral spine” position.

These natural curves serve to distribute forces evenly across the vertebrae and discs, and decrease compression of the discs and the nerves as they exit the spinal cord.

Neutral spine is generally considered the least stressful position for the spine.

The low back is designed for stability. The joints of the lower spine are supported by many strong ligaments and muscles – they are not designed to move very much. The shoulder and hip joints by comparison are large ball and socket joints – joints designed to move a lot.

Without a stable low back, we would not be able to stay upright, and it would be difficult to use our arms and legs very efficiently or effectively.

Lower-Back-Pain-When-Stretching

Low back pain can be caused by persistent stimulation of nociceptors during suboptimal body positioning and mechanics during daily tasks such as sitting, lifting, pushing, carrying, and squatting, etc.

The joints and soft tissues of the spine work in coordination to control movement. Optimal body positioning and mechanics are a function of having sufficient mobility, stability and motor control.

Dysfunctional joint mobility and muscle balance can result in excessive movement at some levels of the spine and not enough movement at others.

Over time, this can lead to degenerative changes in the discs and joints, muscle imbalances, and irritation of the nerves and soft tissues.

The most common reasons for low back pain after stretching

  1. Choosing the wrong stretches

Your tolerance and response to a chosen stretch is specific to you – your current health status and level of fitness.  Not all stretches are appropriate for everyone.

Stretches that involve flexing or extending of the spine can increase low back pain by compressing or pinching the discs, joints, nerves and soft tissues that are already vulnerable or sensitive.  Stretches should not be painful.

  1. Choosing the correct stretch but using poor form

Standing-Spine-Stretch

A good example of this is stretching the hamstrings by bending forward at the waist instead of the hips. Bending forward at the waist flexes the spine and increases the spinal compression.

In this case, the hamstring stretch may be an appropriate stretch, but when done with poor form, the stretching may make the lower back pain worse by compressing the spine at vulnerable points.

  1. Overstretching

Stretching a muscle too far or too hard can stimulate the nociceptors, causing the muscle to tighten to protect itself.  Pushing the muscle to lengthen past the signal of pain can result in irritation or tearing of the tissues.

Stretching should not cause low back pain or even discomfort. The goal is to lengthen the muscle and give the tissue time to relax into its new length. Stretching a muscle that is already within its normal range can lead to instability of the joint.

Avoid stretching into pain or past the muscle’s “normal” range.

  1. Stretching an injured muscle or tendon

If you have an injured muscle or tendon, whether it was a traumatic event or result of overuse, stretching the soft tissue can cause more damage. It is not uncommon for an injured muscle to be pain-free until it is stretched.

  1. Stretching without warming up

Muscles and tendons become more flexible when they are warm. Stretching a cold muscle can lead to irritation or even damage.

  1. Underlying pathology

It is important to rule out undiagnosed underlying pathologies such as fractures, infections, autoimmune disorders, and disease processes. Indications for further medical consultation include:

  • History of trauma – i.e., a fall or impact
  • Family medical history – i.e., autoimmune disorders, osteoporosis
  • Other symptoms – even if seemingly unrelated, i.e.: fever, changes in bowel or bladder, weight loss or gain with no known reason, GI issues, numbness and tingling, new or extreme muscle weakness, unrelenting pain, night sweats.

Can you really loosen tight lower back muscles?

The feeling of tightness in the lower back can be temporarily relieved by using the appropriate stretches. Long term management of lower back pain requires identifying and correcting the cause of the muscle tightness.

There is some confusion about whether a muscle is actually tight or if it just feels tight. This is an important distinction to make. Every muscle has a “normal” range of movement.

Muscles lengths that fall short of the normal range are described as being tight – they are in a shortened position. Muscles can shorten if they are not used through their full range of motion.

For example, if you always wear shoes with heels the calf muscle is held in a shortened position. Over time the muscle will tighten up in that shortened position and prevent full ankle motion.

Muscles can also contract without changing length. For example, tightening up the abs. No movement takes place, but you can feel the increased tension in the muscle tissue.

This is an example of an active muscle but not a short muscle. Muscles that stay contracted, even when you try to relax them, are overactive or “facilitated”.  Muscle overactivity is commonly a result of joint instability, the muscle is trying to stabilize the joint.

Muscle overactivity can interfere with normal joint mobility and even decrease blood flow to the tissues – both can cause pain.

Muscles do not just tighten up without cause. Muscles are naturally in a relaxed state unless they are working. When muscles contract they can produce movement, but they also act to protect the joints from too much movement, compression or impact.

Stretching the lower back, when done correctly, is a great way to get quick and easy pain relief. Loosening the muscles in the low back can reduce the compression on the spine and increase the blood flow to the muscles.

How to Determine If A Muscle Needs To Be Stretched

Overstretching a muscle can lead to joint instability. Each muscle has a normal range of motion. If the muscle is within it’s normal range, it does not need to be stretched unless the range of motion is needed for activities that require it (like certain sports).

Assessment of the muscle’s length involves understanding where the muscle originates and where it attaches. The position for assessing the muscle length, and for stretching the muscle, is just a matter of increasing the distance between where the muscle starts and where it ends.

For example, the hamstring originates on the back of the lower pelvis and attaches to the back of the lower leg just below the knee. To test the hamstring length, lie on the floor. Leave one leg stretched out flat on the floor to prevent the lower back from flexing and the pelvis from tilting posteriorly.

Bring the other thigh up so that it is perpendicular to the floor. Straighten the knee until you feel resistance from the hamstring.  Make sure the thigh and lower back do not move.

If you are able to get the knee completely straight or nearly straight – about 20 degrees short of straight, then your hamstring is within normal limits.

Stretching To Get Relief From Low Back Pain

The majority of lower back pain is due to too much movement in the joints of the lumbar spine. In that respect, it seems counter-intuitive to stretch.

But the body works as whole – when the joints above and below the lower back are not moving enough, the lower back will move more.  The increased movement in the lumbar spine causes the back muscles to contract to limit the movement.

Stretches to relieve low back pain focus on increasing the mobility in the hips, thoracic spine, and shoulders and decompressing the spine.

A great stretch that can relieve lower back pain fast by addressing all of these issues is Down Dog or Inverted V Position. This stretch decompresses the spine, while lengthening the muscles, fascia and other soft tissues that can limit shoulder, hip and thoracic spine mobility.

It also has the added bonus of strengthening the core, arms and legs.

The standard version of this stretch is done on the floor. The stretch can be modified using a chair or wall.

How To Strengthen Lower Back Muscles To Build Resilience

Experiencing low back pain after stretching is a good indication that you need to make some changes. For long term management of low back pain it is necessary to identify why the muscles are tight or overactive.

A successful therapeutic program addresses the cause the dysfunction – which is usually poor posture and body mechanics. Healthy posture and body mechanics requires normal joint and muscle range of motion, and sufficient strength and motor control of the trunk and limbs.

A treatment plan would include:

  • Identifying and correcting limitations in hip, shoulder and thoracic spine mobility.
  • Training the motor control and endurance of the core muscles so they can align and stabilize the spine during static and dynamic posture.

The beginning exercise can seem easy but it is critical to make sure that you are activating the correct muscles.  Once you are familiar with finding your neutral spine position, these beginning exercises are a great way to start:

  • Transverse abdominis activation and/or abdominal bracing
  • Cat – Camel
  • Dead bug – and progressions that add arms and legs
  • Bird-Dog
  • Pallof press
  • Bridges
  • Side Planks

Along with the core exercises, strengthening the legs and arms helps to reduce stress on the spine. Once you have mastered the beginning exercises you can begin to incorporate the core muscle activation into all of your strength training exercises.

You should focus on maintaining a relatively neutral spine while moving through the shoulder and hip joints during common gym movements like squats, lunges, hamstring curls, hip abduction and adduction, deadlifts, upper body presses, rows, and lat pull downs.

Conclusion

If you’re experiencing lower back pain when stretching, be sure to rule out underlying issues which may be at cause, and also spot-check your form to ensure you aren’t making the most common mistakes.

 

TMJ Massage Therapy Techniques For Pain Relief

How Massage Can Help TMJ Pain

Massage therapy can be helpful as a part of a larger TMJ treatment strategy. TMJ pain is often multi-factorial, so proper expectations should be set regarding what massage techniques can realistically accomplish.

Muscles that close the jaw such as the temporalis are commonly associated with tension headaches. Individuals that experience teeth grinding or clenching at night are likely to have increased tension and muscle fatigue that can contribute to pain.

A properly trained massage therapist can assist with these techniques.

How Does The Temporomandibular Joint Work?

TMJ-Massage-Therapy

These highly complex joints consist of the connection between the bones on the side of the head called the temporal bones, and the mandible (jaw bone).

The joints, along with the connecting muscles, allow the jaw to move up and down, side to side, and forward and backward.

When these joints in proper alignment and the muscles are relatively balanced, normal motion is accomplished during activities like yawning, chewing, and swallowing.

When disharmony exists, temporomandibular joint disorders (TMD) can emerge.

Contributing Factors For TMD And Jaw Pain

TMJ disorders are a fairly complex topic, mainly because there are many contributing factors.

For example, experts have discovered various psychological, genetic, and nervous system inputs that can trigger or exacerbate TMJ disorders.

When it comes to structural inputs, the neck should not be overlooked when it comes to temporomandibular joint issues. Due to the close relationship between the position of the head, neck, and jaw, it’s no wonder many individuals present with a wide variety of symptoms such as neck pain, headaches, pressure over or behind the eyes, and more!

TMJ Muscles

There are many muscles that influence the movement and position of the TMJ joints, but the primary ones that tend to produce the best results with released at the following:

Temporalis Muscle

Temporalis-Muscle

The temporalis muscles can be found on the side of the head, from the temporal bones, and insert into the coronoid process on the mandible.

This muscle contributes to closing the jaw, although not as powerful as the masseter. The temporalis is commonly associated headaches since we tend to rub these muscles for quick relief.

Masseter Muscle

Masseter-Muscle

The masseter muscle is arguably the most powerful muscle in the body. These powerful closers of the jaw are often the primary candidate for TMJ massage and treatments, including botox injections.

Pterygoid Muscle

Pterygoid-Lateral

The pterygoid muscles are often underemphasized jaw muscles, usually due to the challenge in directly addressing them.

The lateral pterygoid depresses the jaw and opens it. The medial pterygoid elevates the jaw and laterally shifts it.

Both of these muscles can be massaged both externally and internally to some degree.

TMJ Massage In-Mouth Techniques

While a portion of the muscles can be accessed easily at the side of the face and head, the attachments of the masseter, temporalis, and pterygoids in particular can only be addressed from inside the mouth.

Arguably these are the most important fibers, especially the medial pterygoid. Massaging these muscles is relatively simple, however its important to be mindful of the delicate tissues in the mouth.

In addition, proper sanitation is important. Proper hand-washing and use of a latex or vinyl glove is recommended.

Intra-Oral Masseter and Temporalis Release

The masseter muscle is the first to locate and massage. It can be found by placing the thumb between the clenched teeth and cheek.

This muscle can be massaged with a pinch-style technique using the index finger and thumb. Its important to avoid using excess pressure in this area. Even though the masseter is a dense muscle, there are salivary ducts in this area that you don’t want to irritate or damage.

Intra-Oral Pterygoid Release

The pterygoids (medial and lateral) can be addressed from inside the mouth. While its not always possible to make contact with these tissues on everyone right away, they can be worked into over time.

The key to finding them is placing the index finger next to the upper row of teeth, and sliding straight back and up toward the ear. A slight lateral shift of the jaw toward that side will open up a small pocket to allow the finger further access.

There will be multiple tender spots in this area, and the pterygoid will be the most.

TMJ Trigger Points

Trigger points are a commonly discussed phenomenon when it comes to chronic musculoskeletal pain.

While these tender points are not fully understood, we should be on the lookout for them, especially when they refer sensations to other areas when pressed on. This topic will be covered more in another post regarding specific techniques.

Self Massage Techniques

Self massage is an excellent way to follow up on visits with a professional massage therapist. The techniques shown above can be done on your own, and there are additional TMJ massage tools which can be very helpful, especially if you don’t have the finger strength or endurance.

Stretching and exercises for the jaw muscles can also be very helpful as an adjunct to TMJ massage.

Conclusion

Treating TMJ with massage is a simple conservative approach that can be immensely helpful for those suffering from chronic pain, but should be seen as a piece of the overall strategy for overcoming jaw pain.

*TMJ massage therapy should be performed by a qualified professional that is trained in these techniques.  As always, be safe!

Thorex Back Massage Roller Review

Go here to grab your Thorex: https://amzn.to/3tsBjR1

And in today’s product review, again, we’re taking a look at the Thorax device. And we’ll see what applications we can use this tool for. So first and foremost, it comes in a nice box. Here it’s got a little product card with it. Just taking a look at this here gives you some of the benefits and some of the areas that you can work on. Uh, we’ll talk about that in a few moments here.

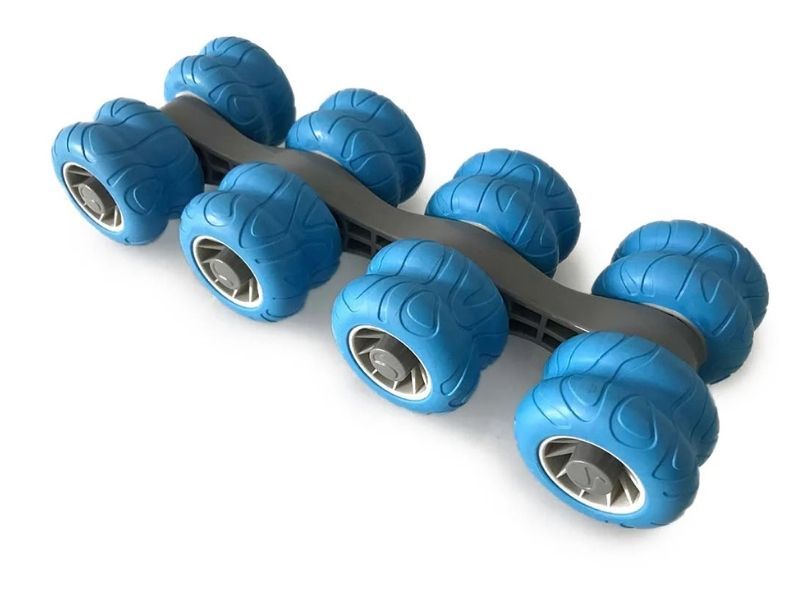
And of course, you have the device. The device is pretty straightforward. It is just a set of wheels on top of this heavy base here, and it has a couple of great features to it actually, which I do want to comment on. First and foremost, this thing is pretty heavy duty. It’s pretty common these days to see a lot of products that are not seemingly made very well or they’re not very sturdy and they’re not going to last very long.

And I would say that that is not the case with the Thorax here. This thing is pretty solidly built. The chances of actually breaking this thing, you can tell right away from the from the density of it, is pretty pretty low. So that’s pretty cool.

So one of the areas that I’ve been looking for, and the reason why I wanted to do this product review, is finding tools that will work really well for assisting and mobilizing not only the spine, the mid to upper portion of the spine in particular, but also something that’s going to be able to address the soft tissues in that area pretty effectively. So I’m going to grab the skeleton here, we’re going to have a look.

All right, so pull out the skeleton here so we can have a look. So we have multiple areas of spine: we’ve got the lumbar spine, thoracic spine, and the cervical spine. Different curvatures, different areas that we need to be able to focus on. They’re oftentimes going to require different tools.

So I have specific tools that I like with the lumbar spine, others with the cervical spine. I’ve reviewed those elsewhere on my channel, so make sure you take a look at those videos. But in particular, let’s talk about this thoracic spine, which is the center section.

Classically, what most people use to mobilize the thoracic spine is a foam roller. And the foam roller is placed essentially perpendicular to the spine, so that you can lay back and extend over it. So that’s obviously good for creating or improving some extension in there. We’re creating a fulcrum that we can basically fold over.

The challenge with this is, the benefit I should say, is it’s a little bit more precise to certain areas depending on the size of the roller and where you’re emphasizing on. The downside to this is that we’re not getting an equal dispersion of forces throughout that portion of the spine.

So it’s hard to actually reduce the intensity in some areas and then gain in others and so forth. It’s harder to kind of manipulate certain areas with a degree of precision. Now, the other thing we have the problem with the foam roller is that the foam roller makes contact with the spinous process for the most part, depending on how thick your extensor muscles are.

So when you lay over it, you’re going to be making contact with the spine. You’re not going to get much effect on the soft tissues that are next to the spine. We’ve got the big thoracic extensor muscles, and then as we start to move up in between the shoulder blades, you have the mid traps, you have the rhomboids, and again, some of those extensors kind of coming off to the side here.

The serratus posterior superior is actually back there too on the side of the ribs. These are all areas that are easy for a massage therapist to get their hands into, but when you’re trying to get leverage on a roller or to try to get those areas worked on with tennis balls and so forth, if they’re not exactly like the right size, it’s very hard to get pressure into those areas.

So the Thorax actually works quite well for this because of its length and the way that it distributes the forces a little bit more, as I just talked about. It’s a little bit easier to be able to get the right amount of pressure in these hard to reach areas.

Now, one of the things that comes up right away is that people say, ‘Well, why don’t I just put, you know, two tennis balls together or lacrosse balls?’ You can absolutely do that, but the primary problem that you have here is that when you place them into certain areas of the back, it’s hard to adjust the pressure.

Most of the time, if you’re using the right size ball, it for the most part, you’re using too much pressure in that area and it’s just too sensitive to be able to even relax. So you’ll find yourself laying over that thing struggling because the pressure is just too much. On the opposite end, you’ve probably tried already using a couple of tennis balls, and just because it’s so easy for you to fold over it, you’re not going to get enough pressure. So it’s the Goldilocks situation: what we want is it to be just right, the right amount of pressure.

So what I found is very quickly when I started rolling on this Thorax, first of all, I rolled on it toward the mid to the lower portion of the spine. Did pretty well and it has, because of the way that this is designed, your spinous process is going to drop inward relative to the wheels. So you’re going to be making contact with those muscles on the side of the spine.

So right away you’re going to get some soft tissue work in particular in that area. You’re going to get some clicks and pops in the thoracic spine as well, so it will help with the spinal extension mobilization portion, but what I’m emphasizing here is the value of doing the soft tissue work on the extensor muscles as you start to roll up even higher there.

Because a lot of your weight is still on the lower rollers, you’re going to get an appropriate amount of pressure there in those upper thoracic lower cervical muscles. So believe me, it’s not super wimpy. You will feel it when you get up there. And in particular, at the top of the shoulder blades there, you’ll oftentimes hit some trigger points that will tend to refer into the shoulder area.

So I think the most surprising part of giving the uh, the Thorax ago was how good it was in working that upper thoracic area in particular. So when you look at a tool, obviously it talks about all of these other different areas that you can work.

You can roll in your calves, you can roll on your thighs and so forth, and those are okay, but the most important, you know, piece of this is again this entire thoracic area. I think the purchase price of this thing, if you have particular needs for that area, which a lot of my clients do in certain circumstances, that alone warrants a good product review and and this is the best tool for the job.

Okay, so in a moment here, I’m going to show you some of those other areas, but all right, so let’s give this guy a go. When I’m laying down on this thing, it’s pretty easy to situate your spinous process, that’s the middle of the spine, in between these these guys, and in the beginning, I always like to start kind of at the top of the lumbar spine.

I don’t really advocate people rolling on the lumbar spine very much without some oversight from a clinician who knows your individual scenario, but the thoracic area is pretty safe.

So as I lay on this thing, just from the get-go, that feels pretty good. I’m already getting some sensitive areas next to the spine, near the upper lumbar spine, lower thoracic area. Very common to have areas in there that are sensitive and or have trigger points at the bottom of the ribs.

So of course I can hang out there. As with anything that you’re laying on with the extension, it’s not comfortable just to hold your head up. Your neck’s going to get tired. Okay, so you can put your hands behind your head here and that’ll allow you to rest down, and of course now we’re not so heavily over the fulcrum here. It’s still pretty comfortable, and I could just hang out here until those tissues start to release.

Once they start to feel a little bit better, I can get a little bit of rolling action here. So I have to just push my heels down into the ground and got some tender areas there. So like I said, if you’re concerned that this thing’s not intense enough for you, then don’t worry about that. Okay, it definitely is. And as I work my way up there, I can work up toward the spine or up to the scapula,

Now I’m starting to get up there, and I’m already hitting a couple of trigger points that are referring into my shoulders in my upper thoracic area, which is just again a hard to reach area, and it’s fantastic. So I can extend back over the roll a little bit more if I want, just to give a little bit of spinal extension mobilization, or I can just stay with the muscles and keep working.

Now I’m quite a bit off the roll, or off the uh, the thorax. I don’t know what to call it. I think I’m going to call it a roller here, but the mid thoracic area is making contact, and now the wheels are pretty much underneath my head. I can rest my head there, and again, this is where you start to get that little teeter-tottering motion where it’s hard to get that pressure.

So if I wanted to now, we’re gonna have to see if I can tolerate this. We’ll lift the hips up a little bit, and woo, now we start to put that pressure into that upper thoracic area again, onto those muscles. So again, I’m not working very hard here, and that’s the part that I like. If you’re working hard, it’s hard to relax, and that’s the point of getting a soft tissue release, is relaxing into it.

And if you’re straining, trying to hold yourself upright, or it’s too intense, then it’s going to be much harder to achieve that effect. Okay, so again, pretty good for that, and come back off of it, and here.

So we start to roll other areas, and we start talking about the glutes, and we start talking about the hamstrings. It’s definitely possible to do that. So I could just sit right on the side here. Now, because of the surface contact area, which is much smaller, it’s harder to get that up into the tissue, into the glutes.

I mean, I definitely feel it here, and I can work my way around. It’s pretty comfortable, probably not the best tool for the job in terms of rolling the glutes, but like I said, you can use almost any tool for multiple applications. If you just want to pick one thing, you can certainly do this. Okay, you can roll on that. If you want to roll on the lateral thigh, certainly doable there as well, and again, the part of it that is nice is that it rolls pretty well because it has so many wheels. Okay, so you can roll and work your IT band area. Of course, you can work on hamstrings.

Okay, still with hamstrings, always the challenge with this is getting enough pressure down into the hamstrings. So not really an ideal tool for a lot of people who are going to need something a little bit more hefty or direct. Okay, calf we can roll that as well. So again, if you want to just use one tool for multiple jobs, then that will get the job done. Okay, but my final verdict here: Thorax, is it worth it just for the spinal extensor rolling in particular, the muscles more than the joint mobilization itself?

This thing gets an A plus. It’s really, really good. I’ve had a lot of clients try it who are happy with it and who want one. So to me, that’s the litmus test. After I’ve done a lot of manual therapy on them, and then I let them try out the tool, do they like this, and would they buy one at home?

And a lot of my clients said yes they would, so to me, that gives it a positive, uh, positive review. So I would highly recommend it if you’re interested in something that’s going to help with that upper thoracic area. You’re going to get a lot of use out of it. All right, I hope that was helpful.

Thanks for watching.


Piriformis Release – Top 8 Techniques To Reduce Painful Trigger Points

The piriformis muscle (included with 5 other muscles) is an external rotator of the hip and a very influential muscle of the pelvis. It connects the sacrum to the femur bone (thigh) and is often associated with a variety of lower back, sacroiliac, and hip issues, as well as sciatica pain.

If during an assessment excessive posterior pelvic tilt, sacroiliac joint region pain, sciatica-type symptoms, IT band issues, or flexibility issues of the hip are found, piriformis massage may be indicated.

If during an assessment excessive posterior pelvic tilt, sacroiliac joint region pain, sciatica-type symptoms, IT band issues, or flexibility issues of the hip are found, piriformis massage may be indicated.

How to know if you need to release your piriformis:

Piriformis Muscle vs. Sciatic Nerve

The piriformis muscle plays an instrumental role in stabilization of the pelvis and hips. Due to its ability to assist in decelerating internal rotation of the femur, it should also be assessed in dysfunctional hips, knee pain, and also mechanical issues as far down as the foot.

Piriformis syndrome is a very common diagnosis which often confused with sciatic pain. While some symptoms can overlap, sciatic nerve pain originates from the spine, and is associated with numbness or tingling down the leg.

Piriformis pain tends to stay localized to the buttocks, and is open directly made worse with aggressive stretching or exercises involving the glutes.

Piriformis Muscle Anatomy And Function

Piriformis trigger points are very common and relatively easy to locate. These sensitive points are capable of referring pain down the backside of the leg. Due to this phenomenon, trigger point activity may be mistaken for symptoms of sciatica.

It is important to note, the concept of trigger points and their relationship to pain is a point of high debate. Regardless, it appears helpful to address these sensitive areas with trigger point piriformis release techniques, at least for temporary relief.

Specifically, piriformis trigger point release can be attained by using simple neuromuscular techniques such as positional release technique, ischemic compression, or muscle energy techniques

Piriformis-Trigger-Points

Top Tips For Dealing With Piriformis Pain

  • Avoid crossing your legs and generally sitting with your knees too close together
  • Avoid excessive aggressive stretching of the piriformis
  • Intense strength training exercises that fatigue the already painful and sensitive tissues
  • Emphasize placing the affected side leg into external rotation to allow the muscle to passively shorten and relax (see below)
  • Use a cane or walking sticks temporarily to assist if painful to walk
  • Use passive therapies such as heat or ice, pain relief creams, or TENS to calm down nerves and promote circulation
  • Strengthen the other gluteal muscles and reduce over-activity of antagonist muscles

#1 Piriformis Relief Position

When piriformis pain is just too aggravated and sensitive to stretch or exercise, sometimes the best thing to do is simply get into a position of relief.

One of the best ways to do this is by laying face down and placing the affected leg out to the side.  This position allows the piriformis muscle to shorten, which can help relieve tension and allow it to calm down.

A small pillow can be placed under the hip to reduce lower back discomfort and allow a better position of rest.  Usually 3-5 minutes is sufficient to allow a reduction in excess muscle tone, but it can be done for much longer if desired.


Left vs Right Side Piriformis Pain

Though you can experience piriformis tightness and pain on either side of the body, the process of getting relief may require a slightly different approach depending on the affected leg.

Asymmetry is normal and natural in the human body, and we tend to be more right-side dominant when it comes to weight bearing. On a weight bearing side, the hip is positioned into internal hip rotation.

The opposite hip is in a relatively externally rotated position.

When you consider the hips in these different positions, its easy to imagine the piriformis is in a slightly different length on each side. Thus stretching or strengthening may be a better option depending on the symptomatic side.

#2 Piriformis Muscle Massage Therapy

The piriformis muscle lies under the larger, more superficial glute muscles, so it can be challenging to directly reach with deep tissue massage work until those layers are relaxed.

This muscle is responsive to more gentle approaches, and does not need overly aggressive pressure to get results.  Piriformis muscle massage is effective even with simple glides with thumbs or the elbow.

The fibers of this muscle connect to the anterior (front) surface of the sacrum bone, so they can challenging to fully address, which is why a combination of deep tissue massage for the piriformis and stretching work is often indicated for best results.

Piriformis Syndrome Massage Notes + Caution

Massage is often indicated for piriformis syndrome, and it can indeed be helpful, but I highly recommend it is done with low pressure.

Since the muscle is already aggravated, excessive intensity when treating this muscle can further increase sensitivity, pain, and guarding.

Piriformis syndrome massage requires a gentle, graded exposure approach in order to achieve the goal of restoring normal health and function to the area.

Since the intensity is generally low, it may be necessary to follow up with exercises and stretches to the get the piriformis muscle release to “stick” after the therapy session.

#3 Stretches For Piriformis – Version 1

The piriformis is an external rotator of the hip, but because of its location and hip mechanics, there are 2 different approaches to stretching the piriformis.  In this first version, the emphasis is on adduction and hip flexion, which allows for release of the more superficial muscles and some of the external hip rotators.

#4 Stretches For Piriformis – Version 2

This second stretch version can directly hit the piriformis and is generally performed AFTER the first variation.  A combination of varying hip positions with external rotation will get most of the deep hip muscles stretched.

#5 Piriformis Release – Post Isometric Relaxation

Post-isometric relaxation works very well for the hip muscles.  Be sure to contract at a low intensity for 8-10 seconds prior to relaxing fully into the new stretch position for another 8-10 seconds.

#6 Piriformis Release – Reciprocal Inhibition

Reciprocal inhibition technique is a very powerful release technique for the piriformis and other external hip rotators because the groin (especially on the left!) is often inhibited and needs to be strengthened.

#7 Piriformis Self Massage with Foam Roll

You can also perform self myofascial release by foam rolling the piriformis, using a lacrosse ball, or a softball.

Any of these tools can be effective, and one may be preferred over the other depending on how sensitive the area is. The foam roller provides a soft surface, and the wider contact area makes it the most tolerable tool to start with.

Using a softball or lacrosse ball for piriformis release massage can be quite uncomfortable due to the more weight you will putting into the area per square inch. This will result in an inability to relax fully against the pressure, trigger guarding, and reduce the effectiveness of the therapy.

This is especially important to consider when self release techniques are included with piriformis syndrome treatment. Gentle, progressive techniques may be preferred in order to avoid aggravating the condition.

#8 Self Piriformis Stretch – The 90-90

The 90-90 stretch is an excellent self piriformis release and variation of the more advanced stretch listed above.