Author: Sam Visnic

Upper Trap Stretches | Top 6 Ways To Loosen Tight Trapezius Muscles

Incorporating trapezius stretches into your daily routine can work wonders for your overall well-being.

These stretches target and loosen the trapezius muscle, an essential muscle responsible for stabilizing your arm, rotating your shoulder blade, and extending your neck.

By releasing the tension and stress built up in the trapezius muscle, it opens up room for improvement in your posture, reduced pain and discomfort, and enhanced mobility.

Trapezius stretches are especially beneficial for those who spend long hours in a sedentary position, as they help to counteract the negative effects of sitting for extended periods.

But where do you start with trapezius stretches?

In this article, we’ll delve into the anatomy and function of your trapezius muscle, explore the leading causes of tightness and pain, and provide you with expert-recommended stretching techniques to incorporate into your routine.

Ready to learn? Let’s get started!

Trapezius Muscles Anatomy And Function

Upper Trap Stretches | Top 6 Ways To Loosen Tight Trapezius Muscles

Understanding the anatomy and function of your trapezius muscles is key to properly caring for and stretching these muscles. Let’s take a look at what they entail.

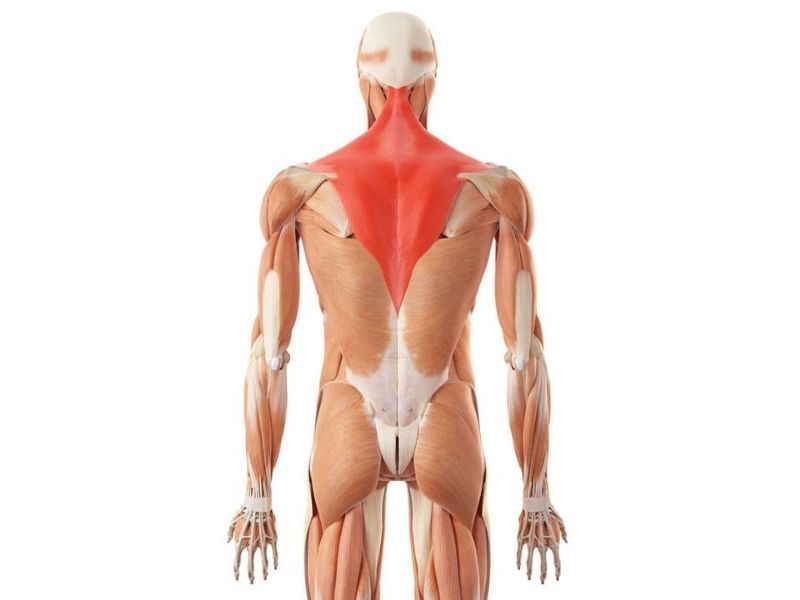
Trapezius muscles are large, triangular-shaped muscles located in the upper back, extending from the base of the skull down to the mid-back and laterally to the shoulders.

These muscles are essential for proper shoulder and neck movements, as well as maintaining posture and overall upper-body strength.

The trapezius muscles can be divided into three distinct sections, each with its own set of functions:

  • The upper trapezius is responsible for elevating the shoulders and rotating the shoulder blade outward.
  • The middle trapezius helps to retract or pull the shoulder blades together and provide stability to the shoulder joint.
  • The lower trapezius assists in the depression of the shoulder blade and extension of the neck.
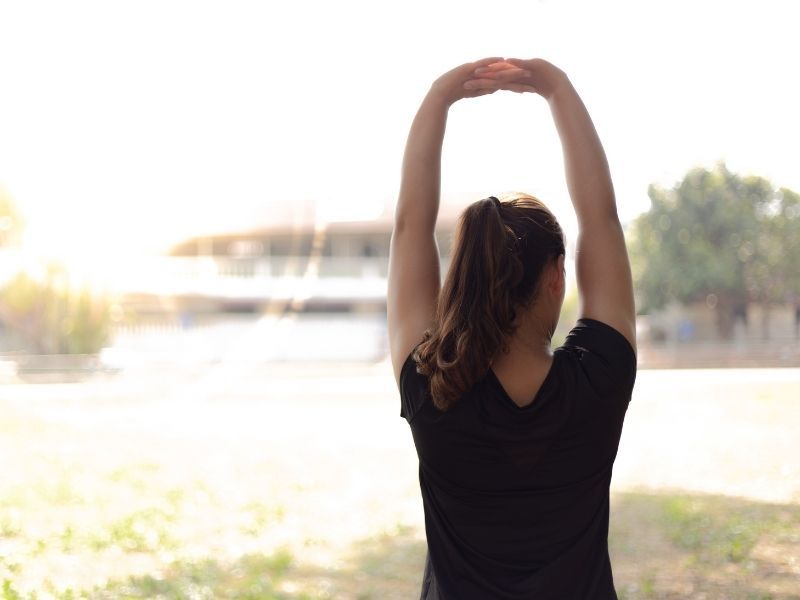
  • Raise our arms above our heads when stretching
  • Throw overarm

When the trapezius muscles are functioning properly, they help to maintain a healthy and strong upper body, but when they become tight or strained, they can lead to pain and discomfort in the shoulders, neck, and upper back.

But what exactly causes the tightness in the upper trapezius? Let’s have a look in the next section.

Causes Of Upper Trapezius Tightness

The trapezius muscles are very responsive to fatigue of underlying muscles, in particular the scalenes and the levator scapula. These underlying muscles are often in disadvantaged positions due to rounded shoulders and an excessively forward-positioned head.

The upper trapezius muscles, in addition to being compensators for this position, can be de-conditioned and weak as well. Don’t fall into the trap of only stretching and massaging these muscles. Building up strength and endurance is part of a proper strategy for restoring optimal muscle function.

Let’s take a look at specific causes of upper trapezius tightness.

  • Poor posture: Sitting or standing with poor posture can cause tension and tightness in the trapezius muscle as well as pain in levator scapulae. This is often seen in people who work at a desk or computer for long periods of time.
  • Repetitive motion: Repeating the same motion, such as lifting heavy objects or using a computer mouse, can cause overuse and strain on the trapezius muscle.
  • Stress: Emotional stress can cause tension in the trapezius muscle, leading to pain and discomfort.
  • Injury: Trauma to the neck or shoulders, such as whiplash or a fall, can cause tightness and pain in the trapezius muscle.
  • Sleeping position: Sleeping in an uncomfortable position or on a pillow that is too high or too low can cause tension and tightness in the trapezius muscle.
  • Lack of exercise: A sedentary lifestyle and lack of exercise can lead to weak muscles, including the trapezius, which can cause pain and tightness.
  • Medical conditions: Certain medical conditions, such as fibromyalgia and myofascial pain syndrome, can cause chronic pain and tightness in the trapezius muscle.

Upper Trap Stretches

Stretching the upper trapezius is fairly straightforward when you know the function of the muscle. There are some additional ways to encourage the traps to relax, such as using a massage percussion gun, or tools such as a Theracane.

Let’s look at the fundamental upper trapezius stretches recommended for you.

#1. Shoulder Rolls

Shoulder rolls should be done at the beginning of every upper trap stretch. You need to undertake them before exercises so that they warm up and loose the muscles before you start full-on stretches.

  • Sit or stand in a comfortable position with good posture
  • Roll both shoulders back and down and then forwards and up in a circular motion
  • Start with small circles and gradually make the circles larger
  • Spend 30-60 seconds doing this and then repeat in the opposite direction

#2. Chin Tucks

Chin tucks are done to realign the neck and ease the tension off the upper traps, combat a forward poking chin posture, and loosen joints in the lower neck and upper back. They’re better done in front of a mirror or with expert guidance to ensure you do them correctly. Additionally, you also need to ensure that you’re relaxed and take breaks from time to time.

To be effective, here is what you need to do:

  • Sit or stand upright in good posture
  • Slowly draw your chin in towards your neck without tilting your head
  • To ensure the correct technique, imagine your chin is sitting on a shelf and you are sliding your chin in along the shelf – it should feel like you are giving yourself a double chin
  • Hold for 3 seconds and relax. Repeat 10-15 times

#3. Upper Trap Side Bends

Doing side bends will help you loosen tight trapezius muscles. When doing the stretch, ensure you tilt your head gently because it can cause general discomfort.

Here is the correct procedure.

  • Sit upright in a chair ensuring good posture
  • Place one of your arms behind your back and keep it there throughout the exercise.
  • Tilt your head to one side, taking your ear down towards your shoulder
  • Keep your eyes and nose pointed forwards through
  • Hold for 3 seconds and return to starting position
  • Repeat to the other side, aiming for 10-15 reps each way

#4. Upper Trap Head Tilts

After side bends, immediately follow them with head tilts. They should be done slowly but steadily to ensure your trapezius muscles cope well.

Here is the recommended procedure:

  • Sit upright in a chair, ensure good posture, and hold the bottom of the chair with one hand
  • Place your free hand over the side of your head (towards the back) and gently pull your head further over for a stronger stretch
  • Once your head is tilted over to the side, turn your head to look down towards your hip – you should feel the traps stretch further back
  • Tilt your head to the opposite side, taking your ear towards your shoulder
  • Anchoring your shoulder down by holding the bottom of the chair helps increase the trapezius stretches.

#5. Middle Trapezius Stretch

This stretch allows you to stretch both sides of the trapezius muscles at the same time.

Procedure

  • Sit or stand ensuring good posture
  • Place your hands and forearms together. Interlace your fingers and draw your hands forward until you feel a stretch across your upper back.
  • Draw your shoulders and shoulder blades forward until you feel a stretch along your upper back
  • Increase the stretch further by bringing your chin down towards your chest
  • Hold for 15-30 seconds and repeat 3-5 times.

#6. Sideways Child’s Pose

This pose allows you to stretch your trapezius muscles and upper back at the same time.

Procedure

  • Kneel on all fours, hands under shoulders, knees under feet
  • Slowly sit your buttocks back onto your feet, letting your chest come down to the floor
  • Holding the position, gradually slide/walk your hands out to the side to stretch out your tight trapezius muscle
  • Hold for 30 seconds, then take your hands over to the other side and repeat
  • Return to starting position and then repeat 2-3 times each way

Remember to breathe deeply and relax into each stretch. Hold each stretch for 10-15 seconds and repeat as needed throughout the day. With consistent stretching, you can help to reduce tension and pain in your trapezius muscles.

Massage For Upper Trapezius Pain Relief

The traps are often a strong focus area for massage therapy, and these muscles are very easy to access. Self massage is another option and is easy to perform.

Massage Ball Stretches

Massage ball stretches help you trigger trapezius points or knots by using a tennis ball placed over your back.

Procedure.

  • Stand with your back towards the wall and place the ball behind your back over the trapezius knot/tight area
  • Lean back into the ball to apply gentle pressure to stretch the trapezius
  • For a knotted trapezius muscle hold the pressure for 30-60 seconds, for a chronically tight trapezius roll the ball in small movements (up/down, side/side or circles) for 1-2 minutes

Loosen up those tense upper trapezius muscles with these four easy stretches:

  • The first stretch involves lying on your stomach and using a ball to gently massage around the base of your skull and the side of your neck.
  • The second stretch is done by placing a ball underneath your upper traps and pushing gently into the knot, or rolling the ball around for a general stretch.
  • For a super tight trapezius muscle, the third stretch can be done by lying on the floor in an open doorway and placing the ball between the wall and the muscle.
  • Lastly, stand by an open doorway for the fourth stretch, bend at the waist, place a ball on the top part of your trapezius, and lean into the ball to stretch out those upper trapezius muscles.

FAQ:

How long does it take for trapezius pain to go away?

The duration it takes for trapezius pain to go away depends on several factors, including the cause of the pain, the severity of the injury, and the type of treatment received. For minor muscle strains or overuse injuries, trapezius pain may resolve in a few days with rest and self-care measures such as stretching and icing. However, for more severe injuries or conditions such as herniated discs or nerve impingements, pain relief may take several weeks to months. It is crucial to seek medical attention for persistent or worsening trapezius pain to determine the underlying cause and receive appropriate treatment.

Can you massage trap pain out?

Yes, massage can be an effective way to alleviate trapezius pain. Massaging the affected area can help to increase blood flow and promote healing by reducing tension and relaxing the muscles. However, it’s important to note that massage may not work for everyone, and the effectiveness of massage for trapezius pain relief can depend on the underlying cause of the pain. For best results, it’s recommended to consult a healthcare professional or a licensed massage therapist who can provide personalized guidance and treatment.

What is the best sleeping position for trapezius pain?

The best sleeping position for trapezius pain is on your back with a small pillow or rolled-up towel under your neck to support the natural curve of your spine. This position helps to prevent your head and neck from twisting, which can exacerbate trapezius pain. If sleeping on your back is uncomfortable, you can try sleeping on your side with a pillow between your knees to help align your spine and relieve pressure on your shoulders. It’s important to avoid sleeping on your stomach if your traps are flared up as this can strain your neck and shoulders, leading to further trapezius pain.

What are trigger points in the trapezius?

Trigger points in the trapezius muscle are knots or tight areas that form in the muscle fibers, causing pain and discomfort. These points can be sensitive to touch and can cause referred pain in other areas of the body. Trigger points in the trapezius can develop due to poor posture, repetitive strain, overuse of the muscle, stress, or injury. Common symptoms of trigger points in the trapezius muscle include headaches, neck pain, shoulder pain, and limited range of motion. Trigger point therapy, which involves applying pressure to the affected area, can help alleviate pain and discomfort caused by trigger points in the trapezius muscle.

How do you loosen your upper traps?

  • Stretching: Perform gentle stretches that target the trapezius muscle, such as the ear-to-shoulder stretch or the chin-to-chest stretch.
  • Self-massage: Use a foam roller or a massage ball to apply pressure to the upper traps and release tension.
  • Heat therapy: Apply a heat pad or take a warm shower to relax the muscles and increase blood flow to the upper traps.
  • Posture correction: Practice good posture by keeping your shoulders back and down and avoiding slouching.
  • Ergonomic adjustments: Adjust your workspace or daily activities to minimize strain on the upper traps. For example, use a headset during phone calls to avoid cradling the phone between your ear and shoulder.

What causes tight upper traps?

There are several factors that can contribute to tightness in the upper trapezius muscles, including:

  • Poor posture: Maintaining poor posture for prolonged periods can cause the upper trapezius muscles to overwork and become tense and tight.
  • Stress and tension: Emotional and mental stress can lead to muscle tension, including in the upper trapezius muscles.
  • Repetitive strain: Activities that require repetitive motion of the arms, neck, or shoulders can cause strain on the upper trapezius muscles and lead to tightness.
  • Injury: Trauma or injury to the upper back or neck can cause the upper trapezius muscles to tighten as a protective response.
  • Sleeping position: Sleeping in an awkward position that strains the neck or shoulders can cause the upper trapezius muscles to become tight and painful.
  • Weakness in other muscles: Weakness in the muscles (such as the pec minor) that support the upper back and neck can cause the upper trapezius muscles to overcompensate and become tight.

How do you stretch your right upper trap?

  1. Shoulder Rolls: Roll your shoulders in a circular motion, lifting them up to your ears and then rolling them back and down. Repeat this motion several times, and then reverse the direction of the rolls.
  2. Neck Stretch: Tilt your head to the left, bringing your ear towards your left shoulder. Use your left hand to gently pull your head further to the left to intensify the stretch. Hold for 20-30 seconds and then repeat on the other side.
  3. Ball Roll: Lie on your back and place a massage ball or tennis ball underneath your right upper trapezius muscle. Move your body so that the ball rolls over the muscle, applying pressure to tight or sore spots.
  4. Doorway Stretch: Stand in a doorway with your right arm extended to the side, resting on the doorframe. Lean your body forward, keeping your arm in place, until you feel a stretch in your right upper trapezius muscle. Hold for 20-30 seconds and then repeat on the other side.
  5. Upper Trap Stretch: Sit or stand up straight and gently tilt your head to the right, bringing your ear towards your right shoulder. Use your right hand to gently pull your head further to the right to intensify the stretch. Hold for 20-30 seconds and then repeat on the other side.
Strengthen Weak Hips With These 5 Top Glute Medius Exercises

Are you experiencing hip pain or discomfort during your workouts? Do you want to improve your athletic performance and overall health? Look no further than your gluteus medius muscle!

This small but mighty muscle plays a crucial role in hip stability and movement, and strengthening it can have a big impact on your body’s posture, balance, and strength.

In this article, I will share with you the top 5 gluteus medius exercises to help you strengthen your hips and improve your overall health.

So, whether you’re an athlete looking to improve your performance or simply want to alleviate hip pain, keep reading to learn how to strengthen your gluteus medius muscles and transform your body.

glute-medius-muscle-exercises

Understanding The Anatomy And Function Of The Gluteus Medius

The gluteus medius is a hip muscle located on the outer surface of the pelvis. It originates from the ilium and inserts into the greater trochanter of the femur.

Its primary functions are to abduct the thigh (pull away from the body) and to medially rotate the thigh (internal rotation). It also helps to stabilize the pelvis during single-leg stance.

Why It’s Important To Strengthen Your Gluteus Medius

The gluteus medius is an important stabilizing muscle for the hip joint, which helps support the entire body when standing, walking, running, and performing other activities.

Strengthening the gluteus medius helps to maintain stability and proper alignment of the hip, pelvis, and lower back, reducing the risk of injuries and promoting optimal performance. It may also be beneficial in helping to reduce knee pain.

Additionally, strengthening the gluteus medius can help to improve balance, coordination, and overall body mechanics.

Signs Of Weak Gluteus Medius Muscles

There are multiple potential signs of a weak gluteus medius muscle. Here is a short list.

1. Hip pain or discomfort while walking

2. Difficulty standing on one foot (associated to Trendelenburg gait)

3. Lower back or hip pain while lying on side

4. Anterior pelvic tilt

5. Difficulty rising from a seated position

6. Knee pain while running or walking up stairs

7. Hip shifting during side to side activities

8. Difficulty standing up from a squat position

9. Uneven wear on shoes

10. Limited hip abduction range of motion

Gluteus Medius Strengthening Exercises

Glute medius exercises are combined with the other glute muscles since its virtually impossible to completely isolate this muscle.

Exercises for the gluteus medius can progress from simple to more complex, as you will find in the list below.

  1. Sidelying Hip Abduction

This exercise is often lumped into the “glute medius activation exercises” type of list. This is mostly because the muscle is most often associated with hip abduction. It is the primary muscle, but the gluteus minimus and tensor fascia lata (TFL) are assisters in this movement as well.

The starting position for this movement is sidelying with legs straight in line with your body. As the leg lifts, maintain your pelvis in neutral and slightly reach the toes away from you to further emphasize the glute medius.

This exercise is usually performed for higher repetitions such as 15-20 or more. For increased resistance, ankle weights can be used.


  1. Sidelying Clamshell

The clamshell exercise with strengthen the gluteus medius but also the glute max and deeper external hip rotation muscles such as the piriformis.

This exercise is started in the sidelying position with knees stacked and feet on top of each other. Hip flexion is around 60 degrees and knees are bent to approximately 90 degrees.

While maintaining the knee bent and feet keeping contact, lift the knee up until it reaches just higher than hip level. For an added challenge, shift the top knee forward a bit so that it is in front of the bottom knee. This positions the hip into more abduction, extension, and external rotation.

Most commonly the challenge is increased by using an exercise band. Adding a resistance band may be too much for some, depending on fitness level. In that case, body weight of the top leg will get the job done.

Average recommended repetitions on this exercise can vary, from 10-20. Heavy resistance bands can be used, but at a certain point it can be difficult to maintain your form, so moving to a seated hip abduction machine may be a better option.


  1. Supine Banded Glute Bridge

The glute bridge is a great all-around glute exercise with a focus more on hip extension than abduction and external rotation. However, the glute medius can be forced to work harder in this movement by adding a resistance band around the knees.

The starting position is laying on your back with knees bent and feet flat on the ground, approximately 12 inches from the butt, and feet hip width apart or wider.

Gently flatten the lower back against the ground with a posterior pelvic tilt, press the heels down into the ground, and squeeze your glutes to lift your hips up as high as possible.

As the hips extend up, press your knees out into the resistance band. You will feel a strong activation of the gluteal muscles.

Pausing at the top for a few seconds can make the exercise more effective and establish coordination at the end of the range of motion. Hold for 1-2 seconds or more, then lower back to the starting position.

Since this exercise recruits many of the stronger lower body muscles, it usually requires added resistance across the waist, or to be performed in a single leg version.

Higher reps are often recommended in the beginning before building up resistance, so 15-20 repetitions is a good place to start.


  1. Lateral Band Walks

This exercise is a fun and useful upright exercise to strengthen weak gluteus medius muscles in the frontal plane of movement.

This exercise is performed in the standing position by placing a resistance band around the ankles or knees. It can be performed with legs straight or knees bent.

While maintaining good upright posture, take a step out to one side with one leg. Then, while maintaining tension on the band, follow with the opposite leg.

You can continue stepping in one direction for a desired number of repetitions OR time, then return back to the starting position using the opposite leg as the “lead” leg.

Using a timer is often the easiest method for this exercise. I often recommend performing the exercise continuously for 60-90 seconds.


  1. Barbell Hip Thrust

The barbell hip thrust is a staple for training the gluteus maximus (glute max), but it is probably one of THE best exercises to address weak glutes or hip instability.

To perform this exercise comfortably, you will need a soft foam device under the bar to protect your hip bone and relieve discomfort. At lighter weights the bar may be fine without this, but as the weights get progressively heavier, this can become quite uncomfortable.

Start by laying on your back (OR back against the edge of a weight bench) and placing the barbell just under the hip bones (ASIS bones).

Feet should be placed just wider than hip width apart. You can of course go much wider depending on what is most comfortable for the way your unique hips are built, and also what helps you feel the muscle contraction best.

As you lift your hips, the goal is to get as much hip extension as possible without excessively arching your lumbar spine. This is mostly going to be dependent on your hip flexor flexibility.

Hold for the desired amount of time, then lower back to the starting position. Then repeat.

Repetition ranges and exercise prescriptions for the barbell hip thrust are VAST. It is an exercise that can be done for low repetitions with very heavy weights, or high repetitions with light weights.

I suggest as usual starting with 15-20 repetitions to get the hang of the technique and gain comfort controlling the bar before adding more weight to the bar.


How Often To Train The Gluteus Medius

When it comes to training protocols for the glute med, there are a number of different variations possible.

In my office with personal clients, I almost always start with a program that fits their schedule and desired results. If building glutes is the primary focus, then picking 1-2 exercises per day, and performing them for ONE SET only works very well.

Once the “mind to muscle” connection is built and adequate intensity can be used without next-day muscle soreness, a second set can be added.

Over the weeks, addition exercises can be rotated in for variety and to train different joint angles.

Training the glutes everyday is NOT necessary for results. You can easily build them into a training program that targets them 2-3x per week and make great progress. Exercise routines should always be tailored to the individual.

When You Should Train The Glute Medius

Glute med exercises can really be performed at any point during a workout session, but since they are thought of as smaller, more slow-twitch muscles (endurance based), its common for them to be placed toward the end of the workout.

The obvious exception to this would be when performing the barbell hip thrust. This movement may be the primary focus of the workout, so it can often be performed as the first exercise.

Gluteus Medius Pain and Exercise

As always with pain, underlying pathology especially of the hip joint, should be ruled out before starting any exercise routine.

Quite often, when there are chronic pain issues with the glute medius (including trigger points in the glute medius), strengthening is the recommendation. This should be initiated under the guidance of a knowledgeable professional.

Being too aggressive too soon with gluteus medius exercises can simply lead to pain flare ups and inability to train the muscle frequently enough to make the progress necessary to get past the pain.

Be smart and consult a pro!

Conclusion:

While there are many other gluteus medius exercises, the list above includes the most common and useful movements. Having strong and functional hip muscles is key to long term health and prevention.

Unlock The Secret To Pain-Free Movement With These Piriformis Muscle Stretches!

Piriformis muscle stretches

Do you ever feel stiff in your hips, or experience pain when moving? Have you been searching for a way to unlock the secret to pain-free movement and reclaim your freedom? Look no further than these simple piriformis muscle stretches!

The piriformis is a small but powerful muscle located deep in the glutes. When it gets tight, it can cause sciatica-like symptoms (often referred to as “pseudo sciatica”) that limit mobility and create discomfort.

But with just a few minutes of stretching and exercises each day, anyone can start resolving this tension and gain more control over their own health and well-being.

In this article we will explore how to utilize piriformis muscle stretching as part of an overall movement practice.

RMT-Piriformis-Protocol

What Causes A Tight Piriformis Muscle?

What causes a tight piriformis muscle? Our bodies are complex systems of muscles, bones and ligaments that need to be in balance to keep us healthy and move freely.

When our body is out of balance due to overuse, sub-optimal movement strategies or trauma this can lead to tightness in the piriformis muscle. This muscle runs from the sacrum down through the hip area and attaches on the outside of the thigh bone.

It helps rotate your leg outward so when it is tight it can cause pain in the buttocks region as well as limit mobility around your hips.

The best way to treat a tight piriformis muscle is with coordination exercises, stretching, foam rolling and strengthening movements. One key thing to note, if there is underlying sciatic nerve irritation, especially originating from the lower back, this may need to be addressed separately.

Symptoms Of A Tight Piriformis

If you’re looking for pain-free movement, it’s important to understand the symptoms of a tight piriformis muscle.

One potential sign of an overactive piriformis is difficulty lying on your back with both legs straight due to an uncomfortable sensation or outright pain in one hip area. Another symptom can present itself as having a hard time bending over and touching your toes without feeling like something is pulling at your sacroiliac joint or upper hip region.

In addition, if you experience sciatic nerve type sensations running through either leg after sitting too long or during physical activity such as walking, then there is likely some degree of tension stored up within your piriformis muscles.

By recognizing signs earlier rather than later and making appropriate changes accordingly will allow more opportunity for natural healing processes to occur before any underlying conditions have had chance to manifest themselves into larger problems that may require outside assistance in order to alleviate them completely.

With regular stretching routine along with incorporating proper rest periods from sitting throughout our day we can effectively manage any existing tension levels found within our bodies helping us stay strong and resilient for years to come.

Should You Stretch A Sore Piriformis?

When it comes to piriformis issues, stretching can be an effective way of relieving tightness and reducing pain. However, if your piriformis is super sore, you may wonder whether it’s safe for you to stretch. The answer depends on the cause of your discomfort.

If you have a mild case of muscle spasms or strain in the area, a gentle stretch may help alleviate tension and reduce pain.

In cases where there is severe inflammation or nerve irritation, such as in piriformis syndrome, a more specialized approach might be needed.

If your pain persists after trying some self-care measures such as rest and stretching, it’s best to seek professional advice from a physical therapist before attempting further activity that could exacerbate your symptoms.

Remember, when dealing issues like piriformis syndrome, proper assessment for underlying causes (such as lumbar pathology) and personalized care are essential for successful recovery.

How Long Does It Take For Piriformis Pain To Go Away?

Believe it or not, the answer to relieving simple piriformis pain in most cases is simple: stretching and gentle exercises!

Most of the time all you need are a few stretches for your piriformis muscle and some patience. With consistent practice, you will be able to unlock the secret to pain-free movement in no time.

Stretching this small but powerful muscle helps ease tension on the sciatic nerve through which pain signals travel down your leg when the piriformis is irritated.

Tricks For How To Calm An Inflamed Piriformis

When it comes to calming an inflamed piriformis, the first thing we need to do is assess the situation. Is it tight? Or does it feel like something more serious, such as a strain or spasm? Knowing this will help us find out what kind of stretches and exercises are best for you.

Stretching can be an invaluable tool when looking to calm an inflamed piriformis but sometimes other treatments may be necessary depending on each individual’s circumstances.

Piriformis Syndrome Exercises To Avoid

The piriformis muscle is a small, but powerful muscle in the buttock that connects to your thighbones. It can cause pain and restriction of movement when it becomes tight or irritated. To unlock the secret to pain-free movement, there are certain exercises you should avoid if you have piriformis syndrome.

Sidelying Clamshells

Clamshells are often assigned early into the process in working with an agitated piriformis, but I personally find this to be a mistake.  They are often too much of a “direct hit” on the muscle, and since its hard to perform them with a low-enough intensity, its best to hold off on them until the muscle is less irritated and reduced pain is accomplished.

Lateral Band Walks

I avoid this exercise for the same main reason as the sidelying clamshell.  Its most often just not well tolerated when the piriformis is aggravated.

By avoiding these exercises for piriformis syndrome, you will be able to find relief from your symptoms and take control of your movement freedom without triggering a flare-up. Pay attention to how your body feels during each exercise and don’t push too hard.

Go slowly and focus on proper form so that you can move without pain. Allow yourself time to rest between sets and always listen to what your body is telling you. With proper technique and guidance, you can keep moving freely without fear of further injury or discomfort.

How To Properly Stretch The Piriformis

First of all, it’s important to make sure you have warmed up before stretching your piriformis muscle. An easy way to warm up is a few minutes of light aerobic exercise like walking. This is often the easiest and fastest way to reduce subconscious tension and guarding.

Supine Cross Leg Glute Stretch

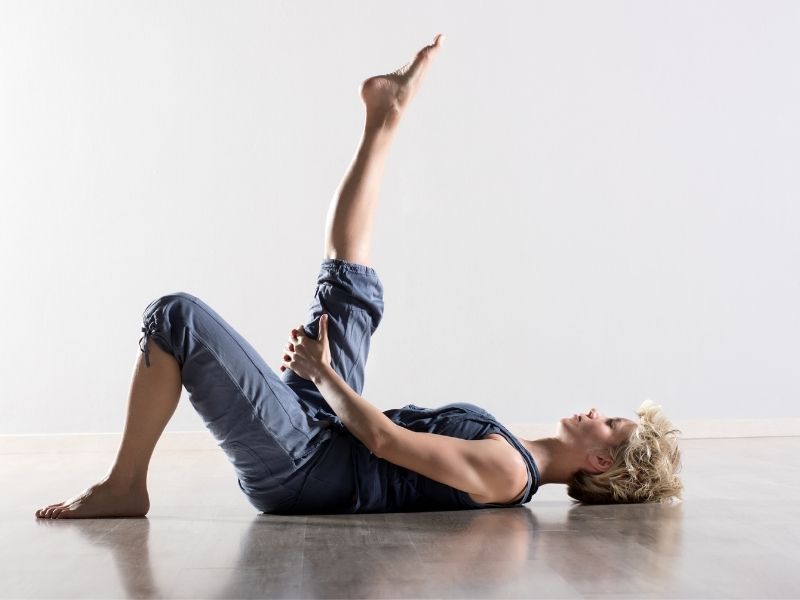
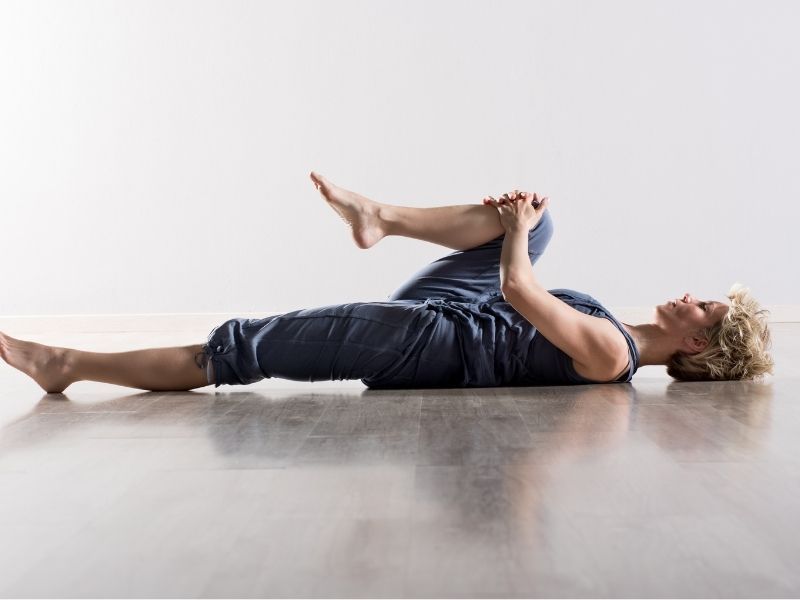
This supine piriformis stretch is often the most comfortable to start with for most people. Start by laying on your back with your legs straight. Bend one leg and place the foot just outside of the opposite knee. Use your opposite hand and gently pull the knee across the body and up slightly toward the hip. You will feel a stretch on the outside of the hip.

Hold for 30 seconds, and repeat 2-3 more times.

90-90 Piriformis Stretch

Sit on the floor with one leg out in front of you at a 90 degree angle from your body. The other leg should be placed to the side with the knee at a 90 degree bend. While maintaining the arch (lordosis) of the lower spine, tip your pelvis forward as though it were a bucket of water.

You should feel a stretch in the gluteal area.

Hold for 30 seconds, and repeat 2-3 more times.

Standing 90-90 Piriformis Stretch

This standing version of the piriformis stretch is virtually identical to the previous one. It is most helpful when its just not possible to get down on the floor, OR if there is not enough mobility in the hips to get into the 90-90 position. In this version, the bent leg is placed on the table. Keep the opposite knee bent to maintain balance, and from the starting position, tip your hips forward until you feel the stretch.

Hold for 30 seconds, and repeat 2-3 more times.

Conclusion

Stretching the piriformis muscle can be an effective way to unlock pain-free movement. While these stretches are not meant as a substitute for professional medical advice, they can provide relief when done correctly and regularly.

Your muscles will thank you for taking the time to do these stretches daily or several times per week. This small investment in yourself is well worth it when it comes to regaining mobility and reducing discomfort from tightness that has built up over time.

The previous stretches for piriformis muscle tension are the most effective, but feel free to experiment if you find others are helpful.

Frequently Asked Questions

What Is The Best Way To Prevent A Tight Piriformis Muscle?

The key to unlocking pain-free movement lies in a well-maintained piriformis muscle. But, how can one prevent the tightness that often leads to discomfort and injury? The answer is through regular stretching, strengthening exercises, and proactive activity.

Strengthening exercises are also essential when it comes to protecting your piriformis from becoming overly tight or strained. Incorporating specific moves like bridges and clamshells into your routine will help build strength without overworking the area. Additionally, making sure you keep active throughout the week with activities such as walking or cycling helps keep everything in balance by encouraging blood flow throughout your body.

By combining these techniques together, you’ll create an effective plan for keeping your piriformis healthy and ready for any adventure life throws at you! With dedication and consistency, you can ensure that even if life takes unexpected turns, your journey towards pain-free movement will remain unhindered.

Are There Any Effective Treatments For Piriformis Syndrome?

When it comes to the discomfort caused by piriformis syndrome, many people are looking for treatments after everything has failed to help. Despite its prevalence and painful symptoms, there is no one-size-fits-all solution. However, with a combination of stretches, exercises, and other lifestyle modifications, you can find relief from this condition.

It’s important to note that if any movement causes significant discomfort then stop immediately and consult a physician. Finally, regular massage therapy may also help reduce tension in the affected area while improving overall mobility. Therapeutic massage techniques such as trigger point release, myofascial release and deep tissue work can provide lasting results when done regularly over time.

By combining these strategies into an effective treatment plan tailored specifically to your individual needs, you can relieve soreness in the piriformis muscle quickly and effectively so that you’re able to move freely without fear of pain or stiffness holding you back. Also be sure to check out these piriformis release techniques.

Are There Any Risks Associated With Stretching The Piriformis?

Stretching the piriformis muscle can be a great way to work towards pain-free movement, but it is important to understand any risks associated with this type of exercise. Whether you choose stretching as an intervention or not, understanding the potential dangers will help ensure your safety and well-being.

When done correctly, stretching can be incredibly beneficial for those dealing with tightness in their hips, glutes, and lower back due to piriformis syndrome. However, incorrect form when performing stretches could lead to further irritation and even cause more mental stress than relief – so caution should always be taken!

It’s also worth noting that if your condition has progressed beyond basic muscular tension, then stretching may not provide much benefit at all. In such cases you should speak with a medical professional about treatment options before continuing on with any sort of physical activity. Ultimately what matters most is listening to your body and taking appropriate measures when engaging in activities like stretching that may have some degree of risk involved.

What Are The Long-Term Effects Of Piriformis Pain?

Piriformis pain can be a debilitating and long-term issue. It’s important to understand the potential effects of this condition so that you can take steps towards recovery or prevention. So, what are the long-term effects of piriformis pain?

The primary concern with any chronic muscle tightness is the risk of further injury due to overuse. If the piriformis remains in an overly contracted state for too long, it could lead to other areas of tension within your body as well as joint instability, resulting in additional pains and discomfort. Additionally, if left untreated, piriformis syndrome may affect your ability to move freely through everyday activities such as walking, sitting down and standing up.

The Ultimate Guide To Back and Shoulder Exercises to Build Muscle Fast

Building muscle in the back and shoulder area is a common goal for many fitness enthusiasts. Strong back and shoulder muscles not only improve posture and athletic performance, but they also contribute to an overall balanced and aesthetically pleasing physique.

However, with so many exercises and workout programs available, it can be overwhelming to know where to start or which exercises to prioritize.

In this ultimate guide, we will provide a comprehensive overview of the most effective back and shoulder exercises to build muscle fast, as well as tips on proper form, programming, and nutrition to maximize your results.

Whether you are a beginner or a seasoned gym-goer, this guide has something for everyone looking to enhance their back and shoulder muscle development.

The Importance Of A Strong And Muscular Back

Having a strong and muscular back is essential for overall health and fitness. Not only does it lead to improved posture, but having stronger shoulder muscles also helps you perform everyday activities with ease. Plus, when your back and shoulders have increased resting muscle tone, you look more impressive in the gym or at the beach!

But getting those chiseled back muscles isn’t as easy as it looks. To achieve serious strength and definition in your upper body you need to focus on specific exercises that target both your shoulder muscles and your back muscles.

An effective workout should include a good variety of movements including, but not limited to things like overhead presses, rows and pull-ups (for starters), all of which will help build both muscle size and power.

The best way to maximize results from these exercises is to begin with lighter weights so you can perfect form before adding heavier ones for increased intensity. Make sure to keep good posture throughout each repetition too – this will ensure maximum benefit from every exercise and reduce the risk of training setbacks.

By incorporating the right protocol into your training program, you can quickly generate progress towards achieving the physique of your dreams.

Back And Shoulder Workout: The Basics

Before diving into the nitty-gritty of exercise selection and program design, we should start with a quick primer on the basics. Here are some basics tips for getting started with your own back and shoulder workout:

1) Invest in good equipment – Having the right tools can make all the difference when it comes to working out. Investing in quality weights and machines will ensure that you get the most out of your training sessions since you’ll be able to push yourself further without having to worry about safety or injury.

2) Focus on form first – Proper technique is essential when doing any kind of exercise; focusing on perfecting each rep before adding weight helps minimize risk of injury while maximizing results. Take time to learn proper form (hire a certified personal trainer if needed) so that you can confidently perform each movement with optimal technique.

3) Mix up your exercises regularly (but not EVERY workout) – Trying different movements not only keeps things interesting but also provides an opportunity for targeted muscle growth as well as overall body sculpting. There are a bazillion ways to vary your workouts, from exercise variety to repetition and set schemes.

TIP: Keep track of your progress by keeping a journal of how many reps/sets you do during each session – this way you know whether or not you need to increase weight/reps or decrease them depending on what goals you have set out for yourself!

Training Volume And Recovery

It’s important to remember that the goal of any workout routine is to create progressive overload. To do this, you’ll need to balance out your training volume with sufficient rest and recovery time over time.

When it comes to back exercises, compound movements such as deadlifts and pull-ups will help target multiple upper back muscles at once while also giving your trapezius a good challenge. These are excellent movements, but also require MORE recovery than when training smaller muscle groups. (2-3 x per week).

Isolation exercises like bicep curls, DB shoulder side lateral raises, and calf raises are less taxing, and therefore can be trained more frequently. (For example every other day).

There are ways to maintain a higher training frequency without slowing down your results. This is why having an effective post-workout routine is key; incorporating active stretches (such as upper trap stretches) after lifting can reduce soreness by loosening tight muscles while foam rolling can provide relief from excess muscle tension and trigger points that are often sensitized by high volume training programs.  Massage therapy can also be an amazing recovery tool to utilize.

Warming Up

Before you can get started on any back and shoulder workout, it’s essential to warm up properly. Warming up helps your body prepare for the upcoming physical activity by increasing muscle temperature which in turn improves flexibility and reduces the risk of injury.

To begin, start with a light jog or brisk walk for 5 minutes followed by some dynamic stretches that target the upper arms and shoulders such as arm circles or overhead reaches. This should be done slowly at first, gradually building intensity until all muscles are warmed up nicely.

Additionally, make sure you’re maintaining correct posture while stretching; its the perfect time to work on body mechanics before you start loading your tissues.

The next step is to move into an active warm-up specifically tailored towards the exercises you’ll be performing during your shoulder workout routine. For example, if you plan on doing pull-ups then knock out a few lat pulldowns to prime the tissues and establish the mind-muscle connection.

By completing these steps prior to lifting weights, you’ll not only reduce soreness after working out but also increase strength gains over time due to increased range of motion in muscles.

Best Back And Shoulders Exercises

Pullup

Pullup - back and shoulder exercises

The Pullup is a bodyweight exercise that works the arms, shoulders, back, and core muscles. It is an effective way to build upper body strength and can be done with or without additional weight.

How-to Instructions:

1. Start by hanging from a pull-up bar with an overhand grip, hands slightly wider than shoulder width apart.

2. Engage your core and keep your legs straight and together.

3. Pull your body up until your chin is over the bar.

4. Slowly lower your body back down to the starting position.

5. Repeat for the desired number of repetitions.

Lat Pulldowns

The lat pulldown is a great exercise for strengthening the back and developing upper body strength. It is an excellent choice for any fitness regimen.

The lat pulldown targets the latissimus dorsi.

How-To Instructions:

1. Position yourself in the lat pulldown machine, with your feet flat on the floor and knees bent at a 90 degree angle.

2. Grasp the bar with an overhand grip, slightly wider than shoulder-width apart.

3. Keeping your chest up and core tight, pull the bar down to your chest while squeezing your shoulder blades together.

4. Slowly return to the starting position.

5. Repeat the exercise for the desired number of repetitions.

Barbell Row

The barbell row is a compound exercise that targets the back, biceps, and core muscles. It is a great exercise for strengthening and building muscle in these areas.

How-To Instructions:

1. Begin by standing with your feet hip-width apart, toes pointing forward. Hold a barbell with an overhand grip, just wider than shoulder-width apart.

2. Hinge forward at the hips, keeping your back flat and chest up. Allow the barbell to hang in front of you, arms extended.

3. Pull the barbell up towards your mid to lower abdomen, leading with your elbows. Keep your core engaged and squeeze your shoulder blades together at the top of the movement.

4. Slowly lower the barbell back down to the starting position.

5. Repeat for desired number of reps.

Dumbbell row

The dumbbell row is an effective strength-training exercise that targets the back muscles, specifically the lats and rhomboids. It is a great exercise for improving posture, strength, and stability.

How-To Instructions:

1. Start by standing with feet hip-width apart, knees slightly bent.

2. Bend at the hips and lower your torso until it is as parallel as possible to the ground.

3. Keeping your back flat, extend your arms with the dumbbells and pull them up towards your mdi to lower abdomen.

5. Squeeze your shoulder blades together and pause for a moment before slowly lowering the dumbbells back to the starting position.

6. Repeat the motion for the desired number of repetitions.

Shrugs

Shrugs are a simple yet effective exercise that targets the trapezius muscles in the neck and shoulders. The shrug exercise can help build strength in the upper body and improve posture.

How-To Instructions:

1. Stand tall with your feet hip-width apart and your arms resting at your sides.

2. Raise your shoulders up towards your ears, making sure to keep your neck straight.

3. Hold the shrug for a few seconds, then slowly lower your shoulders back to the starting position.

4. Repeat for desired number of reps.

Back Extensions

45 degree back extensions are an exercise that involves stretching and strengthening the muscles in your lower back extensors, glutes, and hamstrings. They require the use of a 45 degree angled bench.

How-To Instructions:

1. Start by positioning yourself on a 45 degree back extension machine. Place your feet on the platform and adjust the height so that your hips are slightly lower than the pad.

2. Cross your arms over your chest, or hold a weight plate to your chest for added resistance.

3. Slowly lower your upper body towards the ground, hinging at the hips and keeping your back straight.

4. Pause briefly at the bottom of the movement, and then exhale as you use your lower back and glutes to lift your upper body back up to the starting position.

5. Repeat for the desired number of repetitions.

Overhead press

The overhead press is a compound strength training exercise which primarily targets the shoulder muscles, as well as the triceps and a bit of the chest muscles.

How-To Instructions:

1. Start by standing upright with your feet shoulder-width apart.

2. Take a deep breath and grip the barbell with an overhand grip, your hands slightly wider than shoulder-width apart.

3. Using your legs, lift the barbell up to your upper chest.

4. Brace your core and press the barbell upwards above your head.

5. Keep your arms close to your ears and elbows pointed slightly outward.

6. Lower the barbell back to your upper chest and repeat.

Dumbbell Lateral Raises

Dumbbell lateral raises are a strength exercise that targets the muscles of the shoulders, specifically the lateral deltoids.

How-To Instructions:

1. Stand with feet shoulder-width apart, holding a pair of dumbbells at your sides.

2. Keeping your elbows slightly bent, raise your arms out to the sides until your elbows are parallel with the ground.

3. Pause for a moment at the top then slowly lower the dumbbells back to the starting position.

4. Repeat for desired number of repetitions.

Seated Cable Rows

Seated cable rows are a great exercise to target the muscles of the upper back and arms as well as an excellent shoulder exercise. This exercise is done using a cable machine and involves you sitting on a bench and pulling a weight towards your chest with both arms.

How-to Instructions:

1. Start by sitting on a bench in front of a cable machine with a weight plate attached to the cable.

2. Grab the handle of the cable with both hands, making sure your palms are facing each other.

3. Sit up straight and keep your back straight throughout the exercise.

4. Begin to pull the weight towards your chest by bending your elbows, squeezing your shoulder blades together.

5. Hold the contraction for a second and then return to the starting position.

6. Repeat for the desired number of repetitions.

One-Arm Dumbbell Rows

One-arm Dumbbell Rows is a great exercise for targeting the back muscles, specifically the lats, traps and rhomboids.

How-to Instructions:

1. Start by standing with your feet hip-width apart and holding a dumbbell in one hand.

2. Bend your knees slightly and hinge forward at the waist, keeping your back straight and core engaged.

3. Allow your free arm to hang down and reach the dumbbell toward the floor.

4. Begin the exercise by driving your elbow up and back, keeping your arm close to your body.

5. As you drive your elbow up and back, squeeze your back muscles and focus on pulling your shoulder blade back and down.

6. Lower the weight back down to the starting position and repeat on the same side for the desired number of repetitions.

7. Once you have finished the desired number of repetitions, switch to the other side and repeat the same steps.

Seated Front Dumbbell Press

Seated Front Dumbbell Press is a great exercise for building strength and size in the shoulders. It is an isolation exercise that focuses on the front deltoids. The exercise is performed while seated on a bench and requires a pair of dumbbells.

How-To Instructions:

1. Begin by sitting on a flat bench with a dumbbell in each hand. The dumbbells should be held at shoulder height, with your palms facing forward.

2. Keeping your back straight, press the dumbbells up towards the ceiling until your arms are fully extended.

3. Lower the dumbbells back to shoulder height and repeat.

4. Make sure to keep your chest up, core engaged, and avoid arching your back during the movement.

5. Repeat for the desired number of repetitions.

Frequently Asked Questions

What Is The Best Way To Track My Progress While Doing Back And Shoulder Exercises?

Staying motivated while building muscle can be a difficult task, especially when you can’t see the progress in the mirror on a day-to-day basis. It’s important to track your progress in order to stay on top of the goals you’ve set for yourself. But how do you go about doing this? How do you measure the success of your hard work?

The best way is to keep a journal and tracking your performance with reps and sets that will give you an idea of where your current fitness level stands compared to earlier sessions. Taking notes during workouts can also help remind you which exercises were most beneficial so that they can be replicated in future training sessions.

These simple steps will provide insight into what works best for your individual fitness journey, allowing you to make adjustments along the way as needed. By keeping detailed records of these measures over time, you’ll have a better understanding of both short-term and long-term gains – giving you the confidence boost necessary to keep working toward achieving those desired results!

How Much Time Should I Spend On Each Exercise?

For those aspiring to build muscles through back and shoulder exercises, it is essential to understand how much time should be dedicated to each workout. Undoubtedly, the amount of time spent on an exercise can make or break results. Therefore, striking a balance between focus and intensity is paramount for success.

Achieving muscle building goals requires dedication and commitment in order to obtain desired outcomes. Depending on individual needs, some may require more intense workouts than others; however, allocating an adequate amount of time during exercise sessions will help ensure progress towards these objectives.

Understanding key concepts such as progressive overloads and periodization so that individuals have access to personalized plans tailored specifically towards their own fitness ambitions.

All these considerations must come together harmoniously in order for individuals to reach peak performance levels both physically and mentally in the most efficient way possible while minimizing wasted time in the gym!

What Specific Exercises Can I Do To Target My Lower Back Muscles?

Do you want to target your lower back muscles? If so, there are a few specific exercises that can help you do just that. Deadlifts, 45 degree back extensions, and glute hip thrusts can be extremely helpful at building up lower back muscles.

Its important to keep in mind that all upper back exercises will involve the lower back to some degree as well.

How Many Days Per Week Should I Dedicate To Back And Shoulder Workouts?

If you want to build strong muscles in your back and shoulders, an important question arises: How many days per week should I dedicate to back and shoulder workouts? The answer may differ depending on the individual’s goals, existing level of fitness, lifestyle factors, and other variables.

To figure out what works best for you, consider these three points:

• Assess how frequently you can commit to a dedicated workout program without compromising recovery time or risking burnout.

• Consider any limitations such as preexisting injuries that might prevent frequent exercises.

• Evaluate whether additional rest days are necessary between sessions if you plan to use heavy weights or high intensity interval training (HIIT).

The frequency of your back and shoulder workouts will determine their effectiveness in building muscle fast. During each session, aim for multiple sets with moderate-to-heavy weight at 8–15 repetitions per set.

With this information in mind, it’s up to you to decide which approach works best for your specific needs. If possible, start by committing to two full-body workouts per week — one focused on upper body muscles including your back and shoulders; the second focusing on lower body strength — then assess how much progress you make after six weeks using this framework.

From there, adjust your schedule accordingly based on results so that you can continue making steady progress toward reaching your goals!

What Can I Do To Prevent Injuries While Exercising My Back And Shoulders?

When it comes to exercising your back and shoulders, safety should always come first. A little preparation can go a long way in helping prevent potential injuries while working out these important muscle groups. But what can you do?

Take time to warm up before getting stuck into any back or shoulder workout routine – this is essential if you want to avoid straining those muscles! Spend 5-10 minutes doing light stretches and dynamic movement such as arm circles, shoulder rolls and trunk rotations.

Not only will this help reduce your chances of injury but it also helps increase blood flow and lubricates joints in order to improve performance during exercise. It’s like revving an engine before hitting the gas pedal; don’t skip this step if you want your body ready to deliver its peak performance!

Equally important is form when performing back or shoulder exercises. Good technique is key – use slow to moderate speeds so that each rep is done correctly rather than rushing through sets with poor posture and form. This helps ensure that you’re targeting the correct muscles, prevents incorrect loading on joints and ligaments and ultimately leads to better results from your training session!

Make sure to listen closely when being guided by a certified trainer who understands which types of exercises are best for building strength safely – a qualified fitness professional can provide invaluable insight here.

To sum up then, warming up prior to exercise, using good form throughout reps and following instructions from knowledgeable trainers are all crucial aspects of keeping safe while working out your back and shoulders. When taken together they create an effective framework that lets you focus on pushing yourself further towards achieving whatever goals you have set out for yourself – while avoiding any unnecessary risks along the way.

Conclusion

Well, there you have it – the ultimate guide to building muscle fast with back and shoulder exercises. Now that you know what to do, don’t forget: progress tracking is essential for seeing results! It’s not enough just to go through the motions; make sure you’re marking your milestones and successes along the way so you can keep up the momentum.

Stretching Sciatic Nerve: 5 Top Stretches And Exercises To Try

Sciatic nerve pain can be caused by compression or irritation of the sciatic nerve, resulting in burning pain, tingling, numbness, and weakness in the lower back, buttocks, and legs.

While there are several possible causes of sciatica, stretching and exercise can often help to relieve the symptoms.

In this blog post, we’ll explore six top stretches and exercises to try for stretching the sciatic nerve and reducing pain.

Additionally, we’ll discuss other ways to relieve sciatic nerve pain, including heat rubs, massage techniques, and chiropractic care. We’ll also cover tips for sleeping with sciatic pain and how long it can take for sciatica to heal.

What Causes Sciatic Nerve Pain?

Sciatic pain is usually caused by irritation of the sciatic nerve by a herniated disc, spinal stenosis, or pregnancy. Other causes include injuries to the spine, tumors, and certain infections.

Sciatica vs. Piriformis Syndrome

Sciatica and piriformis syndrome are both painful conditions with often similar symptoms. Sciatica is a general term used to describe pain that radiates along the sciatic nerve, which runs from the lower back down the back of each leg.

Piriformis syndrome is a condition in which the piriformis muscle, located deep in the buttocks, is thought to spasm and compresses the sciatic nerve, causing pain, tingling, numbness, and weakness in the leg.

Signs and Symptoms

Sciatica pain can include burning pain, tingling, numbness, and weakness in the lower back, glutes, and legs. Piriformis syndrome symptoms can also include pain, tingling, numbness, and weakness in the lower back, buttocks, and legs, but may also include pain in the hip, gluteal area, and/or thigh.

Can You Really Loosen Up A Sciatic Nerve?

While technically there is no need to loosen the sciatic nerve, what we want to accomplish is reducing compression on the nerve from surrounding structures, as well as promoting smooth sliding of the nerve through its “sheath”.

Sciatic nerve glide would be a good choice to treat sciatica symptoms for some. This is true regardless if the origin of the problem is the piriformis region, or the lumbar spine. It is important to note that you should speak with your health professional before doing any nerve sliding.

Stretches For Sciatica

Hamstring Stretch

Stretching the hamstrings can be a great way to address tension, but depending on the level of pain you have, you may not tolerate much of it. The key is to maintain the curve in the lumbar spine when bending forward, as well as keeping the knees comfortably bent.

While maintaining this optimal lower spine position, bend forward to accomplish the standing hamstring stretch. Hold for up to 30 seconds, and repeat 2-3 more times.

Standing Calf Stretch

Since the sciatic nerve runs down the back of the leg to the bottom of the foot, stretching the calves can assist with modulating the nerve pain.

Split your stance with one foot forward and the other slightly behind you, while maintaining both feet fully flat on the floor. While keeping the back knee straight, shift your weight forward until you feel a stretch in the back leg calf.

Hold for up to 30 seconds, and repeat 2-3 more times.

Crossover Glute Stretch

Lay on your back with one leg straight.  Place the other foot on the outside of the knee of the straight leg. Gently pull your knee across your body and up toward the shoulder. You should feel a stretch in your glute region.

Hold for up to 30 seconds, and repeat 2-3 more times.

90-90 Glute Stretch

This is a great piriformis stretch. The front knee is bent to 90 degrees, and the opposite knee is the same out to the side.

Sit on the floor with one leg in front and the other out to the side. The front knee is bent to 90 degrees, and the opposite knee is the same out to the side.   Place your hands out in front of your front leg, equal distance out from the knee.  Perform an anterior pelvic tilt (arching the lower back) until you feel the stretch.

Hold for up to 30 seconds, and repeat 2-3 more times.

To get a deeper stretch, try varying the angles.

Standing Adductor Stretch

Start with a wide stance, making sure your feet point straight ahead. Knees should be very slightly unlocked.  Perform a posterior pelvic tilt until a stretch is felt in groin region.  Holding that stretch, turn one foot out and shift weight away from the side you wish to stretch.

Hold for up to 30 seconds, and repeat 2-3 more times.

What if Stretching for Sciatica Exercises do not Help?

If the above stretches for sciatica exercises do not help, you may need to consult with a physical therapist or spine specialist to receive a more comprehensive plan of care including a series of physical therapy.

In some cases, surgery may be recommended (if all conservative measures are exhausted). Additionally, medications, injections, and other forms of conservative treatments may be prescribed to provide relief of sciatica symptoms.

How long does it take sciatica to heal?

The length of time for sciatica to heal depends on the severity of the condition and the treatment approach taken. In some simple cases, sciatica may resolve on its own within a few weeks.

However, more severe cases may require several months or longer of movement therapy, massage therapy, physical therapy or other treatments before the symptoms improve.

Are there other ways to relieve sciatic nerve pain?

Does heat rub help sciatica? Some capsaicin products can help reduce nerve pain temporarily.

Heat rubs may provide temporary relief for sciatica pain (especially capsaicin). They help to increase circulation, relax muscles, and reduce inflammation. However, heat rubs should not be used as a substitute for medical treatment.

How do you massage a sciatic nerve?

While you can certainly apply massage techniques to the muscles and tissues around the sciatic nerve, it isn’t advisable to directly massage the sciatic nerve, especially when its irritated.

The good news is that you don’t need to anyway. General massage techniques applied to the surrounding area can improve blood flow, relax tense tissues, and reduce nerve sensitivity.

This should always be performed gently, especially at first, to gauge level of discomfort and reduce chances of getting excessively sore afterward.

Can a chiropractor fix sciatica?

While a chiropractor can help to treat and manage sciatica, there isn’t necessarily a “fix”. Through a combination of techniques such as spinal manipulation, soft tissue mobilization, and assisted stretching, a chiropractor can help to reduce the pain and discomfort associated with sciatica and improve the your range of motion.

How Should I Sleep With Sciatic Pain?

If you suffer from sciatic pain, it is best to sleep on your side with a pillow between your legs to decrease pain. A pillow top mattress may help to provide extra cushioning and support while decreasing pressure.

It may also be important to keep your spine in neutral alignment, so try sleeping on your back with a pillow under your knees. Make sure your head is also supported with the correct neck pillow. Additionally, using a lumbar support pillow may help to reduce the pressure on your lower back.

Conclusion

Sciatic nerve pain can be a debilitating condition that affects many people. Fortunately, there are several stretches and exercises that can help to alleviate symptoms and promote healing.

Additionally, other treatments such as heat rubs, massage techniques, and chiropractic care can provide relief.

It’s important to remember that healing time can vary depending on the severity of the condition, and it may take time and patience to find the best treatment approach for you.

By staying active, taking care of your body, and seeking the appropriate medical attention, you can find relief from sciatic nerve pain and get back to living your life to the fullest.

10 Lower Ab Exercises That Actually Work

Are you looking for an effective way to strengthen and “tone” your lower abdominal muscles? Have you tried endless exercises without seeing any real results or just making you feel only your upper abs? You’re not alone!

10 Lower Ab Exercises That Actually Work

Many people struggle to find lower ab exercises that actually work. Thankfully, we have the solution – there are 10 lower ab exercises that can help you finally reach your fitness goals. So, what are you waiting for?

Let’s get started!

We all know that having a strong core is essential to leading a healthy lifestyle, yet it can sometimes be difficult to find exercises that really target the lower abdominal area. That’s why we’ve compiled a comprehensive list of exercises designed specifically to strengthen and define this crucial muscle group.

From planks and crunches to mountain climbers and leg lifts, these moves will give you the look you desire in no time.

Read on for 10 lower ab exercises that will transform your midsection.

What Are Lower Abdominals?

The lower abs, otherwise known as the lower portion of the rectus abdominis and obliques, are the muscles located in the lower stomach area, roughly belly button level-down. They are responsible for helping maintain good posture, support your back and spine, and stabilize your core.

Before we go further, we should clarify something. The upper and lower abdominals are NOT 2 separate muscle groups. They both work together, but we can distinguish between initiating movements from the upper body, and the pelvis. You will definitely feel a difference between these 2 actions. It’s the muscle fibers toward the bottom, the pelvis, that we are referring to as “lower abs”.

Lower abdominal exercises can be done without any special equipment or a gym membership. Many of these exercises focus on strengthening and targeting the lower abs while also engaging other muscle groups like the hip flexors and quadriceps.

A few examples of these exercises include crunches, planks, leg raises, bicycles, v-ups and mountain climbers.

Having strong lower abs is an important part of overall health and wellness. With regular practice of these exercises you can start to see results in as little as four weeks.

To make sure that you’re getting the most out of your workouts it’s important to remain consistent with training them so that you continue to see progress over time.

This brings us to our next question: How often should I perform lower ab exercises?

How Often Should I Perform Lower Ab Exercises?

Generally speaking, most people don’t exercise their abominals with the right exercises and frequency to make a difference.

If you want to get results quickly from lower ab exercises, it is important to remain consistent and focus on proper form and technique. Aim for performing two or three sets of your chosen exercises two or three times a week. (They can be done more frequently, as long as the intensity is low.)

This will ensure that your muscles receive the necessary amount of stimulus while also allowing time for rest and recovery between workouts.

It is also important to make sure that you’re getting adequate nutrition in order to fuel your workouts and maximize results. If your energy is low and you’re just not feeling it, then your workouts are going to suffer.

Eating a balanced diet with plenty of lean proteins, fruits and vegetables will help provide your body with the energy it needs to complete each exercise session successfully.

In addition to fueling up properly, it’s also essential that you stay hydrated during your workouts as dehydration can lead to fatigue and decreased performance.

With these tips in mind, let’s move on to discussing what risks or safety considerations you should be aware of when doing lower ab exercises.

What Risks Or Safety Considerations Should You Be Aware Of When Doing Lower Ab Exercises?

When performing any type of exercise, it is essential to maintain proper form. This not only helps you to get the most out of the exercise, but also prevents injury.

When doing lower ab exercises, make sure that you are engaging your core and focusing on the quality of the muscle contraction.

This will help ensure that you are targeting the correct muscles and getting the most out of each move.

Additionally, it is important to choose effective lower ab exercises in order to maximize results. Traditional exercises such as leg raises, hanging knee ups, and side bends can all be effective for strengthening your lower abs when done correctly. You really don’t have to get too fancy.

However, some people find these moves too difficult or too easy depending on their fitness level and body type. If this is the case for you, there are plenty of other options available to fit your needs.

Finally, it’s important to listen to your body and take breaks if necessary while performing lower ab exercises. If an exercise causes discomfort or lower back pain in any way, stop immediately and consult with a doctor before continuing with the workout routine.

Taking these precautions will help ensure that you get the most out of your workouts safely and effectively.

With these tips in mind, let’s move on to discussing why is it important to strengthen your lower abs.

Why Is It Important To Strengthen Your Lower Abs?

Strengthening your lower abdominals is an important part of overall fitness and core strength. The lower abs are responsible for stabilizing the spine, pelvis, and hips, and helping to provide balance during everyday activities, and creating a strong foundation for other exercises.

Having strong lower abs can also help with posture, as well as preventing back pain caused by weak abdominal muscles.

Incorporating regular lower ab exercises into your core training routine is an important part of maintaining a healthy lifestyle. With the right moves and proper form, you can effectively strengthen your core and reap the many benefits that come along with it!

Now let’s move on to discussing how to do some of the most effective lower abdominal exercises, starting with a slider knee tuck.

Slider Knee Tuck

The slider knee tuck is an effective lower ab exercise that can give you a great challenge no matter if you’re a beginner or advanced trainee.

To perform this move, begin by lying on your back with your knees bent and feet flat on the floor.

Place a slider underneath each foot, then slowly raise your hips off the ground, extending your legs straight out so that they are parallel to the floor. Engage your core and pull your knees into your chest while keeping them bent.

Then slowly slide both feet away from you as far as you can go before returning them back to their original position near your hips. Repeat this motion for 10-15 reps before taking a break and repeating 2-3 more times.

This move is a great way to engage and target those hard-to-reach lower abdominals without putting extra strain on other parts of the body. Additionally, it’s low-impact yet still highly effective in building strength in the core area.

Not only does it work those deeper muscles that are often neglected during traditional ab exercises, but it also helps with balance and stability as well.

Overall, the slider knee tuck is an excellent workout for targeting those stubborn lower abs while building overall strength and stability throughout the body.

From here, we will move on to discussing how to do reverse crunches – another great exercise for strengthening those lower ab muscles!

Reverse Crunches

Reverse crunches are another highly effective exercise for targeting the lower abdominals. To perform this move, begin by lying on your back with your hands at your sides and legs bent at a 90-degree angle.

Engage your core and slowly lift both feet off the floor, bringing them towards your head until they are perpendicular to the ground. Then lower them back down without touching the ground before repeating for up to 10-15 reps.

While reverse crunches are an excellent way to strengthen the lower abs, it’s important to make sure you’re performing them correctly in order to get the most out of each rep.

You should be careful not to overarch your back while doing this move, as this can strain or trigger the muscles in your lower back to guard and spasm.

Additionally, focus on keeping your ribs down throughout each rep in order to maximize its effectiveness.

Now that we’ve covered how to do reverse crunches let’s move on to discussing hanging leg raises – another great exercise.

Hanging Leg Raises

This intense move will have your abs burning in no time! To perform this exercise, begin by using an overhand grip on a bar (or other secure object) with your legs extended and hanging down a few inches below. You can alternatively use a pair of ab straps if your grip isn’t ready for the bar-hang version.

While keeping your core tight and back straight, use your lower abdominal muscles to slowly raise both legs as close as you can towards your chest without swinging. Hold this pose for one second (if possible!) before lowering back down with control.

Aim to work up eventually to 10-15 reps per set but you can always add more depending on how advanced you are in your fitness journey.

Hanging leg raises may seem intimidating at first however, with proper form and technique, anyone can do them safely and effectively. Make sure to keep your body rigid throughout the entire movement so that you don’t swing or arch your back.

Additionally, focus on squeezing those abdominal muscles with each rep to ensure that they’re doing all the work and not just your hip flexors.

Finally – remember to take it slow and steady! It’s important that you don’t rush through each rep or try to lift too quickly as this could cause strain in the lower back area.

So there you have it – hanging leg raises are an intense yet effective way to target those tough-to-reach lower abs for a strong looking torso!

Now let’s move on to discussing double leg lifts – another great exercise for sculpting those stubborn lower abdominals!

Double Leg Lifts

This move requires less stability and strength than the hanging leg raise, so it can be a good substitute. To perform this exercise, begin by lying flat on your back with your legs extended straight out in front of you.

From here, engage your core and slowly raise both legs up towards the ceiling until they are at a 90 degree angle from the floor. Hold this position for one second before lowering back down with control – keeping your legs as straight as possible throughout the entire movement.

Aim for 10-15 reps per set or add more if you feel like a challenge!

Similar to hanging leg raises, double leg lifts require proper form and technique in order to avoid any risk of injury or strain. Make sure that you keep your core tight throughout the entire movement so that it’s doing all the work and not any other part of your body.

Additionally, focus on keeping both legs as straight as possible when raising them up towards the ceiling – this will help ensure that you get the most out of each rep and properly target those lower abs!

Double leg lifts will have your lower abdominal muscles burning in no time – so don’t forget to take things slow at first until you master proper form and technique. Now let’s move on to talking about pike plank – an intense move that’s perfect for sculpting those stubborn lower abs!

Pike Plank

It is often referred to as the “pike position”, which is essentially a more challenging variation of a standard plank.

This move requires strength and stability, but with practice it will become much easier. To perform this exercise, begin by getting into a plank position on the ground – making sure that your feet are hip-width apart and your arms are extended straight out in front of you.

From here, shift your body up into a pike position – that is, bring your hips up towards the sky while keeping your core muscles tight and engaged. Your hands should remain firmly planted on the floor; do not let them move or give way!

Hold this position for one second before slowly lowering back down to the start position – maintaining proper form throughout the entire movement. Aim for 10-15 reps per set or add more if you feel like taking it up a notch!

With consistent practice, this exercise will become much easier and you’ll be able to really feel those lower abs working with each rep.

Now let’s talk about bicycle crunch – another great lower ab exercise that packs a punch!

Bicycle Crunches

Bicycle crunches are another classic and effective abdominal training movement. This exercise is a variation of crunches, but with an added twist!

To begin, lie flat on your back and bring your hands behind your head – be sure not to pull on your neck as this can cause injury.

From here, lift your legs off the ground and bring them towards your chest. Hold your hips and knees at a 90 degree angle.

Now, twist at the waist in order to bring one elbow towards the opposite knee while straightening out the other leg. Hold this position for one second before returning back to starting position and switching sides.

Aim for 10-15 reps per set or more if you’re got the endurance.

Next up is stability ball knee tucks – another excellent lower ab exercise!

Stability Ball Knee Tucks

As the name suggests, this exercise involves using a stability ball to perform a tuck motion with your legs.

To get started, place your hands on the floor and both feet on the swiss ball.

From here, while maintaining abdominal muscle tension, bring your knees toward your chest while maintaining control over the movement and keeping your torso parallel to the ground.

Hold this position for one second before returning back to starting position (remember to slowly lower). Aim for 10-15 reps per set and make sure to keep an eye on proper form throughout!

Stability ball exercises are an excellent addition to any lower ab workout because they add some additional deep abdominal muscle recruitment such as the transverse abdominus.

Next up is a popular movement called mountain climbers – another killer conditioning exercise!

Mountain Climbers

Mountain climbers are a great full body exercise that can really get your heart rate up! Start in the plank position with arms straight and shoulder blades down. From here, bring your left knee up towards your chest while keeping the rest of your body as still as possible.

Make sure to keep your abs tight throughout the exercise. Now switch legs, bringing your right knee up towards your chest and returning to starting position. Aim for 10-15 reps per set on each side, focusing on form over speed.

Mountain climbers are an effective way to target multiple muscle groups at once, including core, glutes, quads and arms. Not only will this exercise get you sweating in no time – it will also help build strength and endurance across the entire body.

As you progress through the sets, challenge yourself by increasing speed or adding weights for an extra boost.

Let’s move on to high plank pull-throughs – another great ab burner.

High Plank Pull-Through

For those looking to target their upper body and core muscles together, high plank pull-throughs are an excellent exercise option. This dynamic move requires you to be in a high plank position with your hands under your shoulders and your core engaged.

Start by bringing one arm back, while keeping your shoulder blades down and together.

Then, reach the arm up and over the opposite side of your body, as if you were trying to touch the floor on the other side. Keep alternating arms for 10-15 reps per set.
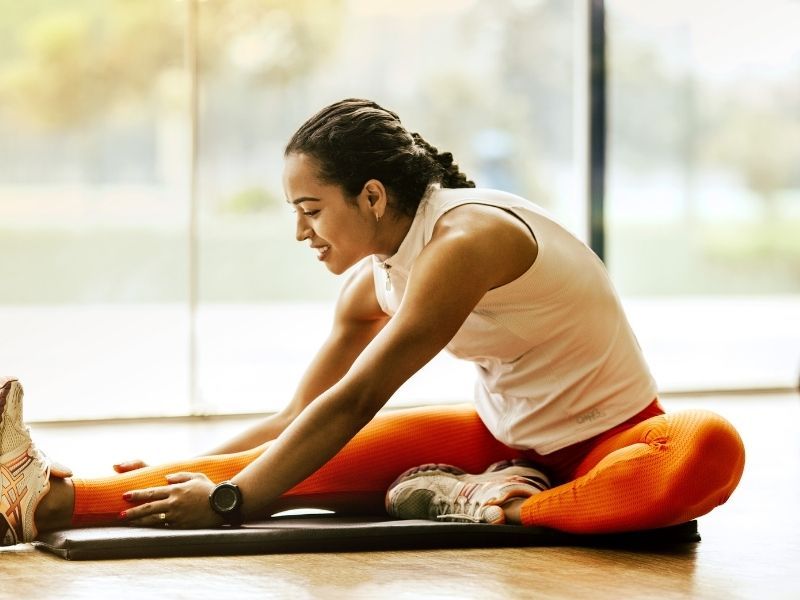
High plank pull-throughs are a great way to work on strengthening your shoulders and stabilizing your core muscles at the same time.

Additionally, try adding weights or resistance bands for an extra challenge.

Frequently Asked Questions

Are There Any Specific Diet Or Nutrition Considerations I Should Keep In Mind?

When it comes to seeing more of the lower abs, nutrition is an essential consideration. You can have the best abdominals the world has ever known, but it won’t matter if you can’t see them under a thick layer of bodyfat.

Eating a balanced, nutrient-rich diet can help support your efforts in shedding the fat to actually seeing your abs (but even more so as it contributes to helping lose weight).

It’s important to eat lean proteins such as fish and poultry, and include whole grains, fruits and vegetables in your meals for added fiber and vitamins. Additionally, drinking plenty of water throughout the day will keep you hydrated so you can maximize your fat loss and fuel your workouts.

Keeping an eye on portion sizes is also key in balancing your appetite and keeping caloric intake to optimal levels.

Supplements such as protein powder may be beneficial depending on individual nutritional needs. However, it’s always best to speak with a doctor or registered dietitian before adding any supplements into your routine.

By following these nutrition tips and keeping track of what you eat, you’ll be able to achieve the lower ab results you’re looking for.

How Can I Prevent Overworking Or Straining My Lower Abs?

When it comes to lower ab exercises, it’s important to take steps to prevent overworking or straining of the abdominal muscles. This type of injury can be very painful and set back your progress significantly.

Fortunately, there are several things you can do to ensure your lower abs remain healthy and strong.

Make sure you don’t start with a ton of sets and or intensity when you first begin training your abs. A little goes a long way. You can always build up over weeks and even months as your training level improves.

When performing lower ab exercises, aim for two or three sets of 10-15 repetitions with one minute of rest in between each set.

It’s also important to ensure you’re getting enough rest between workouts. The harder you train the less frequent you can train. As mentioned earlier in the article, you can train your abs daily, but the intensity needs to be lower.

Following these tips will help ensure your lower abs stay healthy and strong as you work towards achieving your fitness goals. Paying attention to proper form, taking adequate rest breaks, and choosing appropriate exercises are all key components of a successful abdominal workout routine.

What Is The Best Way To Warm-Up Before Performing Lower Ab Exercises?

Warming up helps to ensure that muscles are properly prepared for the upcoming physical activity, which can help to prevent injury and improve performance. But what is the best way to warm-up before performing lower ab exercises?

Research suggests that dynamic stretching may be most beneficial for warming-up prior to exercising. Dynamic stretching involves controlled movements through a range of motion, such as standing leg swings or high knee jogs.

This type of stretching helps to increase blood flow and lubricate joints, while also activating muscles in a way that prepares them for exercise. Static stretching, while still beneficial, may not be as effective as dynamic stretching when it comes to preparing muscles for exercise.

Therefore, when it comes time to work your lower abs, consider engaging in some dynamic stretches beforehand. Not only can this help you perform your exercises safely and effectively, but it can also help you feel more energized throughout your workout!

How Quickly Can I Expect To See Results From Lower Ab Exercises?

Many people want to know how quickly they can expect to see results from lower ab exercises. This is a valid question, as it’s important to understand the timeline of your commitment when you start any kind of exercise program.

The answer depends on a few factors such as your current fitness level, the intensity and frequency of your workouts, and how well you stick with your program.

It’s important to note that even if you do lower ab exercises regularly, it will take time before you see any visible changes in your midsection. It may take anywhere from 4-6 weeks before you start noticing improvements in the strength and definition of your lower abs.

Additionally, it takes dedication and consistency to maintain these results over time.

That said, there are steps that can be taken to maximize the effectiveness of lower ab exercises and help speed up the process.

Eating healthy foods, reducing caloric intake (if you need to lose bodyfat) and getting enough sleep are essential for keeping up energy levels during workouts and aiding in muscle recovery afterward.

In addition, increasing the intensity or frequency of workouts over time can help accelerate progress towards reaching desired goals.

Conclusion

It’s clear that lower ab exercises can be incredibly beneficial, but it’s also important to approach them with a PLAN.

Keep these tips in mind when performing any kind of ab training program, and soon you’ll be on your way to having the strong lower core that you’re after!

Is Swimming Good For SI Joint Pain? – What You Should Know

If you’re experiencing si joint pain and wondering if swimming can be a good form of exercise for you, then read on.

Over the years in practice I have had many people report their si joint pain symptoms were soothed or at the very least not aggravated by pool-based activities.

Let’s take a look at how swimming can alleviate si joint pain and some of the key things you should know before starting.

Note: If you’re dealing with SI Joint issues and need a specific step-by-step protocol, be sure to check out my SI Joint Solution program.

Benefits Of Swimming Exercises To Help SI Joint Pain

Swimming is considered a low-impact form of exercise, and thus a good potential option for those dealing with sacroiliac joint pain. The buoyancy offered by the water environment helps to reduce the amount of stress placed on the joints.

The exercises performed in water are concentric-based. This means muscles are performing the lifting phase, and don’t have to perform the eccentric, which is the lowering or lengthening phase while under resistance.

Since swimming offers a low resistance environment, it can often allow for higher amounts of exercise to be tolerated with less side effects.

Swimming also adds proprioceptive input, which improves the sense of awareness of where some bodyparts are relative to others. This can be particularly helpful to reduce overactivity of compensation muscles that tend to exacerbate structural imbalances.

What Worsens SI Joint Pain?

When considering is swimming good for si joint pain, it’s important to briefly cover what tends to make sacroiliac joint pain worse.

Generally speaking, any spinal or hip movement in extreme ranges may be provocative for si joint pain. Some people are more sensitive to spinal extension (which is sacral nutation), while others have sensitivity to spinal flexion (sacral counternutation).

When you combine one of the above movements with side bending and rotation, it may either compress or stretch structures that directly increase symptoms in the si joint region.

If unsure, exercises should always be performing in a neutral-spine position, and any others omitted until properly evaluated with SI joint tests by an appropriate health care professional in order to get recommendations.

Avoid Certain Swim Strokes

Based on the above, most swimming strokes can be performed if a neutral spinal position is assumed, but some may be more challenging than others to maintain form in.

The breaststroke is one example. This stroke requires a twisting motion in the hips and lower back which may aggravate some SI joint issues.

The backstroke requires a good amount of spinal rotation as well, and may not be well suited for the individual.

The butterfly stroke is another potential stressor for si joint pain. Its often associated with more powerful amount of hip motion, which may be a problem.

Sample Water Workouts

Conclusion

Swimming is generally considered a great form of low-impact exercise that can be excellent to relieve si joint pain and strengthen muscles. However, before starting any exercise program, it’s important to take the time to discover what your needs are, and which factors may exacerbate si joint dysfunction in your individual case, before jumping into the pool.

Related Articles

5 Special Tests To Uncover SI Joint Dysfunction

How To Know If Your SI Joints Are Causing Your Pain

Sacroiliac Joint Belts – Do They Work?

How To Sit With SI Joint Pain?

Best Mattresses For SI Joint Pain

Yoga For SI Joint Pain – Here Are The Best Poses

How To Sleep With SI Joint Pain

How To Select The Best Chair For SI Joint Pain

How To Pick The Best Chair For SI Joint Pain

Sitting with SI joint pain for any length of time can be very uncomfortable, especially if your job requires it. The type of chair you sit in can make a big difference, but its important to pick the best chair for si joint pain specifically.

Let’s take a look at the most important factors and tips when choosing the best office chair.

Can Sitting Aggravate SI Joint Pain?

Before we dive into chair options, let’s address the big question; is sitting bad for your back and si joints?

Contrary to popular belief, there is no evidence that sitting is bad for the spine. While there may be a strong correlation between lack of overall movement, being sedentary and having increased likelihood of aches and pains, sitting by itself is fine.

The problem is when there is aggravation of joints, tissues and nerves, sitting can be uncomfortable.

To make the body happy, we need 3 things: Blood circulation, oxygen, and movement. Sitting in one spot for long periods of time will certainly reduce the ability to do these things.

This leads us to…

What Is The Best Sitting Position For SI Joint Pain?

Human beings are meant to move, not just sit or stand in one position for a long time. So, when we consider the question, there isn’t one best position to sit in overall.

The same is true when dealing with sacroiliac joint pain. As mentioned in other articles, the SI joints do not move much (if at all in many cases!), so we need to be mindful of the joints that are nearby.

This means the lumbar spine and the hips. These joints are HIGHLY mobile and meant to move. This often leads to a number of different positions that can be assumed when sitting. Thus, the variety of options when it comes to available chair options.

When we look at the pelvis, we should consider the primary positions that influence these joints.

The forward and backward tilting of the pelvis (Anterior and Posterior) create the movements of nutation and counternutation of the sacrum. This directly influences the position of the lower lumbar spine (flexion and extension) and also the hips (relative flexion).

Anterior-Pelvic-Tilt
Anterior Pelvic Tilt
Posterior-Pelvic-Tilt
Posterior Pelvic Tilt

A pelvis + hip that is elevated on one side or the other will also contribute to a rotation of the pelvis.

Lateral-Pelvic-Tilt
Lateral Pelvic Tilt

These are the variables we have to play with when it comes to sitting positioning.

Considerations When Choosing A Chair For SI Joint Pain

When considering the best chair for si joint pain, here are a few factors that can influence the ability of the chair to be most comfortable.

  • Seat height and depth

Just like any chair, there is no universal fit. The height of the user is definitely one of the most important considerations.

  • Lumbar support

Lumbar supports can be built into the chair itself, OR added on. Personally, I’m not a huge fan of built-in lumbar supports, as I find them most frequently inadequate. I’d rather add on something like a Mckenzie Super Roll. In this case, the chair needs to be able to accommodate this addition.

  • Firmness of the seat

Some people like very firm seats, while others prefer something more like memory foam. Additionally, the shape of the seat can be an important component, for example, “bucket” type seats are very uncomfortable for some si joint pain sufferers.

  • Armrests

Armrests are a personal preference as well. On average, I find that individuals that are shorter don’t like them as well as taller people. They won’t impact SI joint pain much either way.

Types Of Chairs Available

  • Office chairs

Best-Chair-For-SI-Joint-pain

Standard office chairs come in all sorts of shapes and sizes. Here are some of the top recommendations for office chairs.

  • Exercise ball chairs

Exercise-Ball-Chair

Exercise ball chairs can be good for short term, but in general I find most SI joint pain sufferers don’t like spending too much time on them, so unless you really like them, they may not be worth the money.

  • Kneeling chairs

Kneeling-Chair

Kneeling chairs in my experience are some of the most effective at relieving lower back and hip pain. The problem, however, is using them for a long period of time.

The pressure on the knee contact points can be annoying. Since there is no back support, there is no way to lean back, but due to the low position of the knees and forward tilting of the pelvis, being upright is less effortful.

  • Saddle chairs

Saddle-Chair

Saddle chairs are interesting in how they disperse sitting forces. Although I have no personal experience with these, the reviews are generally good and worth a try.

  • Seat cushions or wedges

Seat cushions and wedges are worth noting. The chair you select is important, but since chairs can rarely be “perfect”, components of it can be easy modified with add-ons. I mentioned the lumbar support above, but the seat can be make softer or firmer, and wedges can be used to elevate the hips relative to the knees.

Steps For Testing The Chair

Whenever possible, you’ll want to be able to test out the chair in person before committing to the purchase. This will give you the opportunity to test it out and check the level of comfort and the available adjustments.

Of course this isn’t ALWAYS possible, because many of the best chairs are only available online, but many of them do have a return policy. Sometimes even when you have done all your research, you just don’t know until you sit in it.

Here is a short checklist of things to test when trying out a chair for si joint pain.

  1. Sit in the chair and pay attention to your posture

Does it feel easier to sit upright? Is your pelvis in more posterior or anterior pelvic tilt?

  1. Test the lumbar support by leaning back in the chair

What is the depth of the support? Is it aggressive or minimal? Is it positioned in the right spot for your body?

  1. Adjust the chair to your preferred height and depth

Can your feet make flat contact on the floor? Is the depth of the chair too much or too little for the length of your thighs?

General Tips For Body Alignment When Sitting

When sitting in your office chair, you need to be able to keep your feet flat on the ground. Dangling feet can alter your center of gravity and increase unwanted excess muscle activity and stress on the joints.

Your knees should be at minimum positioned at 90 degrees, if not more. If more spinal extension/anterior pelvic tilt is desired, the knees should be lower than the hips. This often means having to position oneself closer to the edge of the chair.

Crossing your legs can add to si joint discomfort. This may be due to changing the positioning of the body or stretch on the hip tissues.

Avoid sitting in ONE spot for long periods of time. Shifting around in your seat is completely normal and desirable. Remember, nerves need blood circulation, and that means movement!

Here is a simple movement you can do throughout the day:

Conclusion

Finding the right chair for si joint pain is an individualized process. You need to keep into considering the various factors listed above, but also your own needs and preferences.

You may need to test out a few options, but armed with having done your research ahead of time, you’ll be in the best position to make the best decision.

Related Articles

5 Special Tests To Uncover SI Joint Dysfunction

How To Know If Your SI Joints Are Causing Your Pain

Sacroiliac Joint Belts – Do They Work?

How To Sit With SI Joint Pain?

Best Mattresses For SI Joint Pain

Yoga For SI Joint Pain – Here Are The Best Poses

How To Sleep With SI Joint Pain

5 SI Joint Pain Relief Stretches That Are Safe And Effective

SI Joint Pain Relief Stretches

SI joint pain is a common issue, and there is often very confusing information on these joints found online.

The SI joints themselves move very little, if at all in some individuals. Thus getting a sacroiliac joint stretch itself is not possible nor desired.

Stretching for SI pain is accomplished by targeting the surrounding muscles that serve to stabilize the lumbo-pelvic-hip region, and transmit forces effectively across these joints.

Note: If you’re dealing with SI Joint issues and need a specific step-by-step protocol, be sure to check out my SI Joint Solution program.

SI Joint Pain Relief Stretches To Try

The following stretches will target the specific muscle groups that can influence position of the lumbar spine and hips, and thus sacroiliac joint pain. The reduction of excess muscle tension can provide relief and improve a more even force transfer across the sacroiliac joints.

Kneeling Hip Flexor Stretch

The hip flexor muscles influence the SI joint primarily via their ability to anteriorly rotate the pelvic bone (innominate). This movement increases extension in the lumbar spine.

The iliopsoas muscle originates on all five lumbar vertebrae, and inserts on the inside of the upper thigh. This is by far the most mentioned muscle in hip flexor group, but its far from the only important one.

The other hip flexor muscles include the rectus femoris, sartorious, and tensor fascia lata. A classic quadriceps stretch would target the rectus femoris, but not adequately stretch the others.

As a group, they can be stretched with the Kneeling Hip Flexor Stretch.

Cross Knee Glute Stretch

The gluteal muscles have a strong influence on SI joint pain through the origin on the sacrum and insertion on the upper back of the thigh bone. They extend, abduct and rotate the leg outward.

No discussion about the glutes and pain is complete without mentioning the piriformis muscle. Much like the psoas, the piriformis is often the primary target for stretching when any pain exists in the hip or lower back exists, but its not clearly emphasized relative to the other more superficial gluteal muscles.

Stretching the glutes as a group can be easily accomplished with the Supine Cross Knee Glute Stretch.

Swiss Ball Quadratus Lumborum Stretch

The quadratus lumborum (QL) is freqently considered the “hip hike” muscle, and has a strong influence on the pelvis and lumbar spine in the frontal plane. In essence, elevating a hip will result in an added rotation to the pelvis.

This side bending + rotation can contribute to sacroiliac joint pain in some people. The QL is simple enough to release with a Swiss Ball Side Stretch.

Standing Adductor Stretch

The hip adductors have a close relationship with the quadratus lumborum. When one hip is hiked, the adductor muscles on that same side will be put in a shortened position. Shortness on both sides is often associated with increased anterior pelvic tilt beyond optimal amount.

Getting a hip adductor stretch is accomplished by opening the legs sufficiently with legs straight while adding a small posterior pelvic tilt to target the tight muscles.

The Standing Adductor Stretch is my go-to for this muscle group.

Supine Hamstring Stretch

The hamstring muscles are probably the most influential muscle groups when it comes to stabilization of the sacroiliac joints. This is partly due to their merging with the sacrotuberous ligament via the ischial tuberosity (sit bone).

They are frequently found shortened during assessment, but they can also commonly be found lengthened and weak. Either shortness + weakness or length + weakness can exist and contribute to SI joint pain.

Stretching isn’t usually a problem even if the hamstrings are found to have excessive range of motion, but it won’t likely be particularly helpful in that situation, as strengthening is the best option.

The Supine Hamstring Stretch is a simple option for emphasizing the hamstrings.

Tips To Make Stretching More Effective

Stretching Holding Time

The standard recommendation for stretching is to hold for 30 seconds x 2-3 repetitions. There isn’t anything magical about 30 seconds, but there should be enough time to relax into the stretch. Up to 60 seconds can be used if the stretch is at low-moderate intensity.

Frequency Of Stretching

The outcome of stretching isn’t to lengthen the muscle itself (this takes months and months of consistent and progressive stretching!), but instead to reduce neuromuscular tension.

Therefore, it is useful to apply stretching with a higher degree of frequency. Twice per day is the usual recommendation, but it can be done more frequently IF the intensity is kept low.

A good rule is to avoid muscles soreness as a result of stretching.

Integrate With Resistance Training

Stretching can result in good range of motion improvements over the short term, but the problem is getting those results to “stick”. One of the most effective ways to accomplish this is via full range of motion resistance training.

Strengthening muscles into their stretch position improves tolerance and continues the adaptation process.

Additional Considerations For SI Joint Muscle Stretching

Use Good Technique

Remember, the goal isn’t to force muscles to lengthen. The goal is to reduce excess muscle tension through relaxation and reduction of threatening input from the tissues.

There is no need to bounce or be excessively aggressive with stretching.

Start With Low Intensity To Test

To carry on from the previous point, whenever it comes to sacroiliac joint pain, its always important to consult with your healthcare provider when selecting the best stretches, but also to start slow and easy.

Low intensity to test is a smart way to begin. You can always increase the intensity of the stretch as tolerated.

Does Not Aggravate SI Joint Pain

Unless advised specifically by your healthcare provider, never stretch through pain. If you’re experiencing pain with any specific movement, reduce the range of motion, the intensity, or hold long the stretch is held. If that doesn’t help, stop the movement and talk with your health pro for further advice.

Conclusion

The above SI joint pain relief stretches can be a simple and low-threat way to alleviate si joint pain. They should always be modified to the individual’s needs and should be part of an overall approach to addressing sacroiliac joint pain.

Related Articles

5 Special Tests To Uncover SI Joint Dysfunction

How To Know If Your SI Joints Are Causing Your Pain

Sacroiliac Joint Belts – Do They Work?

How To Sit With SI Joint Pain?

Best Mattresses For SI Joint Pain

Yoga For SI Joint Pain – Here Are The Best Poses

How To Sleep With SI Joint Pain

How To Select The Best Chair For SI Joint Pain

How To Sleep with SI Joint Pain

The pain and discomfort from the Sacroiliac joint (or SI joint pain) will, without a doubt, keep you up most nights. Since good sleep is essential for your health and overall wellness, learning or relearning sleeping positions will relieve the pain and pressure and make for a good night’s sleep.

In this article, you’ll learn about some of the best ways for you to overcome the current challenge from the pain. Remember that while learning how to sleep with SI joint pain is challenging, it is not impossible – especially if you are already on the treatment program recommended by your health care provider.

Before sharing tips on how to sleep with SI joint pain, let’s first look at the basics of this condition.


What Is SI Joint Pain?

SI joint pain, also called sacroiliac joint pain, is the pain in your lower back or the butt region that and could be the result from the inflammation or damage of either one or both of your sacroiliac joints. Pain in this area may also just simply be referred from the lumbar spine.

As mentioned above, this joint is at the pelvis, and the lower spine connects – as a result, the pain can spread to either one or both legs. The pain is also referred to as SI joint syndrome, SI joint inflammation, SI joint dysfunction, or SI joint strain.

Unfortunately, lower back or glute region pain doesn’t often mean the correct diagnosis because SI joint pain’s symptoms often mimic symptoms of other conditions like hip or herniated disc issues. And so getting the correct diagnosis is critical.

How Does The SI Joint Pain Develop?

The SI joint is located between your sacrum and iliac bones. It connects your spine with the hips and is crucial for stability and support. This joint absorbs impact when lifting or walking.

The joints can be located near the most prominent bones on the back side of the pelvis, called the PSIS (posterior superior iliac spine).

These joints have several connective tissues in the form of strong muscles and ligaments that support the joint. The muscles and ligaments keep the joint intact, in good working condition, and in perfect health; negligible motion is necessary for flexibility.

This joint allows for bending, swaying, and moving back and forth. However, as we age and develop arthritic bones, stiff ligaments, and worn-down cartilage, the bones rub against each other, causing pain.

But that is not all – like other synovial-fluid-filled joints, the SI joint is full of synovial fluid and free nerve endings. So, as the bones rub and the joints degenerate while you lose synovial fluid, the exposed nerve endings do what they do best – transmit distress.

Depending on the severity of the damage or the inflammation, the pain can be mild or severe, with acute pain lasting days or weeks and chronic pain persisting for at least three months.

How Does SI Joint Pain Present?

  • Pain that starts from the buttocks and lower back and radiates to the upper thigh, groin, or lower hip.
  • Numbness or tingling feeling in one or both legs
  • Weakness in the leg
  • Worsening pain when sleeping, sitting, climbing stairs, or sleeping

What Are The Primary Causes Of SI Joint Pain?

To determine how to sleep with SI joint pain, you must first understand and address its cause. Here are the common causes of the pain.

  •   Autoimmune disease

Axial spondyloarthritis is one of the autoimmune diseases that may cause SI joint pain.

  •   SI joint ligament damage

The joint becomes painful if your SI joints become inflammed or damaged as a result of trauma. This could result from falls, car accidents, work injuries, pregnancy, childbirth, or even spine/hip surgery like a laminectomy or a lumbar fusion.

  •    Uneven movement of the pelvis

You may experience SI joint area pain if the movement in your pelvis is uneven, either because one leg feels weaker or is longer than the other, or if you have knee problems or hip arthritis.

  •    Degenerative Sacroiliitis

Biomechanical contributors like walking boots after ankle or foot surgery or lack of supportive footwear post-surgery increase the risk of developing SI joint pain.

Diagnosis And Treatment Of SI Joint Pain

Diagnosis of SI joint pain often comprises imaging studies. Once the problem is diagnosed as SI joint pain, non-surgical treatments like physical therapy, massage therapy, nerve ablation, and joint injections may be prescribed.

How To Sleep With SI Joint Pain

Try these ideas for sleeping for SI joint pain to sleep optimally, with minimal discomfort.

1.     Identify Your Sleeping Position

You will find a comfortable sleeping position depending on how you usually sleep.

Supine position – Pillow under the knees

Sleeping on your back promises the highest comfort level if you struggle with SI joint pain. For sacroiliac joint pain caused by tightness or shortness of the hip flexor muscles, soften your pelvic position by placing a pillow under your knees.

This lowers tension on your hip flexor or extension of the lumbar spine, hence more comfort. Use one or two pillows up to 6-7 inches tall. Too many pillows will increase the flexion of your upper spine, causing more discomfort in the lumbar spine.

While sleeping on your back works great, you should avoid sleeping on your stomach because this will strain your back and the SI joint.

Side Sleeping Position – pillow between legs

If you sleep on the side, have a pillow for your head and neck to ensure their neutrality; then add a pillow between your legs. Note that sleeping on your side widens the pelvis relative to the spine – the pillow prevents a stiff spine.

Side Sleeping Position – Lumbar Roll/ Pillow

On the other hand, if you don’t feel comfortable with your pillow between the legs – this is common with females because they have wider hips – consider sleeping with a bolster pillow for SI joint pain. The pillow should sit on the area of your waist that aligns with the small of your back rather than high up near the ribs. And get a soft, squishy pillow for this to work.

2.   Listen To Your Body

Despite these recommendations for sleeping positions for SI joint pain, test different positions until you find what works for your body.

Some of the moves you should avoid doing sit-ups, bringing the knees up to your chest, bending with knees straight, or twisting.

If you wish to stay active, avoid high impact actvities like running. These activities and movements will exacerbate the SI joint pain.

3.   Try Using A Cooling Or A Heating Pad

An ice pack or a heating pad may help alleviate the pain, especially before bed. The ice pack reduces pain if applied for 10 minutes. On the other hand, a heating pad loosens tension and relaxes painful muscles.

4.     Stay On Top Of Your Recommended Treatment Plan

SI joint pain is not the kind of pain you can ride out. See your physicians and get the right diagnosis and treatment. Physical therapy by a professional is also essential.

5.     Incorporate Relaxation Techniques

Even with the proper medication, SI joint pain can be debilitating. The only way to get through the pain without becoming over-reliant on medication is to incorporate mindful relaxation techniques, like deep breathing or meditation. You could also try progressive muscle relaxation. These techniques are known to relax the body and mind and help you fall asleep quickly.

Additionally, a positive attitude is key to shorter recovery times.

Learn to Master Sleep

If you have been struggling with how to sleep with SI joint pain, follow the tips here. By listening to your body and your physician, finding the right sleeping position, mattress and pillows, practicing mindfulness, and following the prescribed treatment, you will sleep comfortably with SI joint pain and wake up well-rested and refreshed.

But don’t ignore the pain, significantly if it worsens or persists for more than a few days. Always consult your healthcare providers for proper evaluation and treatment.

Related Articles

5 Special Tests To Uncover SI Joint Dysfunction

How To Know If Your SI Joints Are Causing Your Pain

Sacroiliac Joint Belts – Do They Work?

How To Sit With SI Joint Pain?

Best Mattresses For SI Joint Pain

Yoga For SI Joint Pain – Here Are The Best Poses